How to Finish Cement Board for Paint: A Step-by-Step Tutorial
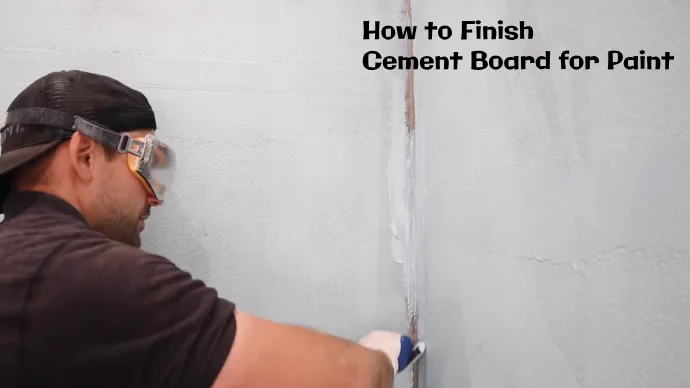
Table of Content
Cement board, a durable and water-resistant material, is an excellent choice for walls and ceilings in areas prone to moisture, such as bathrooms, kitchens, and laundry rooms. However, before you can paint it, you need to prepare the surface properly. This comprehensive guide will walk you through the entire process of finishing cement board for paint, ensuring a smooth, professional-looking finish.
1. Gather Your Tools and Materials
Before you begin, gather the necessary tools and materials to ensure a smooth and efficient workflow:
- Cement board: Choose a thickness appropriate for your project.
- Tape measure: For accurate measurements.
- Utility knife: For cutting the cement board.
- Safety glasses and gloves: To protect your eyes and hands.
- Dust mask: To prevent inhaling dust particles.
- Level: For ensuring straight lines and a level surface.
- Pencil: For marking the cement board.
- Joint compound: For filling gaps and creating a smooth surface.
- Joint tape: For reinforcing joints and corners.
- Primer: For creating a bonding surface for paint.
- Paint: Choose a high-quality paint suitable for your project.
- Paint roller: For applying paint evenly.
- Paint brush: For reaching corners and edges.
- Paint tray: For holding and distributing paint.
- Sandpaper: For smoothing out rough edges and imperfections.
- Sponge: For cleaning up spills and excess joint compound.
- Bucket: For mixing joint compound and cleaning tools.
- Scissors: For cutting joint tape.
- Trowel: For applying joint compound.
- Bucket: For cleaning tools.


2. Prepare the Cement Board
Begin by ensuring the cement board is clean and free of debris. Use a damp cloth to wipe down the surface, removing any dust, dirt, or loose particles. Allow the board to dry completely before proceeding.
3. Cut and Install the Cement Board
Measure and mark the cement board according to your project requirements. Use a utility knife to score the surface along the marked lines, applying pressure to snap the board along the score. If necessary, use a circular saw with a carbide-tipped blade to cut the cement board.
Once cut, install the cement board using screws or nails, ensuring they are driven in straight and flush with the surface. Use a level to check the alignment of the board and adjust as needed.
4. Fill Gaps and Joints
After installing the cement board, it’s essential to fill any gaps or joints between the boards. This step ensures a smooth and even surface for painting.
a) Applying Joint Compound:
- Use a trowel to apply a thin layer of joint compound over the gaps and joints.
- Smooth out the compound with the trowel, ensuring it is flush with the surface of the cement board.
- Allow the compound to dry completely before proceeding.
b) Reinforcing Joints with Tape:
- Once the joint compound has dried, apply joint tape over the gaps and joints.
- Use a trowel to embed the tape into the compound, ensuring it is completely covered.
- Apply a second layer of joint compound over the tape, smoothing it out to create a seamless surface.
- Allow the compound to dry completely before proceeding.
5. Sanding the Surface
After the joint compound has dried, sand the surface to create a smooth and even finish. Use a fine-grit sandpaper to remove any imperfections or rough edges. Work in a circular motion, applying gentle pressure to avoid damaging the surface.
6. Priming the Surface
Before painting, prime the cement board with a high-quality primer. This step creates a bonding surface for the paint, ensuring it adheres properly and provides a smooth, even finish.
a) Choosing the Right Primer:
- Select a primer specifically designed for cement board.
- Consider a primer that seals the surface and prevents moisture from penetrating the paint.
b) Applying the Primer:
- Use a paint roller to apply the primer evenly to the entire surface.
- Pay close attention to corners and edges, ensuring the primer is applied thoroughly.
- Allow the primer to dry completely before proceeding.
7. Painting the Surface
Finally, paint the cement board with your chosen paint color. Use a high-quality paint designed for interior or exterior use, depending on the location of the project.
a) Choosing the Right Paint:
- Consider the desired finish, whether matte, satin, or gloss.
- Select a paint that is moisture-resistant and durable.
b) Applying the Paint:
- Use a paint roller to apply the paint evenly to the entire surface.
- Apply two coats of paint for optimal coverage and durability.
- Allow each coat to dry completely before applying the next.
8. Clean Up
Once the paint has dried, clean up any tools and spills. Use a damp cloth to wipe down the surface, removing any excess paint or dust.
Tips for Achieving a Professional Finish:
- Use a level: Ensure all boards are level and aligned for a professional look.
- Apply thin layers of joint compound: Avoid applying thick layers, as they can crack and require additional sanding.
- Sand carefully: Avoid sanding too aggressively, as this can damage the surface.
- Prime thoroughly: Apply a primer to all surfaces, including corners and edges.
- Use high-quality paint: Choose a paint specifically designed for cement board.
Troubleshooting Common Problems:
- Cracking: If the joint compound cracks, it may be due to applying too thick a layer or insufficient drying time. Sand down the cracks and apply a new layer of compound.
- Uneven surface: If the surface is uneven, it may be due to inadequate sanding. Sand the surface again, ensuring it is smooth and even.
- Paint peeling: If the paint peels, it may be due to insufficient primer or improper preparation. Remove the peeling paint, prime the surface again, and repaint.
Conclusion
Finishing cement board for paint requires careful preparation and attention to detail. By following these steps, you can achieve a smooth, durable, and professional-looking finish that will enhance the beauty and functionality of your space. Remember to use high-quality materials, follow the instructions carefully, and take your time to ensure a successful outcome.

How to Finish Cement Board for Paint: A Step-by-Step Tutorial
Post a Comment for "How To Finish Cement Board For Paint: A Step-by-Step Tutorial"