Car Paint Blending Solution: Perfecting Your Touch-Up Skills

Table of Content
Introduction
A chipped or scratched car paint job can be an eyesore, significantly impacting your vehicle’s aesthetic appeal and even diminishing its resale value. While a professional paint job is the ideal solution, it can be expensive and time-consuming. Fortunately, a DIY touch-up can effectively address minor imperfections, preserving your car’s beauty and protecting it from further damage. The key to achieving a seamless repair lies in mastering the art of paint blending, a technique that ensures a smooth transition between the original paint and the touch-up. This comprehensive guide will delve into the intricacies of car paint blending, equipping you with the knowledge and skills to achieve professional-looking results.
Understanding the Importance of Paint Blending
Paint blending is the process of gradually transitioning the color and finish of the touch-up paint into the surrounding original paint, effectively eliminating the noticeable line between the two. This technique is crucial for achieving a flawless repair, as it prevents a stark contrast between the new and old paint, resulting in a seamless and aesthetically pleasing finish.
Essential Tools and Materials
Before embarking on your paint blending journey, ensure you have the following tools and materials at your disposal:
- Touch-up Paint: Acquire the exact color code of your car’s paint from your vehicle’s manual, service records, or a reputable automotive paint supplier. Ensure the touch-up paint is specifically formulated for your car’s make and model, as different vehicles use varying paint formulations.
- Primer: A primer is essential for creating a smooth and consistent surface for the touch-up paint to adhere to. Choose a primer specifically designed for automotive applications.
- Sandpaper: A variety of sandpaper grits is necessary for achieving a smooth and blended finish. Start with coarse-grit sandpaper (around 400-600 grit) for initial sanding, followed by finer grits (800-1000 grit) for smoothing and finishing.
- Masking Tape: Use masking tape to protect surrounding areas from accidental paint overspray.
- Paint Thinner: Paint thinner is essential for cleaning brushes and tools, ensuring a smooth and even application.
- Paint Brush: A small, high-quality paintbrush is ideal for applying touch-up paint.
- Cleaning Cloths: Use clean cloths for wiping away dust, dirt, and excess paint.
- Gloves: Protect your hands from paint and solvents with disposable gloves.
- Eye Protection: Always wear safety glasses to protect your eyes from paint splatters and dust.
- Respirator: A respirator is recommended for adequate protection against paint fumes.
- Paint Mixing Sticks: Use paint mixing sticks to thoroughly mix the touch-up paint before application.
- Paint Mixing Container: A small container is ideal for mixing the touch-up paint and ensuring a consistent color.


Step-by-Step Guide to Paint Blending
Now that you have the necessary tools, let’s embark on the paint blending process:
1. Preparation is Key
- Clean the Damaged Area: Thoroughly clean the damaged area with soap and water, removing dirt, debris, and any existing wax or polish. Allow the area to dry completely before proceeding.
- Masking the Surrounding Area: Use masking tape to protect the surrounding area from accidental paint overspray. Ensure the tape is securely attached and creates a clean boundary between the repair area and the original paint.
- Sanding the Damaged Area: Sand the damaged area with coarse-grit sandpaper (400-600 grit) to create a smooth surface for the primer and touch-up paint to adhere to. Use even, circular motions, gradually smoothing out the damaged area.
- Applying Primer: Apply a thin coat of primer to the sanded area, ensuring even coverage. Allow the primer to dry completely according to the manufacturer’s instructions before proceeding.
2. The Art of Blending
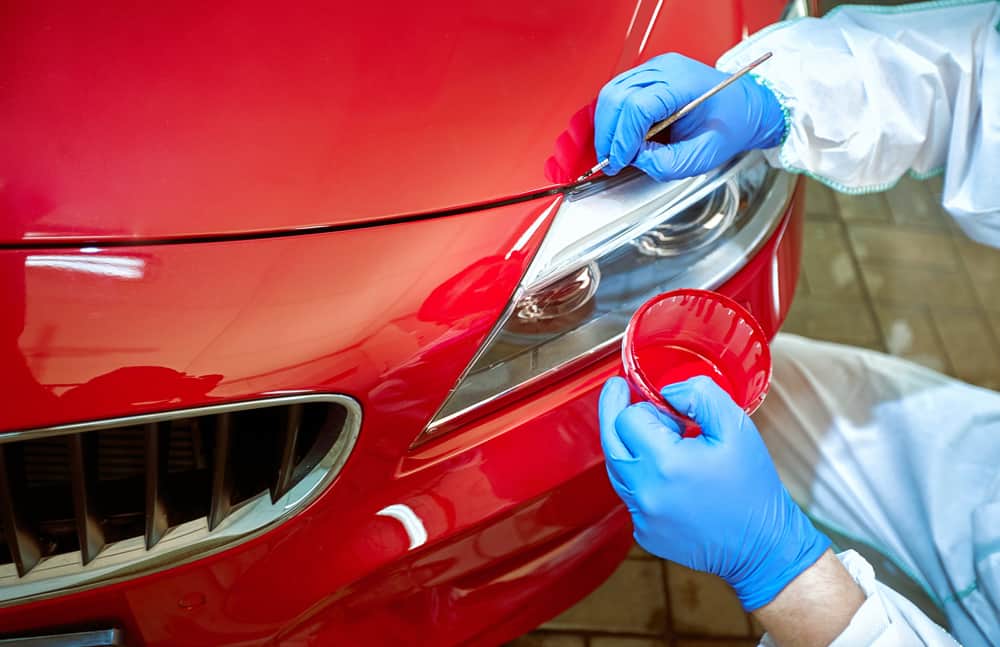
- Applying Touch-up Paint: Apply the touch-up paint to the primed area using a small, high-quality paintbrush. Start with a thin, even coat, allowing it to dry completely before applying additional coats.
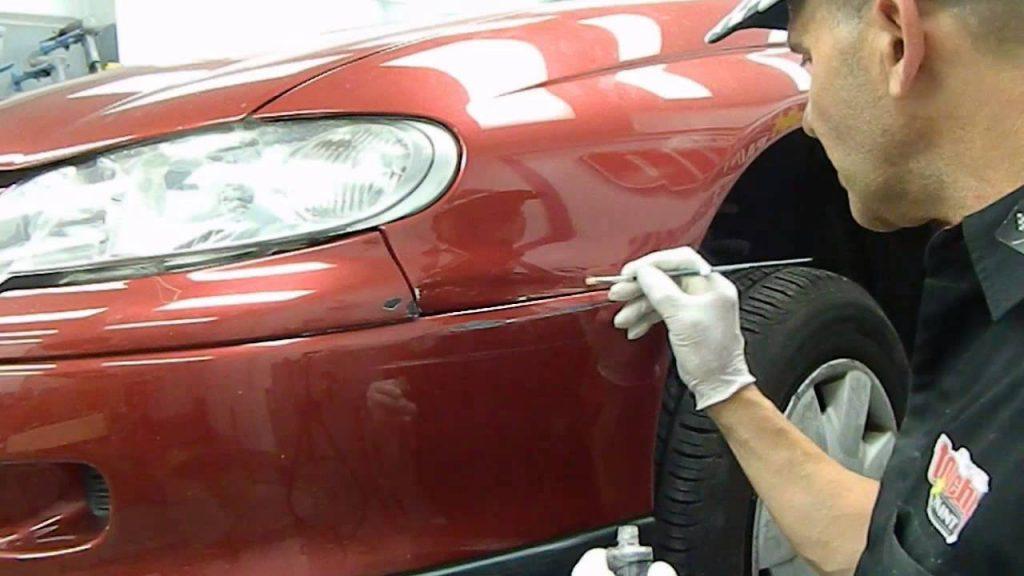
- Gradually Blending the Paint: Once the touch-up paint is dry, use fine-grit sandpaper (800-1000 grit) to gradually blend the edges of the touch-up paint into the original paint. Start by lightly sanding the edges of the touch-up paint, gradually blending it into the surrounding area.
- Maintaining a Smooth Transition: Continue sanding with the fine-grit sandpaper, using light, circular motions. Gradually increase the sanding area, blending the touch-up paint seamlessly into the original paint.
- Achieving a Flawless Finish: As you sand, the transition between the new and old paint should become less noticeable. Continue sanding until the touch-up paint blends seamlessly with the original paint, creating a uniform and flawless finish.
3. Finishing Touches
- Cleaning and Polishing: Once the blending is complete, thoroughly clean the repair area with a damp cloth to remove any sanding residue. Use a polishing compound to enhance the shine and gloss of the repaired area, restoring it to its original brilliance.
- Waxing: Apply a layer of car wax to the repaired area, providing a protective barrier against the elements and enhancing the shine.
Troubleshooting Common Issues
While paint blending is a relatively straightforward process, certain issues may arise. Here’s how to address them:
- Uneven Paint Application: If the touch-up paint is uneven, it’s crucial to sand the area with fine-grit sandpaper, gradually blending the paint into the surrounding area.
- Color Mismatch: If the touch-up paint doesn’t match the original color, it’s best to consult a professional painter for a color match.
- Uneven Sanding: Uneven sanding can result in noticeable lines or blemishes. Use fine-grit sandpaper and apply even, circular motions to avoid uneven sanding.
- Paint Runs: If paint runs occur, use a razor blade or a sharp object to carefully remove the excess paint before it dries completely.
Professional Touch-up Services
While DIY paint blending can achieve satisfactory results, professional touch-up services offer a higher level of expertise and precision. Professional painters have access to specialized tools, equipment, and paint formulations, ensuring a flawless and long-lasting repair.
Conclusion
Mastering the art of paint blending is a valuable skill for any car owner, allowing you to effectively address minor paint imperfections and maintain your vehicle’s aesthetic appeal. By following the steps outlined in this guide, you can achieve professional-looking results, restoring your car’s beauty and protecting it from further damage. Remember to practice patience, precision, and attention to detail, and you’ll be well on your way to perfecting your touch-up skills.
Our Form
The Ultimate Guide to Car Paint Blending: Achieving a Flawless Finish
Introduction
A minor scratch or chip in your car’s paint can be a frustrating eyesore. While a professional paint job is the gold standard for restoring your vehicle’s pristine look, it can be expensive and time-consuming. Thankfully, DIY touch-up solutions can effectively address minor imperfections, preserving your car’s aesthetic appeal and protecting it from further damage. However, the success of a touch-up relies heavily on mastering the art of paint blending, a technique that ensures a smooth transition between the original paint and the touch-up, creating a seamless and flawless finish. This comprehensive guide will delve into the intricacies of car paint blending, empowering you with the knowledge and skills to achieve professional-looking results.
Understanding the Importance of Paint Blending
Paint blending is the critical process of gradually transitioning the color and finish of the touch-up paint into the surrounding original paint, effectively eliminating the noticeable line between the two. This technique is essential for achieving a seamless repair, preventing a stark contrast between the new and old paint, resulting in a flawless and aesthetically pleasing finish.
Essential Tools and Materials for a Successful Blend
Before embarking on your paint blending journey, ensure you have the following tools and materials at your disposal:
- Touch-up Paint: Acquire the exact color code of your car’s paint from your vehicle’s manual, service records, or a reputable automotive paint supplier. Ensure the touch-up paint is specifically formulated for your car’s make and model, as different vehicles use varying paint formulations.
- Primer: A primer is essential for creating a smooth and consistent surface for the touch-up paint to adhere to. Choose a primer specifically designed for automotive applications.
- Sandpaper: A variety of sandpaper grits is necessary for achieving a smooth and blended finish. Start with coarse-grit sandpaper (around 400-600 grit) for initial sanding, followed by finer grits (800-1000 grit) for smoothing and finishing.
- Masking Tape: Use masking tape to protect surrounding areas from accidental paint overspray.
- Paint Thinner: Paint thinner is essential for cleaning brushes and tools, ensuring a smooth and even application.
- Paint Brush: A small, high-quality paintbrush is ideal for applying touch-up paint.
- Cleaning Cloths: Use clean cloths for wiping away dust, dirt, and excess paint.
- Gloves: Protect your hands from paint and solvents with disposable gloves.
- Eye Protection: Always wear safety glasses to protect your eyes from paint splatters and dust.
- Respirator: A respirator is recommended for adequate protection against paint fumes.
- Paint Mixing Sticks: Use paint mixing sticks to thoroughly mix the touch-up paint before application.
- Paint Mixing Container: A small container is ideal for mixing the touch-up paint and ensuring a consistent color.
Step-by-Step Guide to Perfecting Your Paint Blending Technique
Now that you have the necessary tools, let’s embark on the paint blending process, breaking it down into clear and actionable steps:
1. Preparation: The Foundation of a Successful Blend
- Cleaning the Damaged Area: Thoroughly clean the damaged area with soap and water, removing dirt, debris, and any existing wax or polish. Allow the area to dry completely before proceeding.
- Masking the Surrounding Area: Use masking tape to protect the surrounding area from accidental paint overspray. Ensure the tape is securely attached and creates a clean boundary between the repair area and the original paint.
- Sanding the Damaged Area: Sand the damaged area with coarse-grit sandpaper (400-600 grit) to create a smooth surface for the primer and touch-up paint to adhere to. Use even, circular motions, gradually smoothing out the damaged area.
- Applying Primer: Apply a thin coat of primer to the sanded area, ensuring even coverage. Allow the primer to dry completely according to the manufacturer’s instructions before proceeding.
2. The Art of Blending: Creating a Seamless Transition
- Applying Touch-up Paint: Apply the touch-up paint to the primed area using a small, high-quality paintbrush. Start with a thin, even coat, allowing it to dry completely before applying additional coats.
- Gradually Blending the Paint: Once the touch-up paint is dry, use fine-grit sandpaper (800-1000 grit) to gradually blend the edges of the touch-up paint into the original paint. Start by lightly sanding the edges of the touch-up paint, gradually blending it into the surrounding area.
- Maintaining a Smooth Transition: Continue sanding with the fine-grit sandpaper, using light, circular motions. Gradually increase the sanding area, blending the touch-up paint seamlessly into the original paint.
- Achieving a Flawless Finish: As you sand, the transition between the new and old paint should become less noticeable. Continue sanding until the touch-up paint blends seamlessly with the original paint, creating a uniform and flawless finish.
3. Finishing Touches: Enhancing the Blend and Protecting Your Work
- Cleaning and Polishing: Once the blending is complete, thoroughly clean the repair area with a damp cloth to remove any sanding residue. Use a polishing compound to enhance the shine and gloss of the repaired area, restoring it to its original brilliance.
- Waxing: Apply a layer of car wax to the repaired area, providing a protective barrier against the elements and enhancing the shine.
Troubleshooting Common Paint Blending Issues
While paint blending is a relatively straightforward process, certain issues may arise. Here’s how to address them:
- Uneven Paint Application: If the touch-up paint is uneven, it’s crucial to sand the area with fine-grit sandpaper, gradually blending the paint into the surrounding area.
- Color Mismatch: If the touch-up paint doesn’t match the original color, it’s best to consult a professional painter for a color match.
- Uneven Sanding: Uneven sanding can result in noticeable lines or blemishes. Use fine-grit sandpaper and apply even, circular motions to avoid uneven sanding.
- Paint Runs: If paint runs occur, use a razor blade or a sharp object to carefully remove the excess paint before it dries completely.
Professional Touch-up Services: When to Seek Expert Help
While DIY paint blending can achieve satisfactory results, professional touch-up services offer a higher level of expertise and precision. Professional painters have access to specialized tools, equipment, and paint formulations, ensuring a flawless and long-lasting repair.
Conclusion: Achieving a Professional-Looking Finish
Mastering the art of paint blending is a valuable skill for any car owner, allowing you to effectively address minor paint imperfections and maintain your vehicle’s aesthetic appeal. By following the steps outlined in this guide, you can achieve professional-looking results, restoring your car’s beauty and protecting it from further damage. Remember to practice patience, precision, and attention to detail, and you’ll be well on your way to perfecting your touch-up skills.
Visual Guide: A Pictorial Representation of the Process
| Step | Description | Image |
|---|---|---|
| Preparation | Cleaning the damaged area, masking the surrounding area, sanding the damaged area, applying primer | [Diagram of preparation steps] |
| Blending | Applying touch-up paint, gradually blending the paint, maintaining a smooth transition, achieving a flawless finish | [Diagram of blending steps] |
| Finishing Touches | Cleaning and polishing, waxing | [Diagram of finishing touches] |
Key Considerations for a Successful Paint Blend
- Choosing the Right Touch-up Paint: The key to a successful blend is using the exact color code of your car’s paint. Consult your vehicle’s manual, service records, or a reputable automotive paint supplier for the correct code.
- Proper Sanding Techniques: Sanding is crucial for achieving a smooth and blended finish. Use the appropriate sandpaper grits and apply even, circular motions.
- Patience and Precision: Paint blending requires patience and attention to detail. Take your time, work in small sections, and gradually blend the paint into the surrounding area.
Professional Paint Blending: A Cost-Effective Alternative
While DIY paint blending can be a cost-effective solution for minor imperfections, professional paint blending offers a higher level of expertise and precision, ensuring a flawless and long-lasting repair. Consider professional paint blending services if:
- The damage is extensive: For significant scratches, dents, or chips, professional paint blending is recommended.
- You lack experience: If you’re new to paint blending, professional services can ensure a seamless and professional finish.
- You want a guaranteed result: Professional painters have the experience and expertise to achieve a flawless and long-lasting repair.
Conclusion: Empowering You with the Knowledge to Achieve a Flawless Finish
By mastering the art of paint blending, you gain the ability to effectively address minor paint imperfections and maintain your vehicle’s aesthetic appeal. This guide has provided you with the knowledge and skills to achieve professional-looking results, restoring your car’s beauty and protecting it from further damage. Remember, practice, patience, and attention to detail are key to perfecting your touch-up skills. Now, you’re equipped to tackle those minor paint imperfections and enjoy the satisfaction of a flawless finish.
Car Paint Blending Solution: Perfecting Your Touch-Up Skills
Post a Comment for "Car Paint Blending Solution: Perfecting Your Touch-Up Skills"