Crafting a Captivating Red Pearl Car Paint Finish: A Comprehensive Guide
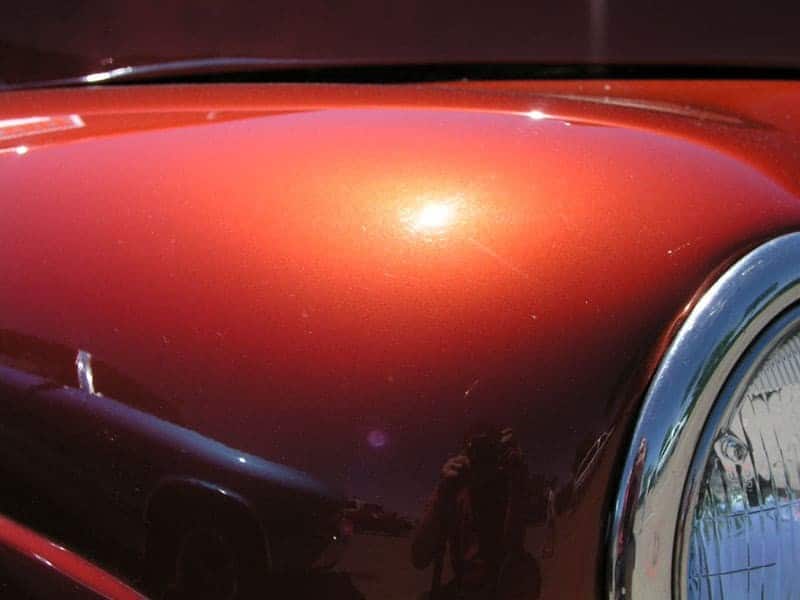
Table of Content
- 1 Crafting a Captivating Red Pearl Car Paint Finish: A Comprehensive Guide
- 1.1 1. The Foundation: Selecting the Perfect Red Pearl Base
- 1.2 2. The Magic Touch: Choosing the Right Pearl Pigment
- 1.3 3. The Recipe for Success: Blending Your Red Pearl Paint
- 1.4 4. The Preparation Stage: Prepping for Perfection
- 1.5 5. The Art of Application: Layering for a Stunning Finish
- 1.6 6. Polishing for Perfection: Enhancing the Red Pearl Shine
- 1.7 7. Maintaining the Magic: Keeping Your Red Pearl Paint Sparkling
- 1.8 8. Beyond the Basics: Exploring Custom Red Pearl Finishes
- 1.9 9. Red Pearl Paint: A Cost-Effective Option
- 1.10 10. Red Pearl Paint: A Timeless Classic
The allure of a red pearl car paint finish is undeniable. It’s a captivating blend of vibrant red and shimmering pearl, creating a depth and brilliance that turns heads. Achieving this stunning effect, however, requires meticulous planning and execution. This comprehensive guide will walk you through every step, from choosing the right materials to mastering the application techniques, ensuring you achieve a flawless, show-stopping finish.
1. The Foundation: Selecting the Perfect Red Pearl Base
The foundation of your red pearl paint lies in choosing the right base coat. This is the foundation upon which your pearl effect will be built, so it’s crucial to select a shade that complements your vision.
Consider these factors when selecting your red base:
- Hue: Do you prefer a deep, fiery red or a lighter, more vibrant shade? The hue of your base will significantly influence the overall tone of the pearl finish.
- Finish: A glossy base will enhance the sparkle of the pearl, while a matte finish will create a more subtle, subdued effect.
- Color Family: Consider whether you want a warm red with orange undertones or a cooler red with blue undertones.
- Brand and Quality: Opt for a high-quality base coat from a reputable brand to ensure a durable and consistent finish.

Popular Red Base Coat Options:
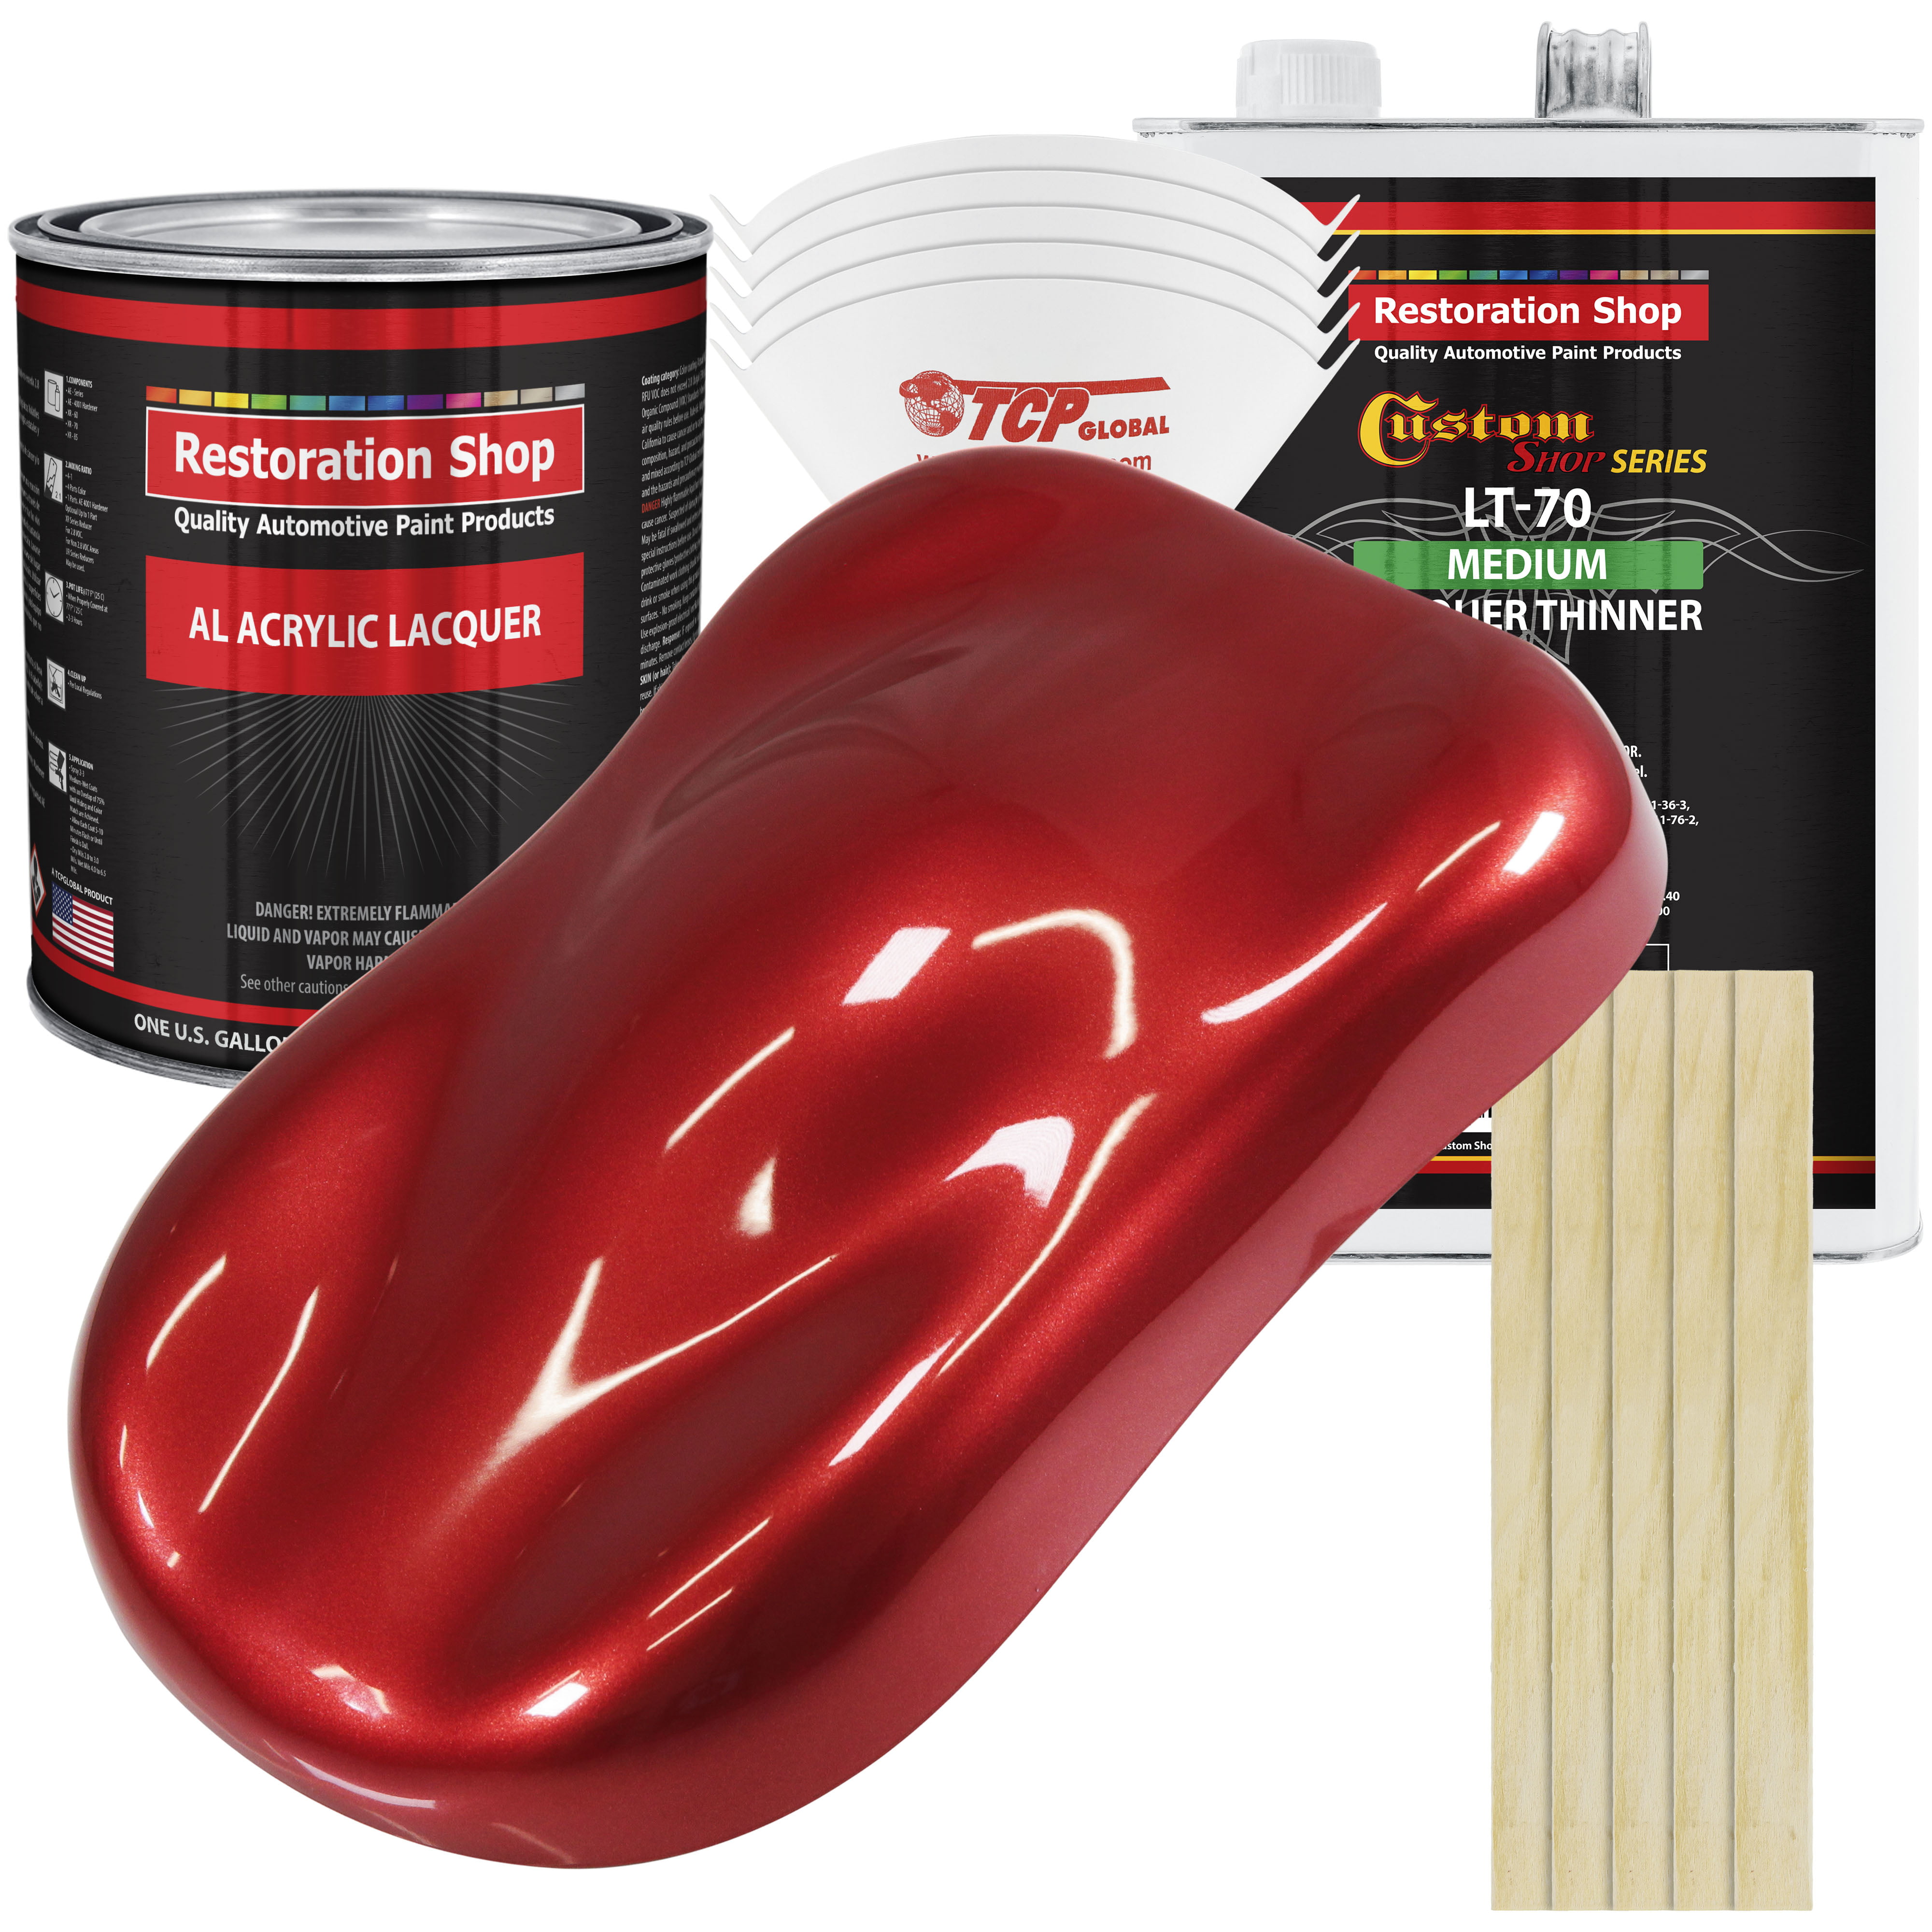
- Single-Stage Red: This is a classic choice, providing a vibrant red finish with a single layer. It’s a cost-effective option but may require more coats for full coverage.
- Base Coat/Clear Coat Red: This system offers greater depth and durability. The base coat provides the red color, while the clear coat adds shine and protection.
2. The Magic Touch: Choosing the Right Pearl Pigment
The pearl pigment is the heart of your red pearl finish. It’s what creates the mesmerizing shimmer and multi-dimensional effect.
Key Factors to Consider:
- Pearl Size: Smaller pearl particles create a finer, more subtle shimmer. Larger particles create a more pronounced and dramatic effect.
- Pearl Color: While white pearl is most common, you can find pearl pigments in various colors, including silver, gold, and even blue. Experiment to find the perfect complement to your red base.
- Concentration: The concentration of pearl pigment determines the intensity of the shimmer. A higher concentration creates a more dramatic effect.

Popular Pearl Pigment Options:
- Automotive Grade Pearl: Designed for durability and long-lasting performance.
- Custom Pearl Pigments: Offer a wider range of colors and particle sizes for unique effects.
3. The Recipe for Success: Blending Your Red Pearl Paint
The key to a stunning red pearl finish lies in carefully blending your base coat and pearl pigment. This process requires precision and patience.
Here’s a step-by-step guide:
- Prepare Your Workspace: Ensure a clean and well-ventilated area for mixing.
- Measure Carefully: Use a precise measuring scale to accurately measure your base coat and pearl pigment.
- Mix Thoroughly: Start by adding a small amount of pearl pigment to your base coat. Mix the two thoroughly using a paint stirrer.
- Adjust the Concentration: Gradually add more pearl pigment until you achieve the desired shimmer intensity.
- Test Your Mix: Apply a small amount of the mixture to a test panel to check the color and shimmer.
- Adjust as Needed: If necessary, adjust the concentration of pearl pigment until you’re satisfied with the results.
Pro Tip: It’s always better to start with a lower concentration of pearl pigment and gradually add more until you achieve the desired effect.
4. The Preparation Stage: Prepping for Perfection
A smooth, flawless finish starts with proper preparation. This involves cleaning, sanding, and priming your car’s surface.
Here’s a detailed breakdown:
- Thorough Cleaning: Wash your car with a car wash soap and water. Remove any contaminants, grease, or wax with a clay bar.
- Sanding: Sand the surface with progressively finer grit sandpaper (e.g., 400, 600, 800 grit) to create a smooth, even surface.
- Primer Application: Apply a high-quality primer to seal the surface and provide a uniform base for the paint.
- Final Sanding: Lightly sand the primer with fine-grit sandpaper (e.g., 1000 grit) to create a perfectly smooth finish.
Pro Tip: Take your time with the preparation stage. A well-prepared surface will make the painting process much easier and lead to a more professional-looking finish.
5. The Art of Application: Layering for a Stunning Finish
Applying your red pearl paint requires a steady hand and a methodical approach. The goal is to achieve even coverage with smooth transitions between layers.
Here’s a comprehensive guide:
- Choose Your Application Method: You can apply your red pearl paint using a spray gun, a brush, or a roller. Each method has its own advantages and disadvantages.
- Thinning the Paint: Thin your paint according to the manufacturer’s instructions to ensure proper flow and atomization.
- Apply Thin Coats: Apply multiple thin coats of paint instead of one thick coat. This allows the paint to dry evenly and prevents runs or sags.
- Allow Drying Time: Let each coat dry completely before applying the next. This will prevent the coats from lifting or peeling.
- Sanding Between Coats: Lightly sand between coats with fine-grit sandpaper (e.g., 1500 grit) to smooth out any imperfections.
- Final Clear Coat: Once the red pearl paint is dry, apply a high-quality clear coat to protect the finish and enhance its shine.
Pro Tip: Use a good quality respirator mask and protective eyewear during the painting process.
6. Polishing for Perfection: Enhancing the Red Pearl Shine
Polishing your red pearl paint is the final step in achieving a show-stopping finish. It removes any imperfections and brings out the full depth and brilliance of the pearl effect.
Here’s how to polish your red pearl paint:
- Choose Your Polishing Compound: Select a polishing compound specifically designed for automotive paint.
- Start with a Less Aggressive Compound: Begin with a less aggressive compound to remove light scratches and imperfections.
- Progress to a Finer Compound: Gradually transition to a finer compound to enhance the shine and create a smooth, glass-like finish.
- Use a Polishing Pad: Apply the compound to a polishing pad and work it into the paint in a circular motion.
- Remove the Compound: Once the compound is evenly distributed, remove it with a clean microfiber cloth.
- Apply Wax or Sealant: After polishing, apply a wax or sealant to protect the finish and enhance its shine.
Pro Tip: Avoid using aggressive polishing compounds on your red pearl paint as they can dull the pearl effect.
7. Maintaining the Magic: Keeping Your Red Pearl Paint Sparkling
A stunning red pearl finish deserves proper care and maintenance to keep it looking its best.
Here are some essential tips:
- Regular Washing: Wash your car regularly with a car wash soap and water to remove dirt and grime.
- Avoid Harsh Chemicals: Avoid using harsh chemicals or abrasive cleaners on your paint.
- Use a Wax or Sealant: Apply a wax or sealant to your paint every few months to protect it from the elements.
- Professional Detailing: Consider professional detailing services to remove deep scratches and restore the shine of your red pearl paint.
8. Beyond the Basics: Exploring Custom Red Pearl Finishes
For those seeking a truly unique red pearl finish, there are several advanced techniques and options available.
Here are some possibilities:
- Multi-Layered Pearl: Create a layered effect by applying different pearl pigments in varying concentrations.
- Candy Red Pearl: Achieve a deep, translucent red with a shimmering pearl effect.
- Metallic Red Pearl: Combine pearl pigment with metallic flakes for a more vibrant and dynamic finish.
- Custom Color Matching: Work with a professional paint shop to create a custom red pearl color that perfectly matches your vision.
9. Red Pearl Paint: A Cost-Effective Option
While a red pearl paint job may seem expensive, it’s a cost-effective option compared to other custom paint finishes.
Here’s a breakdown of the costs involved:
- Materials: The cost of materials, including base coat, pearl pigment, primer, clear coat, and polishing compounds, can range from $100 to $500 depending on the quality and quantity.
- Labor: If you’re having the work done professionally, labor costs can range from $500 to $2,000 depending on the size and complexity of the job.
Pro Tip: Consider doing the work yourself to save on labor costs. However, ensure you have the necessary skills and experience before attempting a DIY paint job.
10. Red Pearl Paint: A Timeless Classic
A red pearl paint finish is a timeless classic that adds elegance and sophistication to any car. It’s a bold statement that turns heads and commands attention. By following the steps outlined in this guide, you can achieve a stunning red pearl finish that will be the envy of all who see it.
Remember: The key to success lies in meticulous planning, careful execution, and a passion for creating a truly remarkable finish.

Crafting a Captivating Red Pearl Car Paint Finish: A Comprehensive Guide
Post a Comment for "Creating A Stunning Red Pearl Car Paint Finish"