Skull Acrylic Painting: A Dark and Edgy Project
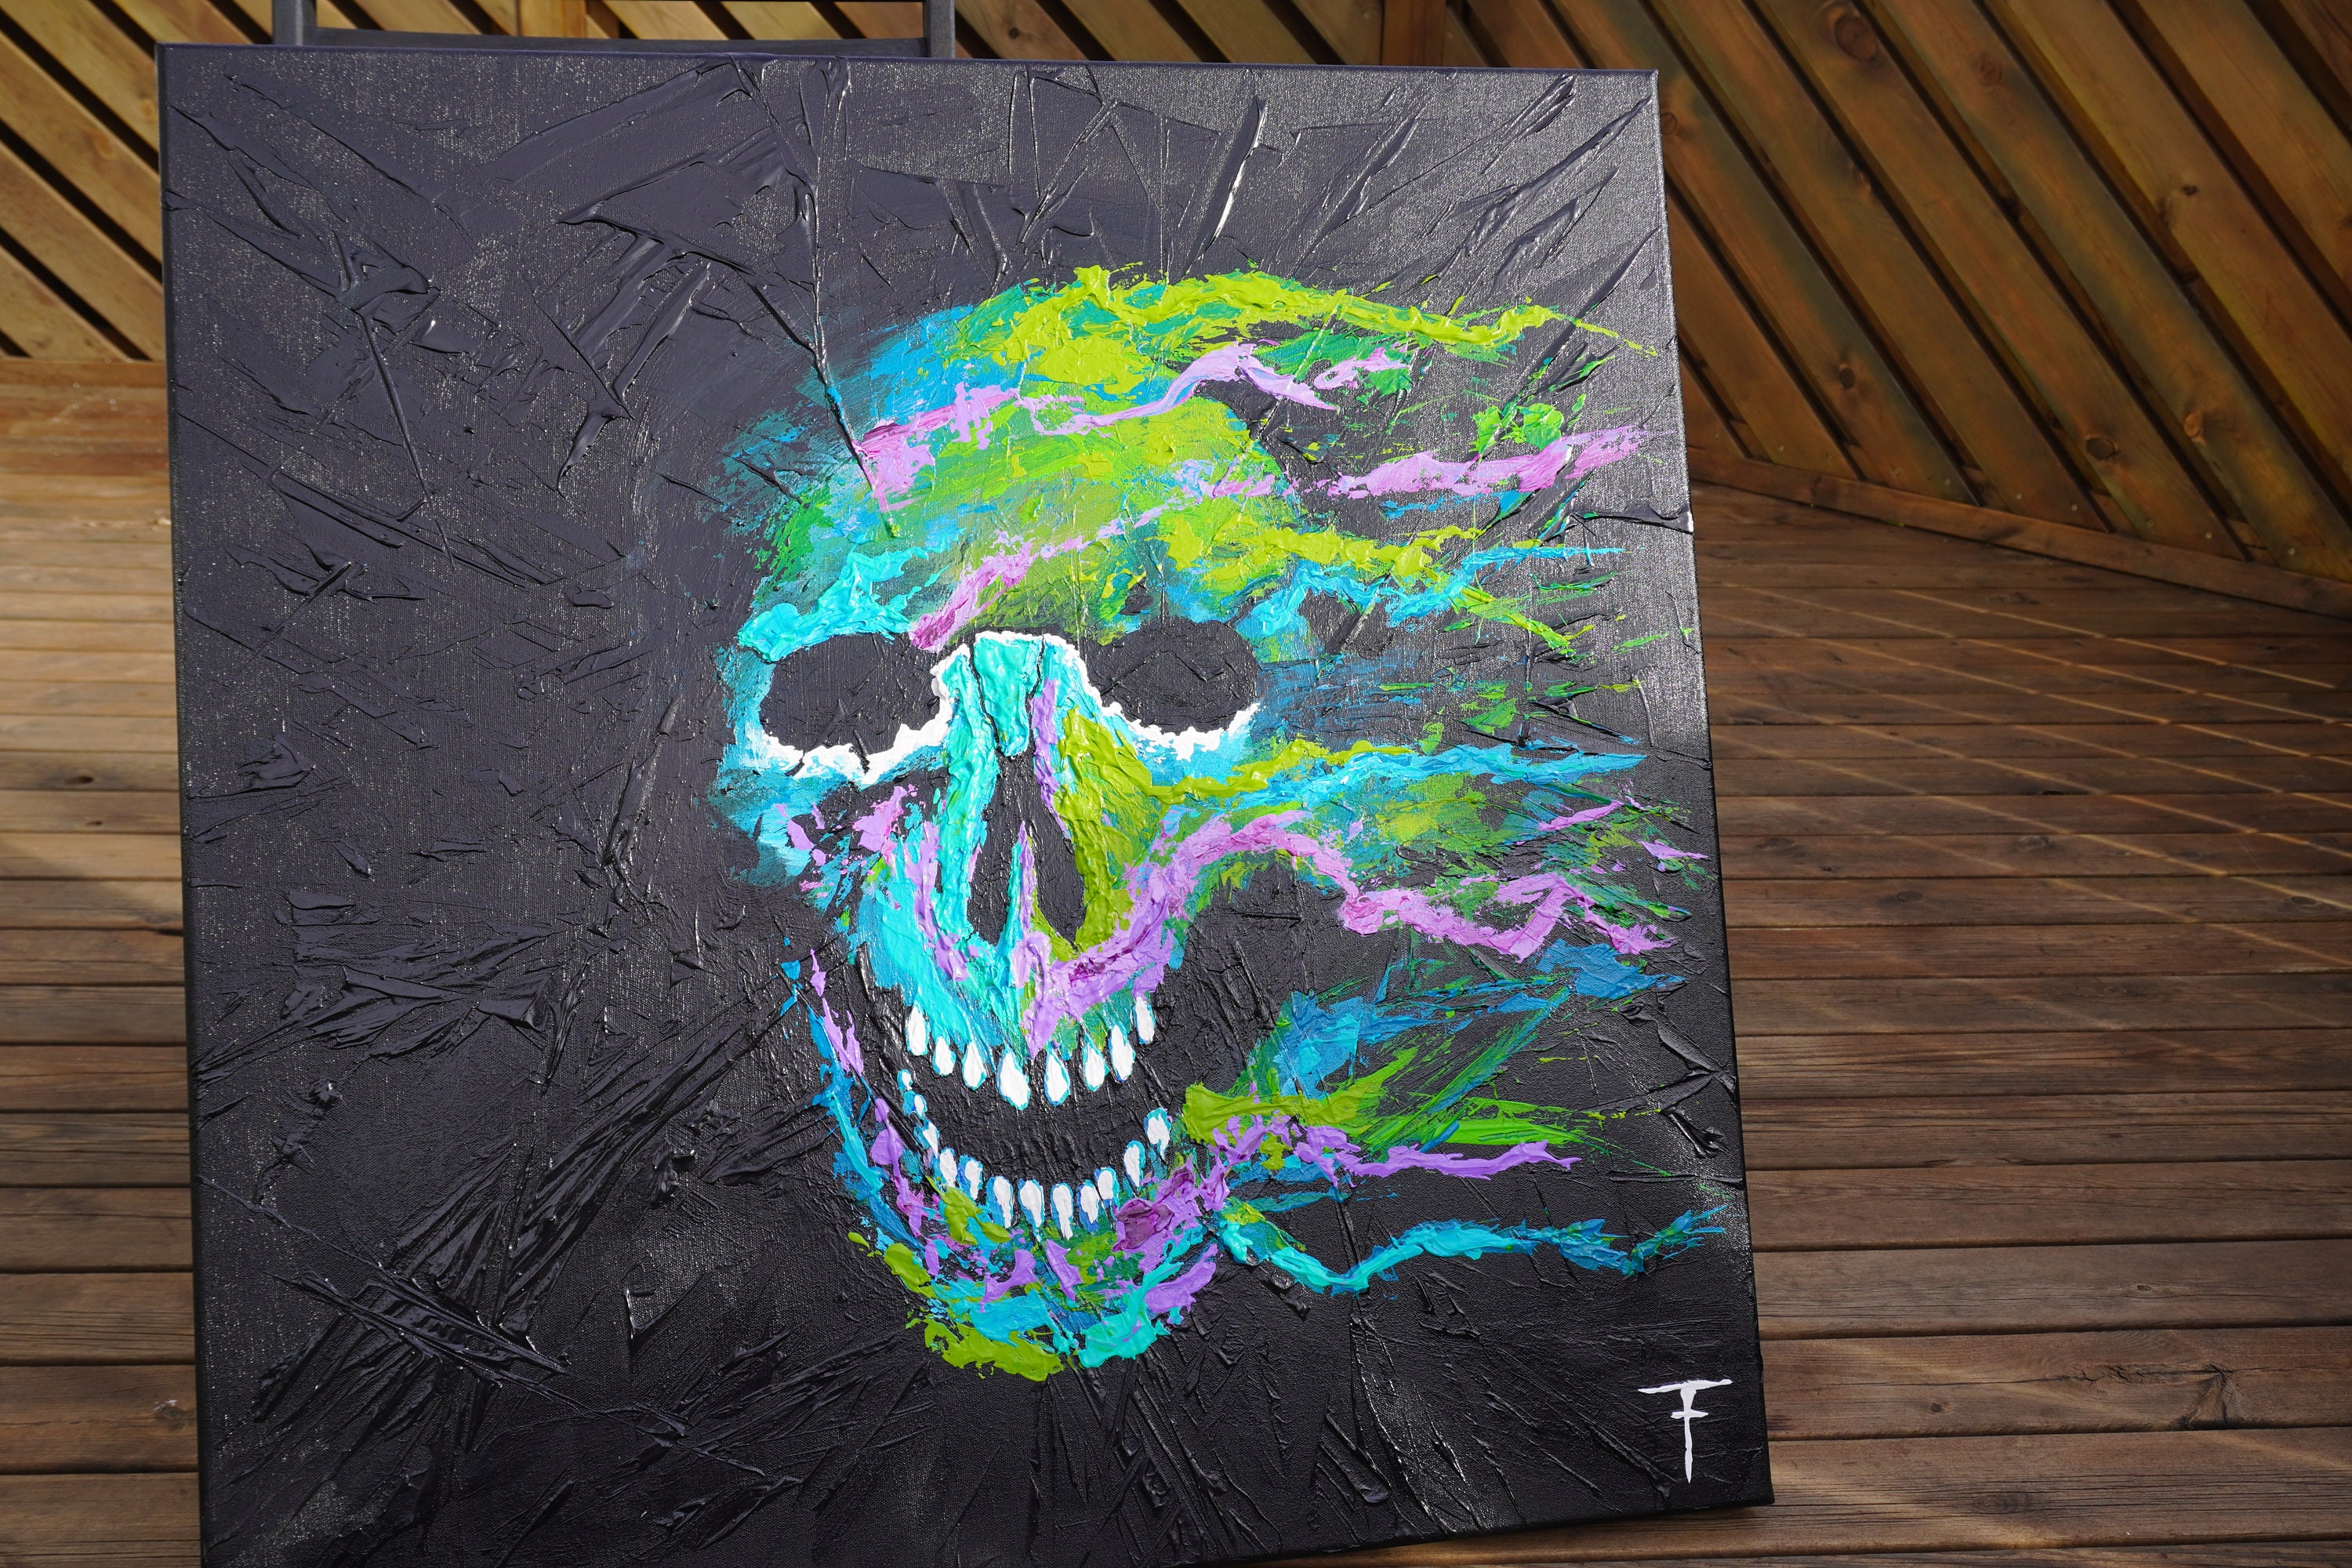
Table of Content
The allure of skulls in art is undeniable. They represent a complex mix of mortality, beauty, and symbolism. Painting a skull with acrylics offers a unique opportunity to explore these themes while embracing the dark and edgy nature of this subject. This comprehensive guide will walk you through the process, providing insights and techniques to create a captivating skull painting.
1. Gathering Your Materials:
- Acrylic Paints: Choose a range of colors, including black, white, and a variety of grays for shading. Consider adding touches of color for accents and highlights.
- Brushes: A variety of brush sizes will be essential, from fine brushes for detail work to larger brushes for filling in areas.
- Canvas: Choose a size that suits your vision. A canvas board is a good option for beginners as it offers a smooth surface.
- Pencil: Use a pencil to sketch the skull outline and details.
- Eraser: To erase any mistakes during the sketching process.
- Palette: A palette is essential for mixing colors and keeping your workspace organized.
- Water: Water is necessary for cleaning brushes and thinning paints.
- Paper Towels: For wiping brushes and cleaning spills.
- Reference Images: Find high-quality reference images of skulls to guide your painting.
2. The Sketching Phase:
- Choose Your Skull: Select a reference image that resonates with your artistic vision. It could be a human skull, animal skull, or even a stylized skull design.
- Light and Shadow Study: Observe the light source in your reference image and how it casts shadows on the skull. This understanding will be crucial for creating depth and dimension in your painting.
- Sketching on the Canvas: Lightly sketch the outline of the skull onto your canvas using a pencil. Don’t worry about making it perfect at this stage; it’s just a guide.
- Adding Detail: Once the outline is complete, start adding details like the eye sockets, teeth, and nasal cavity. Remember to consider the perspective and angles of these features.


3. Laying Down the Base Colors:
- Black Underpainting: Begin by applying a thin layer of black acrylic paint over the entire canvas. This creates a dark base that will enhance the contrast and depth of your painting.
- Layering White: Use white acrylic paint to start building the form of the skull. Begin with the areas that receive the most light, such as the top of the skull and the teeth.
- Grayscale Transition: Gradually transition from white to darker grays as you move towards the areas that receive less light. This creates a smooth gradient effect.
4. Adding Depth and Dimension:
- Shadow and Highlight Techniques: Use a combination of dark and light grays to create shadows and highlights. Observe how the light source affects the shape and form of the skull in your reference image.
- Layering for Detail: Build up layers of paint to create depth and texture. Use thin layers for smooth transitions and thicker layers for more pronounced effects.
- Blending and Smudging: Use a brush or a blending tool to soften the edges between colors and create a more realistic appearance.
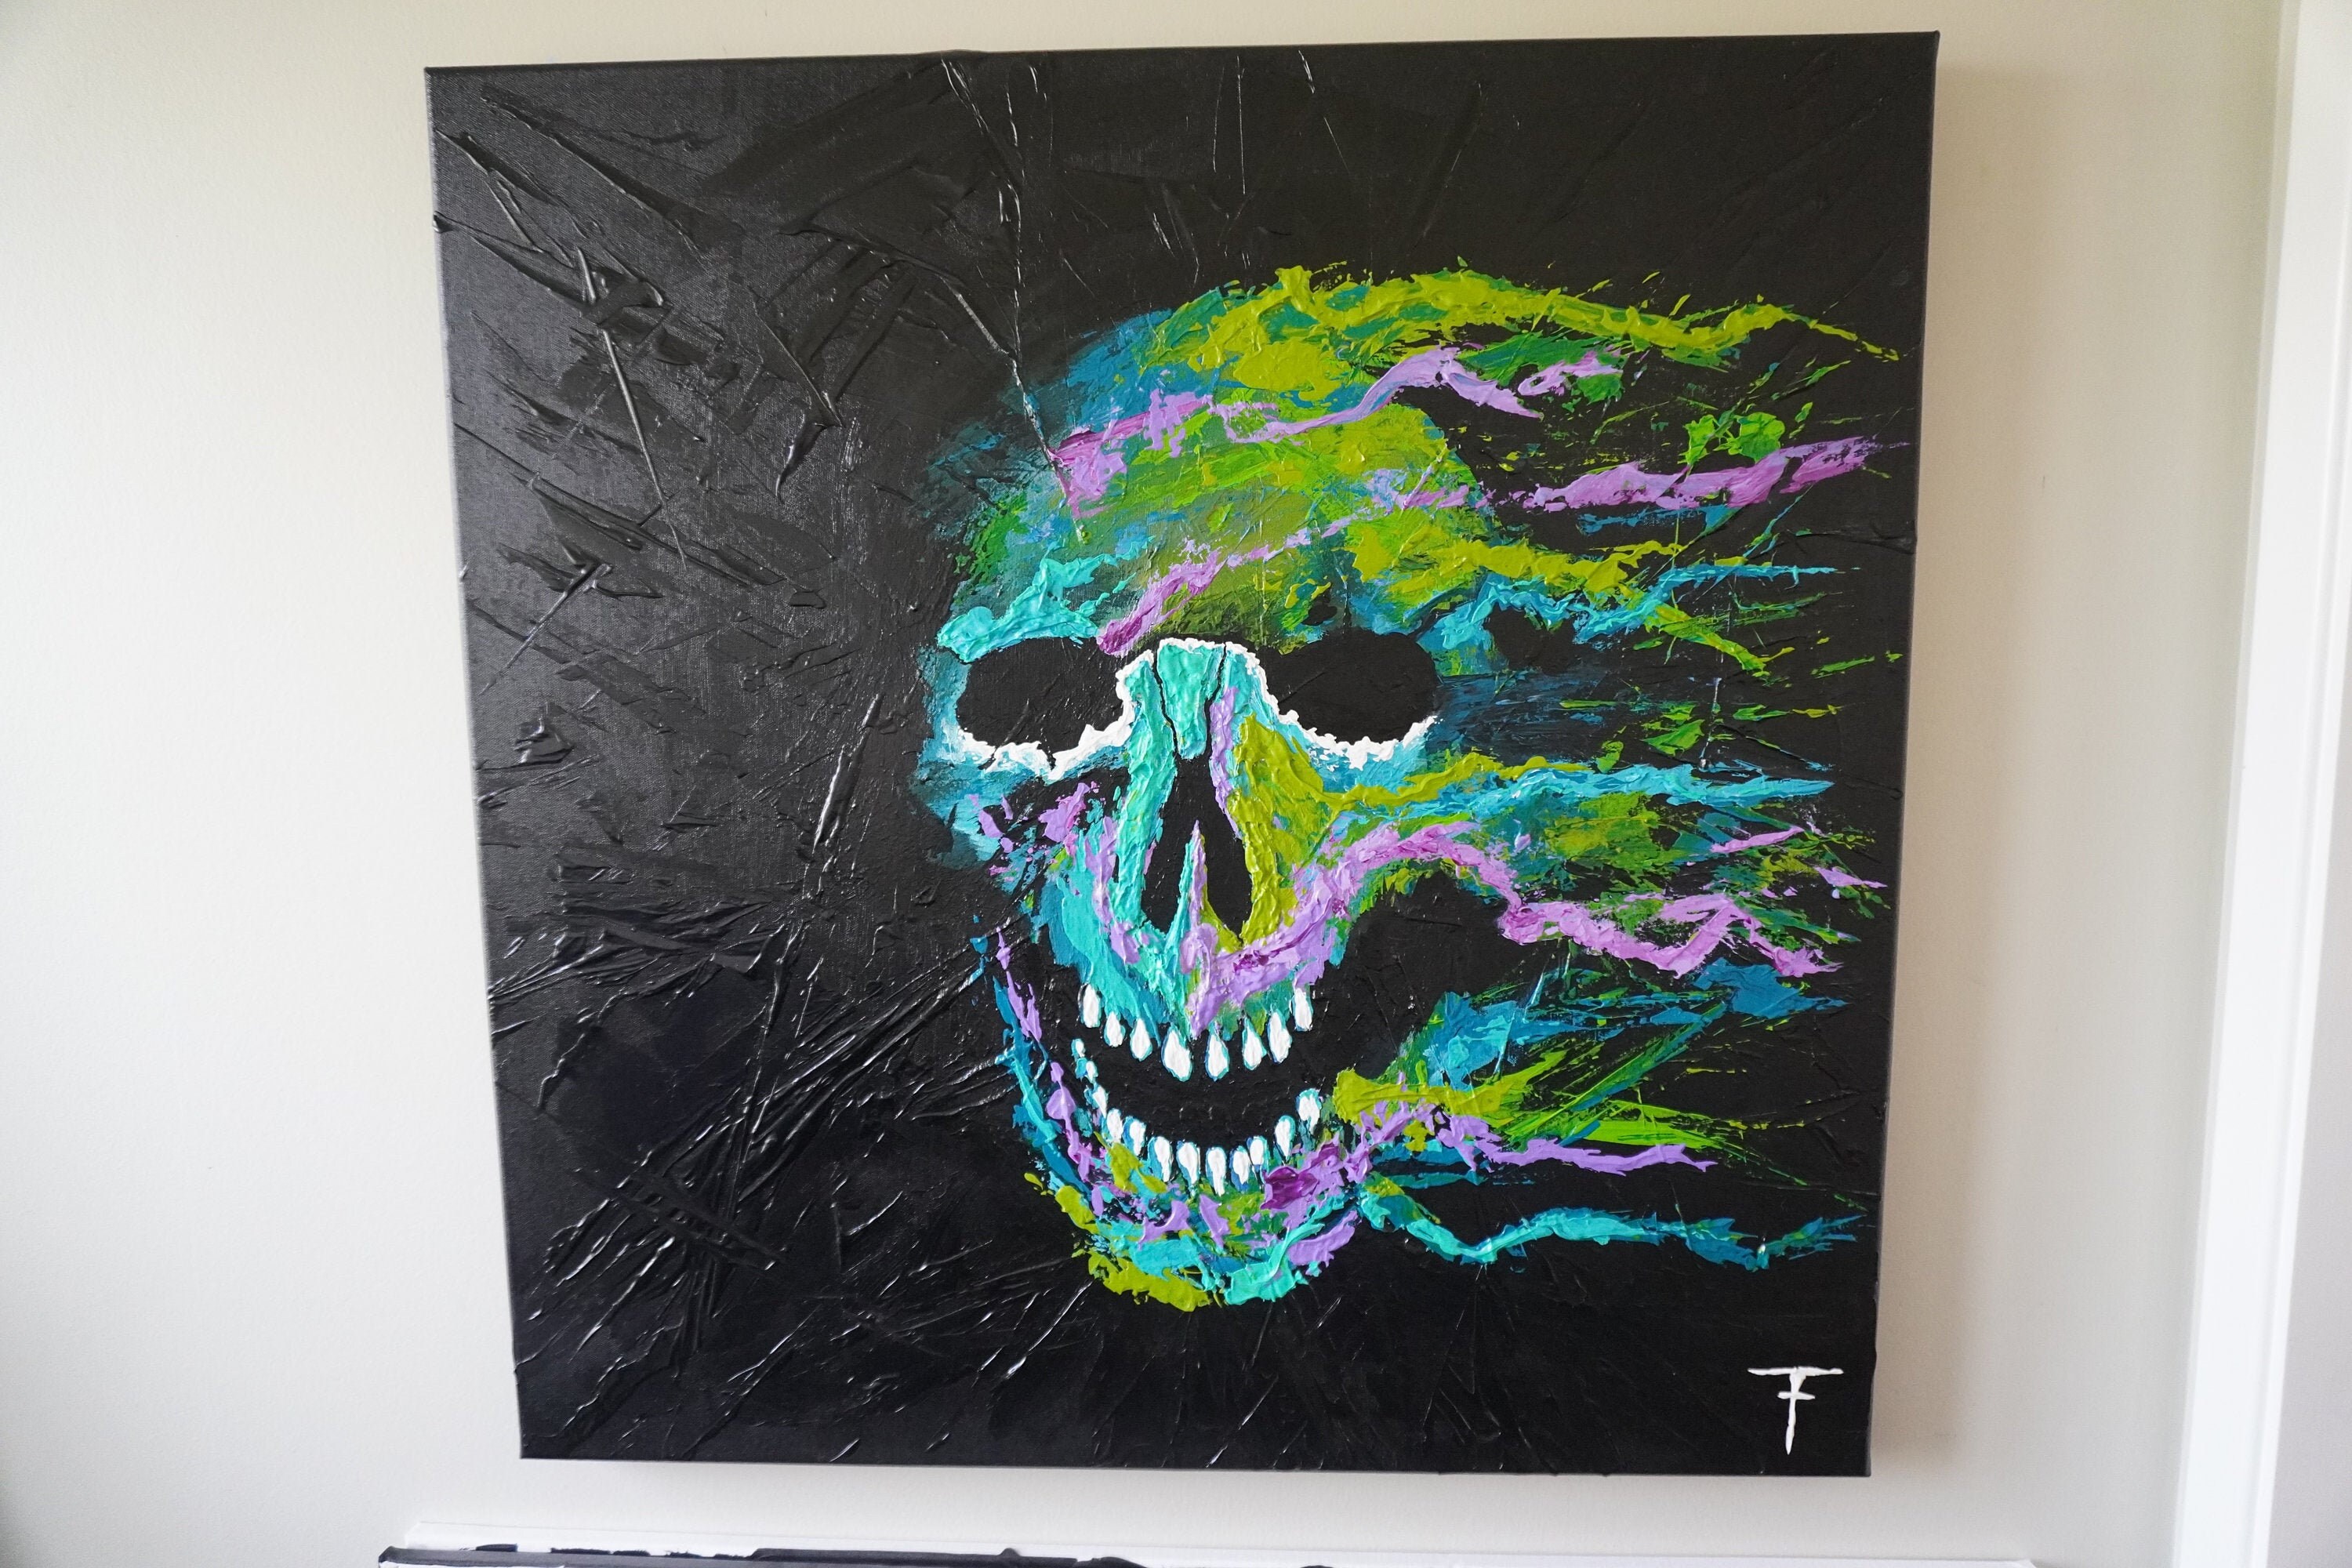
5. Introducing Color Accents:
- Strategic Placement: Consider adding splashes of color to specific areas of the skull. For example, you could add a touch of red to the teeth, a hint of blue to the eye sockets, or a subtle green to the nasal cavity.
- Complementary Colors: Experiment with complementary color combinations to create visual interest and enhance the overall impact of your painting.
- Subtlety is Key: Remember that color accents should be used sparingly. Too much color can detract from the skull’s inherent beauty and symbolism.
6. Final Touches and Refinement:
- Detailing and Refinement: Use fine brushes to add fine details, such as the texture of the bone, the individual teeth, or any intricate patterns.
- Background Considerations: Decide on a background for your skull. A simple black background can create a dramatic effect, while a more complex background can add context and depth.
- Varnish Application: Once the paint is completely dry, apply a layer of varnish to protect your painting and enhance its vibrancy.
7. Exploring Different Styles:
- Realistic Skull Painting: Focus on capturing the anatomical accuracy and detailed features of the skull.
- Stylized Skull Painting: Embrace artistic freedom and experiment with abstract shapes, patterns, and textures.
- Surreal Skull Painting: Combine elements of reality with fantasy to create a dreamlike and imaginative composition.
8. Incorporating Symbolism:
- Mortality and Life: Skulls are often associated with mortality, reminding us of the impermanence of life.
- Strength and Resilience: The skull can also symbolize strength, resilience, and the ability to overcome challenges.
- Individuality and Identity: Skulls can represent individuality and the uniqueness of each person.
9. Displaying Your Skull Painting:
- Framing Options: Choose a frame that complements the style and mood of your painting.
- Placement: Consider the placement of your painting in your home or studio. A dark and dramatic skull painting might look striking in a room with a minimalist aesthetic.
10. Beyond Acrylics:
- Exploring Other Mediums: Experiment with different mediums such as oil paints, watercolors, or charcoal to create unique and expressive skull paintings.
- Digital Art: Utilize digital art software to create stunning skull paintings with advanced tools and techniques.
11. Tips for Success:
- Practice Makes Perfect: The more you paint, the better you will become at capturing the nuances of light, shadow, and form.
- Experiment with Techniques: Don’t be afraid to try different techniques and approaches to find what works best for you.
- Seek Inspiration: Look at other artists’ skull paintings for inspiration and learn from their techniques.
- Enjoy the Process: Painting a skull should be an enjoyable and rewarding experience. Embrace the creative journey and let your imagination run wild.
Conclusion:
Painting a skull with acrylics is a captivating and rewarding experience. By following the steps outlined in this guide, you can create a stunning and thought-provoking piece of art that reflects your artistic vision and personal interpretation of this powerful symbol. Remember, the key to success is to practice, experiment, and most importantly, have fun!
Our Form Article:
Mastering the Art of Skull Acrylic Painting: A Comprehensive Guide
The allure of skulls in art is undeniable, representing a complex interplay of mortality, beauty, and symbolism. Painting a skull with acrylics provides a unique opportunity to explore these themes while embracing the dark and edgy nature of this subject. This comprehensive guide will delve into the intricate details of creating a captivating skull painting, offering insights and techniques to elevate your artistic expression.
1. Laying the Foundation: Gathering Your Materials
Before embarking on your artistic journey, ensure you have the necessary tools at your disposal. A curated collection of materials will empower you to execute your vision with precision and finesse:
- Acrylic Paints: A vibrant palette of acrylic paints is essential. Black, white, and a range of grays are fundamental for shading and creating depth. Consider incorporating splashes of color for accents and highlights, adding a touch of vibrancy to your composition.
- Brushes: A versatile array of brushes is crucial for achieving both delicate details and sweeping strokes. Fine brushes are ideal for intricate work, while larger brushes are perfect for filling in expansive areas.
- Canvas: The canvas serves as the foundation for your masterpiece. Choose a size that aligns with your artistic vision and allows ample space for your skull to come alive. A canvas board offers a smooth surface, making it a suitable choice for beginners.
- Pencil: A sharp pencil is your guide in the initial sketching phase. Use it to lightly outline the skull and its intricate details.
- Eraser: An eraser is indispensable for correcting any sketching mistakes, ensuring a clean and precise foundation for your painting.
- Palette: A palette is a crucial tool for organizing your colors and facilitating seamless mixing. It provides a dedicated workspace for your artistic endeavors.
- Water: Water is essential for cleaning brushes and thinning paints. Keep a container of clean water readily available throughout your painting process.
- Paper Towels: Paper towels serve multiple purposes, from wiping brushes clean to absorbing spills. Maintain a supply for a tidy and efficient workspace.
- Reference Images: High-quality reference images of skulls are invaluable for guiding your painting. Select images that resonate with your artistic vision and offer detailed anatomical information.
2. The Art of Sketching: Creating the Foundation
The sketching phase is the first step in bringing your skull painting to life. It involves translating your vision onto the canvas, laying the groundwork for the intricate details that will follow:
- Choosing Your Skull: Select a reference image that speaks to your artistic sensibilities. It could be a human skull, an animal skull, or even a stylized skull design. The choice should reflect your desired aesthetic and thematic intentions.
- Light and Shadow Study: Before you begin sketching, carefully observe the light source in your reference image and how it casts shadows on the skull. Understanding the interplay of light and shadow is crucial for creating depth and dimension in your painting.
- Sketching on the Canvas: Using your pencil, lightly sketch the outline of the skull onto your canvas. Don’t strive for perfection at this stage; the sketch serves as a guide for your subsequent painting.
- Adding Detail: Once the outline is complete, start adding the intricate details of the skull, such as the eye sockets, teeth, and nasal cavity. Remember to consider the perspective and angles of these features, ensuring they are accurately represented on your canvas.
3. Building the Foundation: Laying Down the Base Colors
The base colors set the stage for your skull painting, creating a foundation upon which you will build depth, dimension, and visual interest. This step involves carefully applying layers of paint to establish the initial tones and contrasts:
- Black Underpainting: Begin by applying a thin layer of black acrylic paint over the entire canvas. This creates a dark base that will enhance the contrast and depth of your painting, allowing the white and gray tones to stand out.
- Layering White: Use white acrylic paint to start building the form of the skull. Begin with the areas that receive the most light, such as the top of the skull and the teeth. These areas will be the brightest points in your composition.
- Grayscale Transition: Gradually transition from white to darker grays as you move towards the areas that receive less light. This creates a smooth gradient effect, enhancing the sense of depth and form. Observe your reference image carefully to guide your color choices.
4. Sculpting with Light and Shadow: Adding Depth and Dimension
The art of adding depth and dimension to your skull painting lies in mastering the interplay of light and shadow. By meticulously applying different shades of gray, you can create a three-dimensional effect, making your skull appear to leap off the canvas:
- Shadow and Highlight Techniques: Use a combination of dark and light grays to create shadows and highlights. Observe how the light source affects the shape and form of the skull in your reference image. The areas that receive direct light will be the highlights, while the areas that are shielded from the light will be the shadows.
- Layering for Detail: Build up layers of paint to create depth and texture. Use thin layers for smooth transitions and thicker layers for more pronounced effects. The layering process allows you to gradually refine the form and details of your skull.
- Blending and Smudging: Use a brush or a blending tool to soften the edges between colors and create a more realistic appearance. Blending creates a seamless transition between shades, enhancing the sense of depth and realism.
5. Introducing Color Accents: Adding a Touch of Vibrancy
Strategic splashes of color can add a touch of vibrancy and visual interest to your skull painting. Use color accents sparingly to enhance the overall impact of your composition:
- Strategic Placement: Consider adding splashes of color to specific areas of the skull. For example, you could add a touch of red to the teeth, a hint of blue to the eye sockets, or a subtle green to the nasal cavity. These color accents will create focal points and add depth to your painting.
- Complementary Colors: Experiment with complementary color combinations to create visual interest and enhance the overall impact of your painting. Complementary colors, such as red and green or blue and orange, create a dynamic contrast that draws the viewer’s eye.
- Subtlety is Key: Remember that color accents should be used sparingly. Too much color can detract from the skull’s inherent beauty and symbolism, overwhelming the overall composition.
6. Final Touches and Refinement: Polishing Your Masterpiece
The final touches are crucial for transforming your skull painting into a finished masterpiece. Take your time to refine the details, add finishing touches, and ensure your painting is ready for display:
- Detailing and Refinement: Use fine brushes to add fine details, such as the texture of the bone, the individual teeth, or any intricate patterns. These details will give your skull painting a sense of realism and depth.
- Background Considerations: Decide on a background for your skull. A simple black background can create a dramatic effect, while a more complex background can add context and depth. The background should complement the overall mood and style of your painting.
- Varnish Application: Once the paint is completely dry, apply a layer of varnish to protect your painting and enhance its vibrancy. Varnish creates a protective layer that prevents the paint from fading or becoming damaged over time.
7. Exploring Artistic Styles: Unleashing Your Creativity
The beauty of art lies in its diversity. Explore different styles of skull painting to discover your artistic voice and express your unique vision:
- Realistic Skull Painting: Focus on capturing the anatomical accuracy and detailed features of the skull. Realistic skull paintings strive for a faithful representation of the subject matter, showcasing the intricate details of bone structure.
- Stylized Skull Painting: Embrace artistic freedom and experiment with abstract shapes, patterns, and textures. Stylized skull paintings offer a unique perspective, interpreting the subject through an artistic lens, often incorporating geometric shapes, bold colors, and abstract elements.
- Surreal Skull Painting: Combine elements of reality with fantasy to create a dreamlike and imaginative composition. Surreal skull paintings explore the subconscious, blurring the lines between reality and imagination, often incorporating symbolic elements and dreamlike imagery.
8. Embracing Symbolism: Exploring the Depth of Meaning
Skulls, as a subject matter, carry a rich tapestry of symbolism, offering profound insights into the human condition and the nature of existence. Explore these symbolic interpretations to deepen your understanding and enhance your artistic expression:
- Mortality and Life: Skulls are often associated with mortality, reminding us of the impermanence of life. They serve as a poignant reminder of the passage of time and the fragility of existence.
- Strength and Resilience: The skull can also symbolize strength, resilience, and the ability to overcome challenges. It represents the enduring power of the human spirit, even in the face of adversity.
- Individuality and Identity: Skulls can represent individuality and the uniqueness of each person. Each skull is a unique anatomical structure, reflecting the individual characteristics of its owner.
9. Displaying Your Skull Painting: Showcasing Your Masterpiece
Once your skull painting is complete, it’s time to showcase your masterpiece. Choosing the right frame and placement will enhance the impact and beauty of your artwork:
- Framing Options: Choose a frame that complements the style and mood of your painting. A simple black frame might be suitable for a realistic skull painting, while a more ornate frame could complement a stylized or surreal composition.
- Placement: Consider the placement of your painting in your home or studio. A dark and dramatic skull painting might look striking in a room with a minimalist aesthetic, while a more whimsical skull painting could brighten up a space with a playful vibe.
10. Beyond Acrylics: Exploring New Artistic Frontiers
The world of art is vast and diverse, offering a plethora of mediums and techniques to explore. Venture beyond acrylics to discover new artistic frontiers:
- Exploring Other Mediums: Experiment with different mediums such as oil paints, watercolors, or charcoal to create unique and expressive skull paintings. Each medium has its unique characteristics and challenges, offering a range of artistic possibilities.
- Digital Art: Utilize digital art software to create stunning skull paintings with advanced tools and techniques. Digital art offers a flexible and dynamic platform for experimentation, allowing you to create realistic, abstract, or surreal skull paintings with ease.
11. Tips for Success: Elevating Your Artistic Journey
The path to artistic mastery is a journey of continuous learning and growth. Embrace these tips to enhance your skills and elevate your skull painting endeavors:
- Practice Makes Perfect: The more you paint, the better you will become at capturing the nuances of light, shadow, and form. Regular practice will refine your technique and enhance your artistic vision.
- Experiment with Techniques: Don’t be afraid to try different techniques and approaches to find what works best for you. Experimentation is key to discovering your artistic voice and developing a unique style.
- Seek Inspiration: Look at other artists’ skull paintings for inspiration and learn from their techniques. Study the works of masters and contemporary artists to expand your artistic horizons.
- Enjoy the Process: Painting a skull should be an enjoyable and rewarding experience. Embrace the creative journey and let your imagination run wild. The joy of creation is the driving force behind great art.
Conclusion:
Painting a skull with acrylics is a captivating and rewarding experience that allows you to explore the dark and edgy nature of this powerful symbol. By following the steps outlined in this comprehensive guide, you can create a stunning and thought-provoking piece of art that reflects your artistic vision and personal interpretation. Remember, the key to success is to practice, experiment, and most importantly, have fun! Embrace the artistic journey and let your creativity soar.

Skull Acrylic Painting: A Dark and Edgy Project
Post a Comment for "Skull Acrylic Painting: A Dark And Edgy Project"