Mastering the Gingham: A Comprehensive Guide to Painting Checkered Patterns

Gingham, with its charming checkered appeal, adds a touch of rustic charm and timeless elegance to any surface. Whether you’re aiming for a vintage farmhouse feel, a playful picnic aesthetic, or a bold statement piece, painting gingham patterns can transform your projects.
This comprehensive guide delves into the world of gingham painting, equipping you with the techniques, tools, and tips to achieve professional-looking results.
Section 1: Planning Your Gingham Project
1.1 Choosing the Right Surface
The choice of surface is crucial for a successful gingham project. Consider these factors:
- Material: Wood, canvas, fabric, metal, and even ceramic tiles can be painted with gingham. Each material requires specific preparation and paint types.
- Size and Shape: The size and shape of your surface will influence the scale and complexity of your gingham pattern.
- Existing Finish: If your surface has an existing finish, ensure it’s compatible with the new paint. Sanding or priming may be necessary for optimal adhesion.

1.2 Selecting Colors and Pattern Size
Gingham’s beauty lies in its simplicity. Choose colors that complement your project’s overall theme. Consider:
- Color Contrast: High contrast between colors creates a bold and striking gingham pattern.
- Color Harmony: For a softer look, opt for colors that complement each other, creating a harmonious visual effect.
- Pattern Size: The size of the squares will determine the overall feel of the gingham. Smaller squares create a more delicate and intricate look, while larger squares create a bolder and more graphic effect.

1.3 Gathering Supplies
- Paint: Acrylic paint is versatile and dries quickly, making it ideal for gingham projects. Choose high-quality acrylic paint for durability and vibrant colors.
- Brushes: Use a variety of brush sizes, depending on the size of your squares. For precise lines, opt for fine-tipped brushes. For larger areas, use wider brushes.
- Measuring Tape and Ruler: Essential for marking out the squares accurately.
- Pencil or Chalk: For lightly sketching the gingham grid.
- Masking Tape: For creating clean lines and precise edges.
- Drop Cloth or Newspaper: To protect your work surface from paint spills.
- Paint Thinner: For cleaning brushes and thinning paint if necessary.
Section 2: Mastering Gingham Painting Techniques
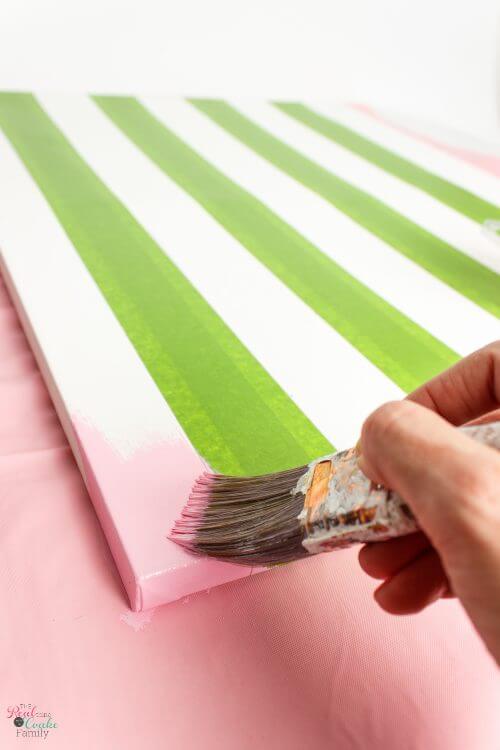
2.1 Grid Method
The grid method is the most common and versatile technique for painting gingham. It involves creating a grid of squares on your surface and then filling in alternating squares with your chosen colors.
2.1.1 Marking the Grid
- Measure and Mark: Using a measuring tape and ruler, mark out the grid lines on your surface. Ensure the squares are uniform in size.
- Light Lines: Use a pencil or chalk to lightly sketch the grid lines. These lines will be erased later.
- Tape for Precision: For sharper lines, use masking tape to create the grid lines. This is especially helpful for larger projects.
2.1.2 Filling in the Squares
- Alternating Colors: Fill in the squares with your chosen colors, alternating between each square.
- Brush Technique: Use a brush to apply the paint evenly within the squares. For a smooth finish, use light strokes and avoid overworking the paint.
- Drying Time: Allow each layer of paint to dry completely before applying the next.
2.2 Freehand Gingham
For a more artistic and less structured approach, try freehand gingham painting.
2.2.1 Visual Guide: Use a reference image of a gingham pattern to guide your hand.
2.2.2 Light Strokes: Start with light strokes of paint, gradually building up the color and filling in the squares.
2.2.3 Practice Makes Perfect: Freehand gingham painting requires practice and a steady hand.
2.3 Stencil Method
Using stencils is a great way to achieve a crisp and consistent gingham pattern, especially for intricate designs.
2.3.1 Choosing Stencils: Select stencils with the desired size and shape of squares.
2.3.2 Applying the Stencil: Secure the stencil onto your surface using masking tape.
2.3.3 Painting the Stencil: Apply paint through the stencil, using a brush or sponge.
2.3.4 Removing the Stencil: Carefully remove the stencil once the paint has dried.
2.4 Gingham Variations
- Diagonal Gingham: Instead of horizontal and vertical squares, create a diagonal gingham pattern by tilting the grid lines.
- Overlapping Gingham: Overlay two gingham patterns with different colors and sizes to create a more complex and visually interesting effect.
- Distressed Gingham: Achieve a vintage look by distressing the painted gingham pattern using sandpaper or a wire brush.
Section 3: Tips and Tricks for Painting Gingham
- Practice on Scrap Material: Before tackling your final project, practice painting gingham on a scrap piece of the same material. This will help you get a feel for the techniques and ensure you’re happy with the results.
- Clean Brushes Regularly: Clean your brushes thoroughly after each use to prevent paint from drying and hardening.
- Use a Light Touch: When painting gingham, use a light touch to avoid smudging or bleeding.
- Don’t Overwork the Paint: Allow the paint to dry completely between layers. Overworking the paint can lead to unevenness and a less professional finish.
- Consider a Primer: For surfaces that are porous or have a glossy finish, use a primer to ensure the paint adheres properly.
- Protect Your Work: Cover your work surface with a drop cloth or newspaper to prevent paint spills.
- Use a Level: For a perfectly aligned gingham pattern, use a level to ensure the grid lines are straight.
- Experiment with Different Techniques: Don’t be afraid to experiment with different techniques to find what works best for you.
Section 4: Gingham Painting Ideas
- Gingham Furniture: Transform old furniture with a fresh coat of gingham paint.
- Gingham Walls: Create a whimsical and charming accent wall with gingham paint.
- Gingham Accessories: Add a touch of gingham to your home decor with painted trays, vases, and other accessories.
- Gingham Clothing: Personalize your wardrobe with gingham-painted clothing and accessories.
- Gingham Art: Create unique and eye-catching gingham artwork for your home.
Section 5: Finishing Touches
- Sealing: Once your gingham pattern is dry, consider sealing it with a clear sealant to protect it from wear and tear.
- Distressing: For a vintage look, use sandpaper or a wire brush to distress the painted gingham pattern.
- Embellishments: Add decorative elements like buttons, ribbons, or fabric scraps to enhance your gingham project.
Conclusion
Mastering the art of gingham painting is a rewarding journey. By following these techniques and tips, you can create stunning checkered patterns that will add a touch of charm and character to any project. So, gather your supplies, choose your colors, and unleash your creativity!

Mastering the Gingham: A Comprehensive Guide to Painting Checkered Patterns
Post a Comment for "How To Paint Gingham Patterns: Techniques And Tips"