From Drab to Fab: A Chalk Paint Bed Frame Makeover

Table of Content
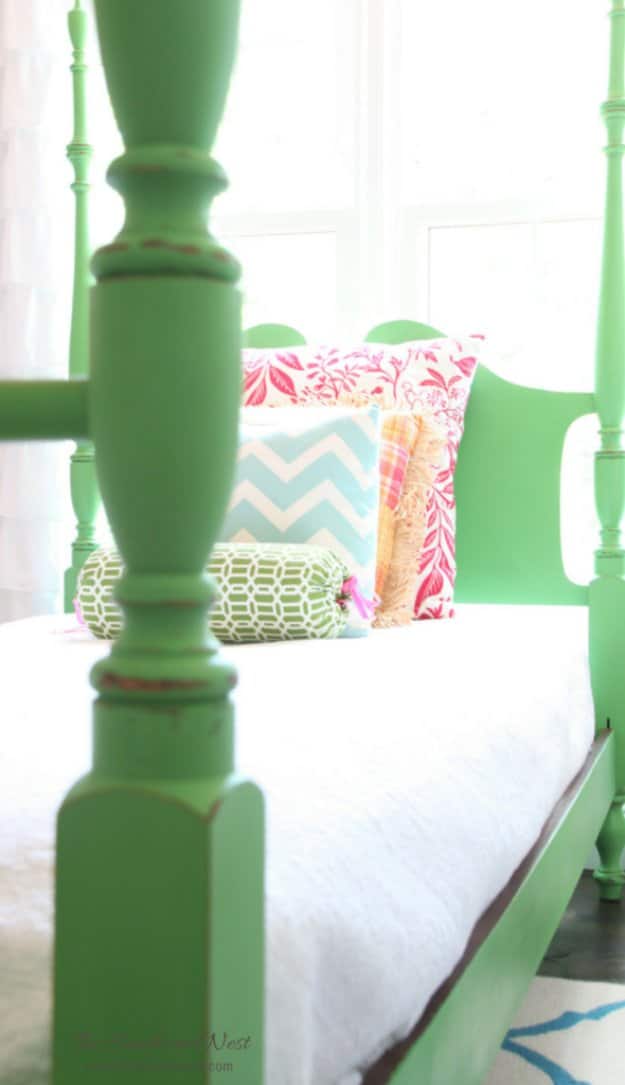
Tired of your old bed frame’s tired look? Chalk paint is a magical solution that can transform your furniture from drab to fab in a weekend! This versatile paint is perfect for beginners, requiring no primer and offering a beautiful matte finish. This article will guide you through a complete bed frame makeover using chalk paint, showcasing a stunning before-and-after transformation.
Before We Begin: Gather Your Supplies
- Chalk paint: Choose a color that complements your bedroom decor. There are countless shades available, from classic white to bold jewel tones.
- Paintbrushes: Opt for a high-quality brush designed for chalk paint. A flat brush is ideal for large surfaces, while a smaller angled brush works well for details.
- Sandpaper: You’ll need both fine-grit (220 grit) and medium-grit (120 grit) sandpaper for prepping and distressing.
- Wax: A clear or tinted wax will seal the chalk paint, adding a protective layer and enhancing the finish.
- Wax brushes: Use separate brushes for applying and buffing the wax.
- Drop cloths: Protect your work area from paint spills.
- Gloves: Keep your hands clean and prevent paint stains.
- Screwdriver: For removing and reattaching hardware like knobs or headboard accents.
- Cleaning cloths: For wiping away dust and excess wax.

Step 1: Prep Your Bed Frame
- Clean the surface: Remove any dust, dirt, or grime using a damp cloth. Let the frame dry completely before proceeding.
- Sand lightly: Use medium-grit sandpaper to lightly roughen the surface, creating better adhesion for the chalk paint. Focus on areas with imperfections or uneven paint.
- Remove hardware: Unscrew any knobs, handles, or decorative elements to ensure a smooth paint application.

Step 2: Apply the Chalk Paint

- Choose your technique: Chalk paint can be applied with a brush, roller, or even a sponge. For a smooth finish, use long, even strokes, overlapping each stroke slightly.
- Apply thin coats: It’s better to apply multiple thin coats than one thick coat. Allow each coat to dry completely before applying the next.
- Don’t worry about imperfections: The beauty of chalk paint lies in its ability to embrace imperfections. Embrace brushstrokes, drips, and unevenness for a vintage, handcrafted look.
Step 3: Distress (Optional)
- Create a weathered effect: Distressing adds character and depth to your bed frame. Use fine-grit sandpaper to lightly sand down edges, corners, and raised areas.
- Focus on high-wear areas: Distress areas that would naturally show signs of wear and tear, such as the edges of the headboard and footboard.
Step 4: Seal with Wax
- Apply the wax: Use a clean wax brush to apply a thin layer of wax over the entire painted surface. Work in sections to ensure even coverage.
- Buff the wax: Once the wax has dried, use a clean cloth to buff the surface, bringing out the shine and creating a smooth, protective finish.
- Apply multiple coats (optional): For extra durability and a deeper sheen, apply a second coat of wax. Allow each coat to dry completely before applying the next.
Step 5: Reassemble and Enjoy!
- Reattach hardware: Once the wax has dried, screw back on any removed hardware.
- Admire your handiwork: Step back and admire your stunningly transformed bed frame! Your bedroom will feel instantly refreshed and inviting.
Beyond the Basics: Enhance Your Makeover
- Add a touch of color: Consider using a tinted wax to add subtle color to the finished piece. A light gray or brown wax can enhance the vintage feel.
- Incorporate stencils: Create unique patterns by using stencils with chalk paint. Stencils can be found in a variety of designs, from simple geometric shapes to intricate florals.
- Embrace decoupage: Add a personal touch by decoupaging fabric, paper, or photos onto the bed frame. This technique adds texture and visual interest.
- Try mixed media: Combine chalk paint with other decorative techniques, such as metallic paints, fabric accents, or even embroidery.
Before and After Inspiration:
(Insert images of your before and after bed frame makeover here. Choose images that showcase the transformation clearly and highlight the details of the makeover.)
Conclusion
Transforming your old bed frame with chalk paint is a rewarding and affordable project that can instantly upgrade your bedroom. With a little creativity and effort, you can create a stunning piece that reflects your personal style and adds a touch of charm to your space. So, gather your supplies, put on some music, and enjoy the process of bringing your bed frame back to life!
Pro Tips for a Flawless Finish:
- Test the paint: Always test the chalk paint on a hidden area of the bed frame before applying it to the entire surface. This helps you ensure the color is exactly what you want and that it adheres properly.
- Work in well-ventilated areas: Chalk paint can emit a slight odor, so it’s best to work in a well-ventilated space.
- Let the paint dry completely: Don’t rush the drying process. Allow each coat of paint and wax to dry completely before proceeding to the next step.
- Clean up immediately: Chalk paint can be difficult to remove once it dries, so clean up any spills or drips immediately.
- Protect your finished piece: Once your bed frame is complete, avoid placing heavy objects on it to prevent scratches or dents.
Ready to take on your own chalk paint bed frame makeover? We’d love to see your results! Share your before-and-after photos on social media and tag us!
Remember, the possibilities are endless when it comes to transforming furniture with chalk paint. So, unleash your creativity and enjoy the journey!
From Drab to Fab: A Chalk Paint Bed Frame Makeover
Post a Comment for "Chalk Paint Bed Frame Makeover: Before And After"