Transform Your Entrance: A Comprehensive Guide to Painting Composite Doors

Table of Content
- 1 Transform Your Entrance: A Comprehensive Guide to Painting Composite Doors
- 1.1 1. Preparation is Key: Setting the Stage for a Flawless Finish
- 1.2 2. Primer: The Foundation for a Long-Lasting Finish
- 1.3 3. Choosing the Right Paint: A Palette of Possibilities
- 1.4 4. Mastering the Art of Painting: Techniques for a Professional Finish
- 1.5 5. Finishing Touches: Polishing Your Masterpiece
- 1.6 6. Maintaining Your Painted Composite Door: Keeping it Looking its Best
- 1.7 7. Beyond the Basics: Exploring Advanced Techniques
- 1.8 8. Safety First: Protecting Yourself and Your Home
- 1.9 9. Troubleshooting Common Painting Problems: Solving Challenges Along the Way
- 1.10 10. Professional Help: When to Call in the Experts
- 1.11 11. Choosing the Right Paint for Your Composite Door: A Detailed Guide
- 1.12 12. Essential Tools for Painting Your Composite Door: A Complete Checklist
- 1.13 13. Painting a Composite Door: A Step-by-Step Guide
- 1.14 14. Conclusion: A Fresh Look for Your Home
A composite door is a modern marvel – offering the beauty of wood with the durability of fiberglass or PVC. But sometimes, even the most stylish door needs a refresh. Painting your composite door can breathe new life into your home’s exterior, adding a touch of personality and enhancing curb appeal. This comprehensive guide will walk you through the process, from preparation to finishing touches, ensuring a professional-looking result.
1. Preparation is Key: Setting the Stage for a Flawless Finish
Before you even pick up a paintbrush, meticulous preparation is paramount. This ensures a smooth, even finish and prevents unsightly imperfections.
a. Cleaning is Crucial:
- Start with a thorough wash: Remove dirt, grime, and debris with a mild detergent and a soft brush. Rinse thoroughly with water and allow the door to dry completely.
- Tackle stubborn stains: For tougher stains, consider using a specialized cleaner designed for composite doors. Follow the manufacturer’s instructions carefully.
- Remove existing paint: If your door is already painted, use a paint stripper to remove the old coating. This ensures proper adhesion of the new paint. Be sure to wear protective gear during this process.
b. Surface Refinement:

- Sanding for smoothness: Lightly sand the door’s surface with fine-grit sandpaper (180-220 grit). This removes any remaining imperfections and creates a better surface for the paint to adhere to.
- Filling imperfections: Use a high-quality wood filler to address any cracks, holes, or scratches. Let the filler dry completely before sanding it smooth.
c. Protecting Your Surroundings:
- Cover the area: Protect your surrounding surfaces from paint splatters by covering them with drop cloths or painter’s tape.
- Mask off the hardware: Remove any removable hardware, such as door handles and hinges. Mask off the remaining hardware with painter’s tape to prevent paint from getting on them.
2. Primer: The Foundation for a Long-Lasting Finish
Applying a primer is a crucial step that prepares the surface for the paint and ensures a more durable, even finish.
a. Primer Types:
- Adhesion primer: This type of primer helps the paint adhere better to the composite door’s surface.
- Moisture-resistant primer: If your door is exposed to moisture, a moisture-resistant primer is essential to prevent paint peeling or blistering.
- Stain-blocking primer: This type of primer effectively hides any underlying stains and prevents them from bleeding through the paint.
b. Application Techniques:
- Use a brush or roller: Apply the primer evenly using a brush or roller, ensuring full coverage.
- Allow sufficient drying time: Let the primer dry completely before moving on to the next step. Check the manufacturer’s instructions for drying time recommendations.
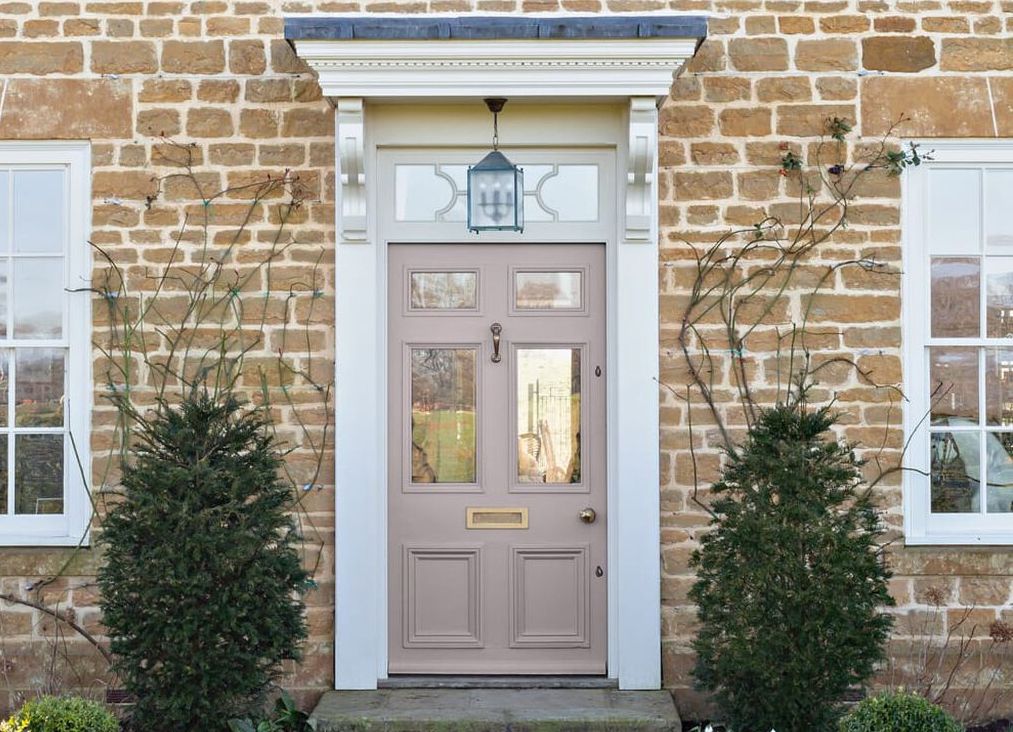
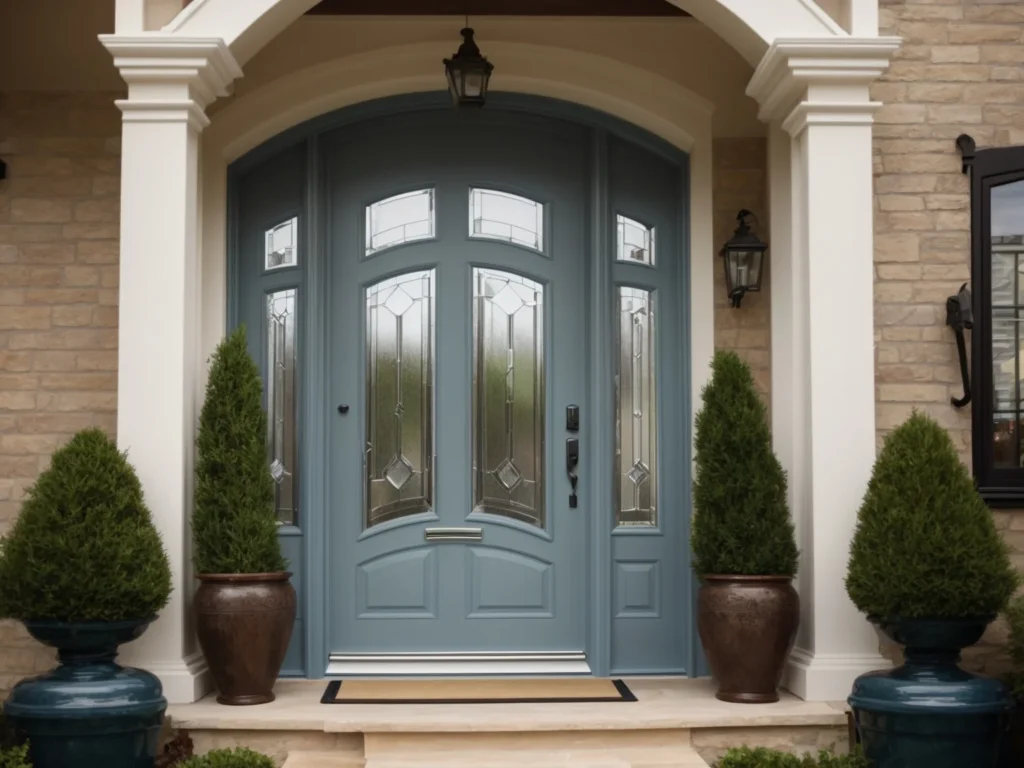
3. Choosing the Right Paint: A Palette of Possibilities
The paint you choose will significantly impact the final look and durability of your composite door.
a. Paint Types:
- Acrylic paint: A popular choice for exterior doors, acrylic paint offers excellent durability, water resistance, and a wide range of colors.
- Epoxy paint: Known for its high gloss and durability, epoxy paint is an excellent choice for high-traffic areas.
- Oil-based paint: While less common for composite doors, oil-based paint offers a smooth, durable finish and excellent color retention.
b. Color Considerations:
- Choose a color that complements your home’s exterior: Consider the style and color scheme of your house when selecting a door color.
- Explore color trends: Stay up-to-date with current color trends for exterior doors to create a modern and stylish look.
- Think about light reflection: Lighter colors reflect more light, making the door appear brighter and larger. Darker colors absorb more light, creating a more dramatic effect.
4. Mastering the Art of Painting: Techniques for a Professional Finish
With the preparation complete and the paint selected, it’s time to apply your artistic touch.
a. Brushwork Precision:
- Use a high-quality brush: Choose a brush specifically designed for exterior paint. Look for a brush with stiff bristles that can handle the paint’s viscosity.
- Apply thin, even coats: Work in small sections, applying thin, even coats of paint. Avoid overloading the brush, as this can lead to drips and runs.
- Smooth out brushstrokes: Use smooth, overlapping strokes to blend the paint seamlessly.
b. Roller Application:
- Use a high-quality roller: Select a roller with a nap length suitable for the paint you’re using.
- Load the roller lightly: Dip the roller into the paint tray, ensuring it’s evenly coated. Avoid overloading the roller, as this can lead to drips.
- Roll in smooth, even strokes: Roll the paint in smooth, even strokes, working in small sections. Overlap each stroke slightly to ensure complete coverage.
c. Handling Edges and Corners:
- Use a brush for edges and corners: For detailed areas like edges and corners, use a brush to ensure precise application.
- Mask off areas carefully: If you’re painting a door with glass panels, carefully mask off the glass with painter’s tape to prevent paint from getting on it.
5. Finishing Touches: Polishing Your Masterpiece
Once the paint is dry, there are a few final steps to ensure a professional and long-lasting finish.
a. Allow Sufficient Drying Time:
- Check the manufacturer’s instructions: Refer to the paint manufacturer’s instructions for recommended drying times. Allow the paint to dry completely before applying any additional coats or handling the door.
b. Adding a Top Coat:
- Consider a clear coat: A clear top coat can add extra protection and enhance the paint’s gloss or matte finish.
- Choose a suitable type: Select a clear coat that’s compatible with the paint you’ve used.
c. Reinstall Hardware:
- Clean and reattach hardware: Once the paint is completely dry, remove the painter’s tape and carefully clean any paint residue from the hardware. Reinstall the hardware securely.
6. Maintaining Your Painted Composite Door: Keeping it Looking its Best
A little maintenance goes a long way in preserving the beauty and durability of your painted composite door.
a. Regular Cleaning:
- Wash the door regularly: Use a mild detergent and a soft brush to remove dirt and grime. Rinse thoroughly with water and allow the door to dry completely.
- Avoid harsh chemicals: Avoid using harsh chemicals or abrasive cleaners, as these can damage the paint.
b. Touch-Ups as Needed:
- Address minor scratches or chips: If you notice any minor scratches or chips, touch them up with a small amount of paint.
- Use a touch-up pen: For quick and easy touch-ups, consider using a touch-up pen designed for the paint you’ve used.
7. Beyond the Basics: Exploring Advanced Techniques
For those seeking to elevate their painting skills, these advanced techniques can create truly stunning results.
a. Distressed Look:
- Create a vintage aesthetic: Achieve a distressed look by lightly sanding the paint after it’s dry, revealing the underlying color or wood grain.
b. Two-Tone Effect:
- Add depth and dimension: Create a two-tone effect by painting the door with two different colors, using painter’s tape to create a sharp line between the colors.
c. Stenciling:
- Add a decorative touch: Use stencils to add patterns or designs to the door, creating a unique and personalized look.
d. Faux Finishing:
- Simulate different textures: Use faux finishing techniques to create the look of wood grain, stone, or other textures.
8. Safety First: Protecting Yourself and Your Home
Painting a composite door involves working with chemicals and potentially hazardous materials. Always prioritize safety by taking the following precautions:
- Wear protective gear: Wear gloves, a mask, and eye protection to safeguard yourself from paint fumes and splashes.
- Work in a well-ventilated area: Open windows and doors to ensure good ventilation while painting.
- Keep paint out of reach of children and pets: Store paint and other materials in a secure location out of reach of children and pets.
- Dispose of materials properly: Dispose of paint cans and other materials according to local regulations.
9. Troubleshooting Common Painting Problems: Solving Challenges Along the Way
While painting a composite door can be a rewarding project, challenges may arise. Here are some common problems and their solutions:
a. Drips and Runs:
- Cause: Overloading the brush or roller.
- Solution: Apply thin, even coats of paint and work in small sections. Use a brush or roller specifically designed for exterior paint.
b. Uneven Coverage:
- Cause: Insufficient paint coverage or uneven application.
- Solution: Apply multiple thin coats of paint, allowing each coat to dry completely before applying the next. Use a brush or roller with a nap length suitable for the paint you’re using.
c. Paint Peeling:
- Cause: Poor preparation, improper primer selection, or moisture trapped beneath the paint.
- Solution: Ensure proper surface preparation, including cleaning, sanding, and filling imperfections. Choose a moisture-resistant primer if necessary.
d. Blistering:
- Cause: Moisture trapped beneath the paint.
- Solution: Use a moisture-resistant primer and allow the paint to dry completely before applying any additional coats.
10. Professional Help: When to Call in the Experts
While painting a composite door can be a DIY project, there are times when seeking professional help is beneficial.
- Complex designs or intricate details: For complex designs or intricate details, a professional painter can ensure a flawless finish.
- Limited time or experience: If you have limited time or experience, a professional painter can save you time and effort.
- Large-scale projects: For large-scale projects involving multiple doors or other exterior surfaces, a professional painter can provide efficient and high-quality results.
11. Choosing the Right Paint for Your Composite Door: A Detailed Guide
Selecting the right paint for your composite door is crucial for achieving a beautiful and durable finish. Here’s a comprehensive breakdown of paint types, their characteristics, and suitability for composite doors:
a. Acrylic Paint:
- Characteristics: Water-based, fast-drying, low odor, excellent adhesion, durable, and available in a wide range of colors.
- Suitability: Highly recommended for composite doors due to its excellent adhesion, durability, and water resistance. It’s a versatile choice for both interior and exterior applications.
b. Epoxy Paint:
- Characteristics: Two-part system (resin and hardener), high gloss, extremely durable, resistant to chemicals, abrasion, and impact.
- Suitability: Suitable for composite doors, especially in high-traffic areas or where durability is paramount. However, epoxy paint can be more challenging to apply and requires careful preparation.
c. Oil-Based Paint:
- Characteristics: Solvent-based, slow-drying, strong odor, excellent color retention, durable, and provides a smooth finish.
- Suitability: While less common for composite doors, oil-based paint can offer a durable and long-lasting finish. However, it requires proper ventilation during application and can be more difficult to clean up.
d. Specialty Paints:
- Moisture-resistant paint: Designed to withstand moisture and prevent peeling or blistering. Ideal for composite doors exposed to rain, snow, or humidity.
- Stain-blocking paint: Prevents stains from bleeding through the paint. Useful for doors with underlying stains or discoloration.
- High-gloss paint: Creates a shiny, reflective finish. Can enhance the appearance of the door and provide extra protection.
- Matte paint: Creates a flat, non-reflective finish. Offers a more subtle and understated look.
e. Factors to Consider When Choosing Paint:
- Door location: Consider the door’s location and exposure to weather conditions. For exterior doors, choose a paint that’s weather-resistant and durable.
- Desired finish: Determine the desired finish, such as gloss, semi-gloss, matte, or satin.
- Color: Select a color that complements the home’s exterior and personal style.
- Budget: Consider the cost of the paint, as different types and brands can vary in price.
- Ease of application: Choose a paint that’s easy to apply and provides a smooth, even finish.
12. Essential Tools for Painting Your Composite Door: A Complete Checklist
Having the right tools is essential for a successful painting project. Here’s a comprehensive checklist of tools you’ll need:
a. Preparation Tools:
- Cleaning supplies: Mild detergent, soft brush, bucket, sponge, water.
- Paint scraper: To remove old paint.
- Sandpaper: Fine-grit sandpaper (180-220 grit) for smoothing the surface.
- Wood filler: To fill cracks, holes, or scratches.
- Putty knife: To apply wood filler.
- Drop cloths: To protect surrounding surfaces from paint splatters.
- Painter’s tape: To mask off areas that should not be painted.
b. Painting Tools:
- Paint brush: A high-quality brush designed for exterior paint.
- Paint roller: A roller with a nap length suitable for the paint you’re using.
- Paint tray: To hold the paint and load the roller.
- Roller cover: A replacement cover for the paint roller.
- Paint stirring stick: To mix the paint thoroughly.
- Paint thinner: To clean brushes and rollers.
c. Finishing Tools:
- Clear coat: A top coat to enhance the paint’s finish and provide extra protection.
- Touch-up pen: For quick and easy touch-ups.
- Screwdriver: To remove and reinstall hardware.
13. Painting a Composite Door: A Step-by-Step Guide
Now that you’re equipped with the knowledge and tools, let’s dive into the step-by-step process of painting your composite door.
1. Prepare the Door:
- Clean the door thoroughly: Remove dirt, grime, and debris with a mild detergent and a soft brush. Rinse thoroughly with water and allow the door to dry completely.
- Remove existing paint: If your door is already painted, use a paint stripper to remove the old coating.
- Sand the surface: Lightly sand the door’s surface with fine-grit sandpaper (180-220 grit) to create a smooth surface for the paint to adhere to.
- Fill any imperfections: Use wood filler to address cracks, holes, or scratches. Allow the filler to dry completely before sanding it smooth.
- Protect surrounding surfaces: Cover surrounding surfaces with drop cloths or painter’s tape.
- Mask off hardware: Remove any removable hardware, such as door handles and hinges. Mask off the remaining hardware with painter’s tape.
2. Prime the Door:
- Choose the right primer: Select a primer that’s compatible with the paint you’re using and appropriate for the door’s location and exposure to moisture.
- Apply the primer evenly: Use a brush or roller to apply the primer evenly, ensuring full coverage.
- Allow the primer to dry completely: Check the manufacturer’s instructions for drying time recommendations.
3. Paint the Door:
- Choose the right paint: Select a paint that’s durable, weather-resistant, and complements your home’s exterior.
- Apply the paint in thin, even coats: Work in small sections, using a brush or roller to apply the paint evenly. Avoid overloading the brush or roller, as this can lead to drips and runs.
- Allow each coat to dry completely: Check the manufacturer’s instructions for drying time recommendations before applying additional coats.
- Apply multiple coats for a durable finish: Apply at least two coats of paint for a durable and long-lasting finish.
4. Finish the Door:
- Apply a clear coat (optional): If desired, apply a clear top coat to enhance the paint’s finish and provide extra protection.
- Remove painter’s tape and clean hardware: Once the paint is completely dry, remove the painter’s tape and carefully clean any paint residue from the hardware.
- Reinstall hardware: Reinstall the hardware securely.
5. Maintain the Door:
- Clean the door regularly: Use a mild detergent and a soft brush to remove dirt and grime. Rinse thoroughly with water and allow the door to dry completely.
- Avoid harsh chemicals: Avoid using harsh chemicals or abrasive cleaners, as these can damage the paint.
- Touch up as needed: If you notice any minor scratches or chips, touch them up with a small amount of paint.
14. Conclusion: A Fresh Look for Your Home
Painting a composite door is a rewarding project that can transform the look of your home. With careful preparation, the right tools, and a little patience, you can achieve a professional-looking finish that enhances your home’s curb appeal and adds a touch of personal style. Remember to prioritize safety, choose the right paint, and maintain your door for a long-lasting, beautiful entrance.

Transform Your Entrance: A Comprehensive Guide to Painting Composite Doors
Post a Comment for "Painting A Composite Door: Techniques And Tips"