Seaside Holiday: Painted Oyster Shell Christmas Ornaments
Introduction
As the festive season approaches, the allure of creating unique and meaningful Christmas decorations grows stronger. Among the myriad of traditional and contemporary ornaments, painted oyster shell ornaments stand out as a captivating blend of coastal charm and artistic flair. This comprehensive guide will delve into the enchanting world of oyster shell Christmas ornaments, providing step-by-step instructions, design inspiration, and expert tips to help you craft exquisite keepsakes that will adorn your holiday tree for years to come.
Materials and Preparation
To embark on this artistic journey, you will require the following materials:
- Cleaned and dried oyster shells
- Acrylic paints in various colors
- Paintbrushes (fine-tip and medium-sized)
- Clear acrylic sealer
- Pencil or chalk
- Ruler or measuring tape
- Scissors
- Ribbon or twine
Before painting, thoroughly clean the oyster shells to remove any debris or residue. Allow them to dry completely before proceeding.
Design Inspiration
The beauty of painted oyster shell ornaments lies in their versatility. From classic coastal motifs to whimsical designs, the possibilities are endless. Consider the following design ideas to spark your creativity:
- Seascapes: Paint miniature seascapes on the shells, capturing the serene beauty of the ocean with shades of blue, green, and white.
- Marine Life: Bring the underwater world to life with intricate paintings of fish, seahorses, or dolphins.
- Coastal Elements: Incorporate coastal elements such as seashells, starfish, or sand into your designs for a touch of seaside charm.
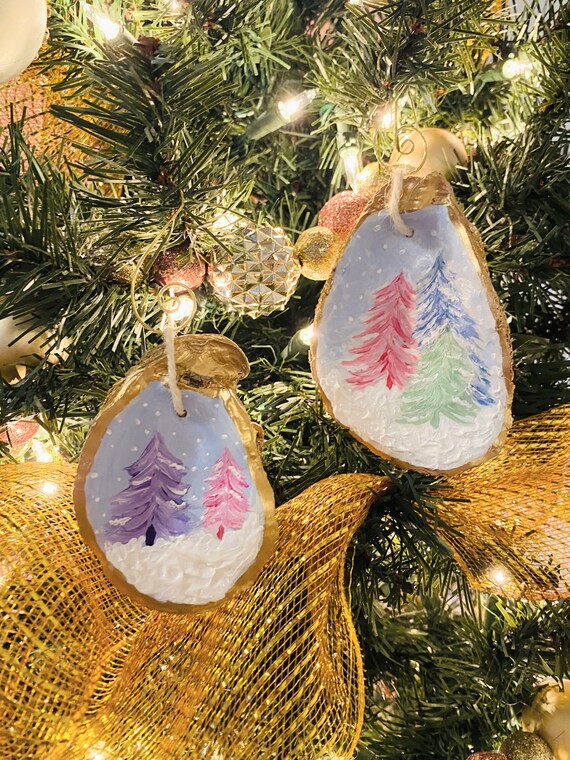
- Holiday Symbols: Paint traditional holiday symbols like Christmas trees, snowflakes, or Santa Claus on the shells to create festive ornaments.
- Personalized Designs: Create unique ornaments by painting names, initials, or special messages on the shells.
Step-by-Step Instructions
- Sketch Your Design: Lightly sketch your desired design onto the oyster shell using a pencil or chalk. This will serve as a guide for your painting.
- Apply Base Coat: If desired, apply a thin base coat of white or light-colored paint to provide a smooth surface for the subsequent layers.
- Paint Your Design: Using fine-tip paintbrushes, carefully paint your design onto the shell. Allow each layer to dry completely before applying the next.
- Add Details: Enhance your design by adding details such as highlights, shadows, or textures using a medium-sized paintbrush.
- Seal Your Ornament: Once your design is complete, apply a clear acrylic sealer to protect the paint and enhance its longevity.
- Attach Ribbon or Twine: Create a loop by tying ribbon or twine around the top of the shell to hang it on your Christmas tree.
Expert Tips
- Use high-quality acrylic paints for vibrant and durable colors.
- Experiment with different brush sizes and techniques to achieve a variety of effects.
- Allow ample drying time between each step to prevent smudging.
- Protect your work surface with a drop cloth or newspaper.
- If you make a mistake, simply wipe off the paint with a damp cloth and start over.
- Consider using a magnifying glass for intricate details.
- Let your creativity soar and don’t be afraid to experiment with different designs.
Conclusion
Painted oyster shell Christmas ornaments are a delightful and unique way to celebrate the holiday season. By following the step-by-step instructions and incorporating your own artistic flair, you can create exquisite keepsakes that will bring joy to your home for years to come. Whether you choose to paint seascapes, marine life, or personalized designs, the possibilities are endless. So gather your materials, let your imagination run wild, and embark on a creative journey that will result in beautiful and meaningful Christmas ornaments.
Post a Comment for "Seaside Holiday: Painted Oyster Shell Christmas Ornaments"