Mastering Sharp Edges in Outline Watercolor: Techniques for Precision and Detail

Table of Content
- 1 Mastering Sharp Edges in Outline Watercolor: Techniques for Precision and Detail
- 1.1 1. Choosing the Right Tools for the Job:
- 1.2 2. Techniques for Achieving Sharp Edges:
- 1.3 3. Beyond the Basics: Advanced Techniques
- 1.4 4. Mastering the Art of Observation:
- 1.5 5. Practice and Experimentation:
- 1.6 Conclusion:
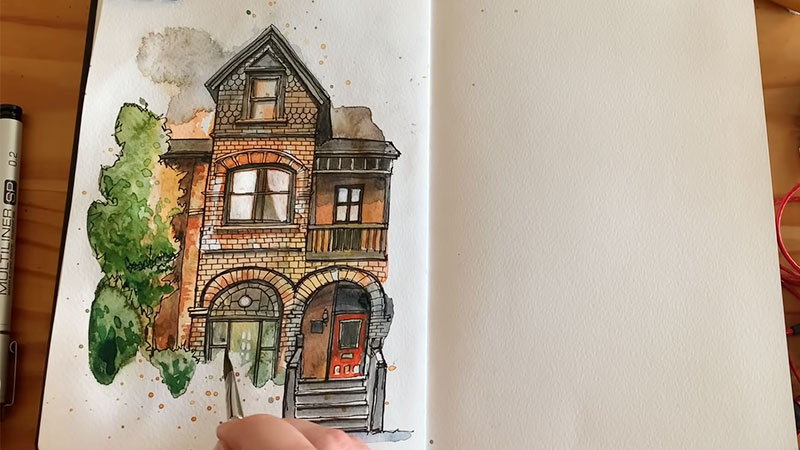
Outline watercolor painting, a captivating art form, utilizes the power of linework to define shapes and create intricate compositions. This style, often associated with whimsical illustrations and delicate details, demands a level of control and precision that can be challenging for even seasoned artists. One of the most crucial aspects of this technique is achieving sharp, clean edges that enhance the impact of the outlined forms and bring the artwork to life.
This comprehensive guide delves into the world of outline watercolor painting, exploring various techniques and tips to master the art of achieving sharp edges. From choosing the right materials to mastering specific brushstrokes, we’ll equip you with the knowledge and skills necessary to elevate your outline watercolor creations.
1. Choosing the Right Tools for the Job:
1.1. Paper:
- Cold-pressed watercolor paper: This type of paper, with its slightly textured surface, provides excellent adhesion for watercolor paints and allows for easy control of washes. The texture helps to create a subtle, diffused effect around the edges of the outlines, adding depth and character to the artwork.
- Hot-pressed watercolor paper: This paper offers a smooth, almost slick surface, ideal for achieving sharp, crisp edges. Its smooth texture minimizes the potential for paint bleeding and allows for greater precision in outlining and filling in shapes.
- Sketch paper: While not specifically designed for watercolor, sketch paper can be used for practice or quick sketches. Its slightly rough texture can create a unique effect, but it may not provide the same level of control and sharp edges as dedicated watercolor paper.
1.2. Brushes:
- Round brushes: These versatile brushes are essential for both outlining and filling in shapes. Look for brushes with a good spring and a fine point for creating delicate lines and precise detail work.
- Flat brushes: Flat brushes are ideal for creating broad washes and filling in large areas. Their flat edge can also be used to create a clean, sharp line when applying paint directly along the outline.
- Synthetic brushes: These brushes are durable, affordable, and offer excellent versatility. They are particularly suitable for outline watercolor painting as they can hold a good amount of water and paint without losing their shape.
- Natural hair brushes: While more expensive, natural hair brushes offer exceptional softness and a fine point, making them ideal for delicate details and precise outlining.
1.3. Paints:
- Watercolor paints: Choose high-quality watercolor paints that offer good pigment concentration and vibrancy. Look for paints that flow smoothly and allow for easy blending.
- Gouache paints: Gouache paints, a type of opaque watercolor, can be used to create bold, vibrant outlines and fill in shapes with a more solid, opaque effect.

1.4. Masking Fluid:
- Liquid masking fluid: This fluid, applied with a brush, creates a protective barrier on the paper, preventing paint from reaching the areas covered. It is particularly useful for creating intricate details and sharp edges around complex shapes.
- Masking film: Masking film, available in various shapes and sizes, is a versatile tool for creating precise outlines and masking large areas. It can be applied and removed easily, leaving clean, sharp edges.
2. Techniques for Achieving Sharp Edges:
2.1. The Importance of Precision:
- Light, controlled strokes: When outlining, use light, controlled strokes to create clean, defined lines. Avoid pressing too hard on the brush, as this can cause the outline to become blurry or uneven.
- Sharp, angled brushstrokes: Hold the brush at a slight angle to the paper to create a crisp, defined line. This technique allows for greater control and minimizes the risk of the outline bleeding or becoming too thick.
- Clean brush: Make sure the brush is clean and free of excess paint before outlining. Any excess paint can lead to bleeding and blurred edges.
2.2. Utilizing Masking Fluid:
- Application: Apply masking fluid to the areas you want to remain white or unpainted. Use a brush with a fine point for intricate details and a wider brush for larger areas.
- Drying time: Allow the masking fluid to dry completely before applying watercolor paint. If the fluid is not fully dry, it can cause the paint to lift or bleed.
- Removal: Once the watercolor paint is dry, carefully peel off the masking fluid. Use a rubber eraser or a tool designed for masking fluid removal to avoid damaging the paper.
2.3. The Power of Negative Space:
- Understanding negative space: Negative space refers to the empty area surrounding the subject matter. By outlining the negative space around the subject, you can create a clean, defined edge for the object itself.
- Using a light touch: When outlining the negative space, use a light touch to avoid obscuring the subject matter. The outline should be subtle and serve as a guide for the watercolor washes.
2.4. Watercolor Wash Techniques:
- Controlling the flow: Apply watercolor washes with a light touch, allowing the paint to flow naturally around the outlines. Avoid overworking the washes, as this can lead to muddy edges.
- Layering: Build up the color gradually through multiple thin layers of washes. This technique allows for greater control over the intensity of the colors and helps to create smooth transitions.
- Blending: Use a clean, damp brush to blend the edges of the washes, creating a soft, diffused effect. This technique can help to soften the outlines and create a more harmonious composition.
2.5. The Art of Lifting:
- Lifting techniques: Use a clean, damp brush or a tissue to lift excess paint from the paper, creating a lighter, more subtle effect. This technique can be used to refine the edges of the outlines and create subtle highlights.
- Lifting for sharp edges: Lifting paint from the edges of the outlines can create a clean, defined edge. This technique is particularly effective when working with darker colors or when you want to emphasize the outline.
2.6. Adding Detail and Texture:
- Using a fine brush: Once the washes are dry, use a fine brush to add details and textures within the outlined shapes. This technique can enhance the visual impact of the artwork and add a sense of realism.
- Adding depth with shadow: Use a darker shade of watercolor to create shadows within the outlined shapes, adding depth and dimension to the artwork.
3. Beyond the Basics: Advanced Techniques
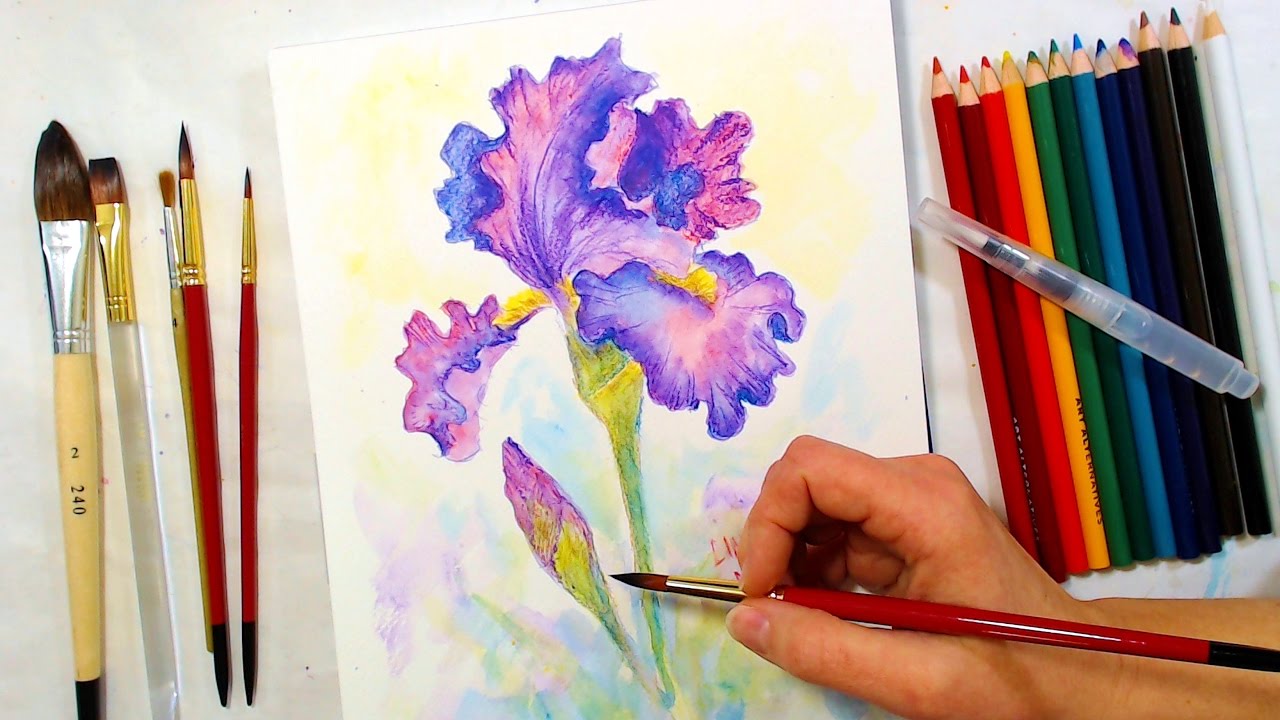
3.1. Watercolor Pencil for Precision:
- Layering with watercolor: Watercolor pencils offer a unique combination of precision and water-soluble properties. Use them to create sharp outlines and then apply washes over the pencil lines for a seamless blend.
- Creating texture: The graphite in watercolor pencils can be used to create interesting textures and effects. Experiment with different pressure and blending techniques to achieve unique results.
3.2. Salt for Textural Effects:
- Creating a unique texture: Sprinkle salt onto damp watercolor washes before they dry. The salt absorbs the moisture, creating interesting textured patterns and a "salt-and-pepper" effect.
- Experimentation: Experiment with different types of salt and application methods to create unique textures and effects.
3.3. Using a Stencil for Repeated Motifs:
- Creating consistent outlines: Stencils offer a convenient and precise way to create repetitive outlines. They are particularly useful for creating patterns, borders, and intricate designs.
- Experimenting with shapes: Use a variety of stencil shapes and sizes to create a diverse and visually engaging artwork.
3.4. The Power of Masking Tape:
- Creating crisp lines: Masking tape can be used to create straight, clean edges for outlines and washes. Apply the tape firmly to the paper and then paint around it.
- Removing the tape: Once the paint is dry, carefully peel off the masking tape, revealing sharp, defined edges.
3.5. Blending Techniques for Soft Edges:
- Creating soft transitions: While sharp edges are a hallmark of outline watercolor painting, sometimes soft edges can enhance the overall composition. Use a damp brush to blend the edges of washes, creating a subtle, diffused effect.
- Blending with a dry brush: Use a dry brush to blend the edges of the washes, creating a more textured, less defined effect.
4. Mastering the Art of Observation:
- Observing the world around you: The key to creating successful outline watercolor paintings lies in observing the world around you. Pay attention to the shapes, lines, and textures of everyday objects.
- Finding inspiration in nature: Nature offers endless inspiration for outline watercolor painting. Study the shapes of leaves, flowers, and animals, and translate those observations into your artwork.
5. Practice and Experimentation:
- Practice makes perfect: The key to mastering any art form is practice. Experiment with different techniques and materials to find what works best for you.
- Embrace mistakes: Don’t be afraid to make mistakes. Mistakes are an opportunity to learn and grow as an artist.
- Develop your own style: As you gain experience, develop your own unique style of outline watercolor painting. Experiment with different color palettes, textures, and techniques to create artwork that reflects your personal vision.
Conclusion:
Achieving sharp edges in outline watercolor painting is a journey of exploration and practice. By understanding the tools, techniques, and principles outlined in this guide, you can elevate your artwork to new heights of precision and detail. Embrace the challenges, experiment with different approaches, and most importantly, enjoy the creative process. The beauty of outline watercolor lies in its ability to capture the essence of shapes and lines, transforming simple outlines into vibrant and captivating works of art.

Mastering Sharp Edges in Outline Watercolor: Techniques for Precision and Detail
Post a Comment for "Outline Watercolor Painting: Techniques For Sharp Edges"