DIY Galaxy Painted Pumpkin: A Step-by-Step Tutorial to Cosmic Creativity

Table of Content
- 1 DIY Galaxy Painted Pumpkin: A Step-by-Step Tutorial to Cosmic Creativity
- 1.1 Gathering Your Galactic Supplies
- 1.2 Preparing Your Pumpkin for Cosmic Transformation
- 1.3 Unveiling the Cosmic Canvas: Painting Your Galaxy
- 1.4 Preserving Your Cosmic Creation: Sealing Your Galaxy Pumpkin
- 1.5 Displaying Your Galactic Masterpiece
- 1.6 Tips for a Stellar Galaxy
- 1.7 Beyond the Pumpkin: Expanding Your Cosmic Canvas
- 1.8 Conclusion: A Universe of Creativity
Embrace the celestial beauty of the cosmos and transform your ordinary pumpkin into a stunning, galaxy-painted masterpiece. This detailed guide will walk you through every step, from prepping your pumpkin to achieving that mesmerizing, otherworldly glow.
Gathering Your Galactic Supplies
Before embarking on your cosmic journey, ensure you have all the necessary tools and materials:
1. Pumpkin: Choose a pumpkin with a smooth surface, preferably one that’s not too bumpy or misshapen. The size and shape depend on your desired galaxy design.
2. Acrylic Paints: A vibrant palette of acrylic paints is essential for creating your galaxy. Opt for a range of blues, purples, pinks, and whites, as well as a few metallic accents like gold or silver.
3. Paintbrushes: Assemble a variety of brushes, including flat brushes for broad strokes, round brushes for detail work, and a sponge brush for blending.
4. Palette Knife: A palette knife is handy for mixing paints and adding texture to your galaxy.
5. Water: A cup of clean water is crucial for cleaning brushes and thinning paints.
6. Paper Towels: Keep paper towels nearby for wiping spills and excess paint.
7. Protective Gear: Wear an apron or old clothes to shield yourself from paint splatters.

8. Optional Extras:
- Glitter: Add a touch of sparkle to your galaxy with various colored glitters.
- Star Stickers: Enhance your galaxy with pre-made star stickers or create your own using a stencil.
- Clear Sealer: Protect your finished masterpiece with a clear sealant spray for long-lasting beauty.
Preparing Your Pumpkin for Cosmic Transformation
Before you start painting, ensure your pumpkin is prepped for a smooth, flawless finish:
1. Cleaning: Wash your pumpkin thoroughly with soap and water to remove any dirt or debris.
2. Drying: Allow the pumpkin to dry completely before proceeding to the next step.
3. Priming (Optional): Applying a primer, especially on a white pumpkin, can create a smoother surface and enhance the vibrancy of your galaxy colors.
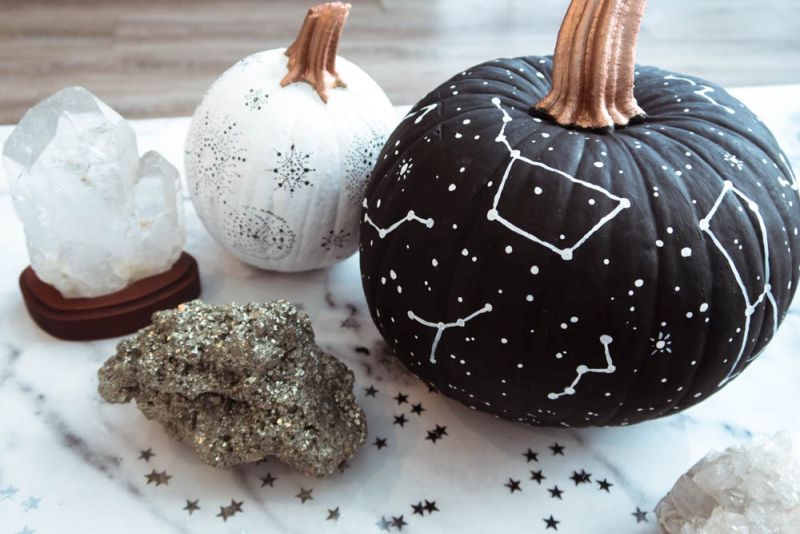
Unveiling the Cosmic Canvas: Painting Your Galaxy
Now, it’s time to unleash your inner artist and paint your galaxy masterpiece:
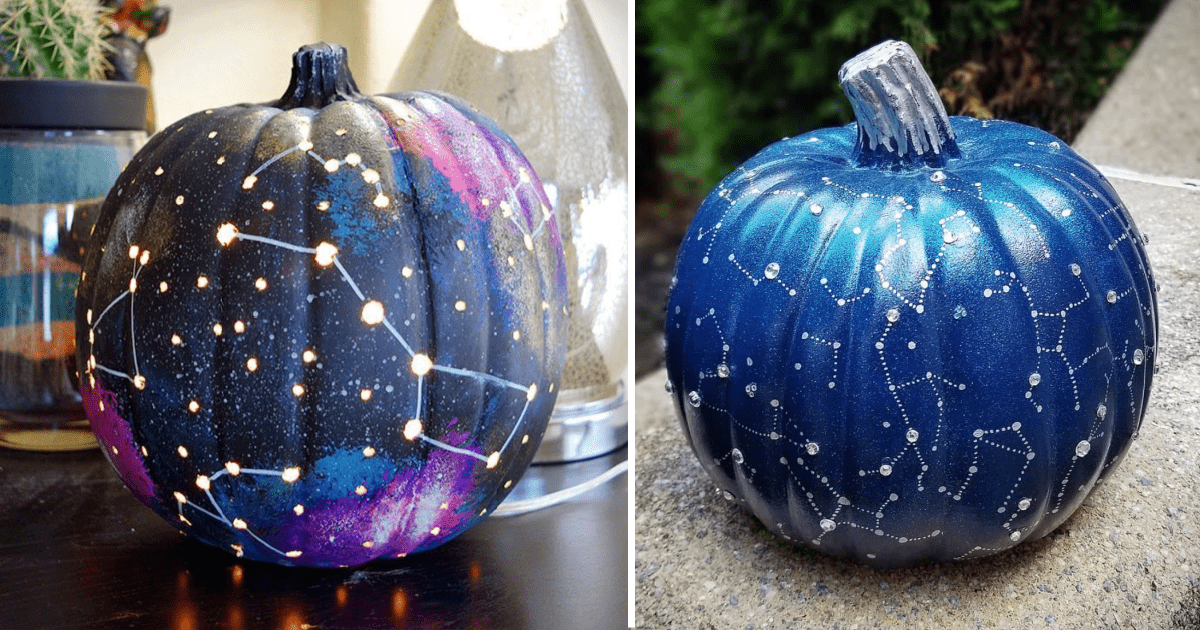
1. Base Coat: Begin by applying a base coat of dark blue or black acrylic paint to your pumpkin. This provides a rich backdrop for your galaxy elements.
2. Nebula Swirls: Using a variety of blues, purples, and pinks, create swirling patterns on your pumpkin. Remember, a galaxy is not symmetrical, so embrace the free-flowing, chaotic nature of space.
3. Blending and Smudging: Use a sponge brush or a clean, damp brush to blend the colors together, creating soft transitions and ethereal effects.
4. Adding Depth and Dimension:
- Star Clusters: Apply small dots of white paint to create clusters of stars.
- Nebula Highlights: Use a lighter shade of blue or pink to highlight specific areas of your nebula, adding depth and dimension.
- Metallic Accents: Introduce a touch of gold or silver paint for a shimmering, celestial effect.
5. Fine Detailing: Employ a fine-tipped brush to add intricate details to your galaxy, such as:
- Spiral Arms: Create swirling patterns with white or a lighter shade of blue to depict the spiral arms of a galaxy.
- Nebulae: Paint delicate, wispy clouds of color to represent nebulae, vast clouds of gas and dust.
- Star Trails: Use a thin brush and white paint to create streaks of light, simulating the trails of shooting stars.
6. Enhancing Your Galaxy:
- Glitter: Sprinkle a touch of glitter onto wet paint for a sparkling, cosmic effect.
- Star Stickers: Add pre-made star stickers or create your own using a stencil for a more defined star field.
7. Drying Time: Allow your galaxy masterpiece to dry completely before applying any additional embellishments or sealant.
Preserving Your Cosmic Creation: Sealing Your Galaxy Pumpkin
To protect your galaxy-painted pumpkin and ensure its longevity, a clear sealant is highly recommended:
1. Applying the Sealant: Once your pumpkin is completely dry, spray it with a clear sealant spray.
2. Drying Time: Allow the sealant to dry completely according to the manufacturer’s instructions.
Displaying Your Galactic Masterpiece
Now that your cosmic creation is complete, proudly display your galaxy-painted pumpkin:
- Indoor Decor: Place your pumpkin on a mantle, shelf, or table for a stunning display.
- Outdoor Decor: If you’re using a weather-resistant sealant, you can display your pumpkin outdoors, but remember to protect it from harsh weather conditions.
Tips for a Stellar Galaxy
- Experiment with Colors: Don’t be afraid to experiment with different color combinations and techniques to create a unique galaxy.
- Use a Light Source: Place a light source behind your pumpkin to enhance the depth and dimension of your galaxy.
- Add a Personalized Touch: Incorporate your own artistic flair by adding unique elements like planets, comets, or even your own constellations.
- Practice Makes Perfect: Don’t be discouraged if your first attempt doesn’t turn out perfectly. Keep practicing, and you’ll soon be creating galaxy-painted pumpkins that are truly out of this world.
Beyond the Pumpkin: Expanding Your Cosmic Canvas
The techniques and principles used for galaxy-painted pumpkins can be applied to other creative projects, expanding your cosmic artistry:
- Galaxy-Painted Rocks: Transform ordinary rocks into celestial wonders by using the same painting techniques.
- Galaxy-Painted Canvas: Create a stunning galaxy artwork on a canvas using acrylic paints and a palette knife for texture.
- Galaxy-Themed Crafts: Explore other galaxy-themed crafts, such as galaxy-painted ornaments, jewelry, or even clothing.
Conclusion: A Universe of Creativity
Painting a galaxy on a pumpkin is a fun and rewarding project that allows you to unleash your creativity and explore the vastness of the cosmos. With this detailed guide, you can create a stunning, personalized masterpiece that will bring a touch of celestial beauty to your home or any space you choose. So, gather your supplies, embrace your inner artist, and embark on your own cosmic painting journey!

DIY Galaxy Painted Pumpkin: A Step-by-Step Tutorial to Cosmic Creativity
Post a Comment for "DIY Galaxy Painted Pumpkin: A Step-by-Step Tutorial"