RV Touch Up Paint: How to Achieve a Seamless Repair

Table of Content
The open road beckons, but the wear and tear of travel can leave your RV with unsightly scratches, chips, and fading paint. Don’t let these blemishes detract from your adventures! With the right tools and techniques, you can achieve professional-looking touch-up repairs that blend seamlessly with your RV’s original finish.
This comprehensive guide will equip you with the knowledge and steps necessary to tackle touch-up paint jobs like a pro. We’ll delve into the essential tools, paint selection, preparation techniques, application methods, and finishing touches that ensure a flawless repair.
Understanding RV Paint and Its Challenges
RVs are exposed to a variety of harsh elements, from UV rays and road grime to harsh chemicals and accidental bumps. This can lead to paint damage that requires careful attention to restore the vehicle’s aesthetic appeal.
Types of RV Paint
- Gelcoat: Commonly found on fiberglass RVs, gelcoat is a thick, durable layer that provides both structural integrity and a smooth, glossy finish.
- Acrylic Paint: Acrylic-based paints offer excellent durability and color retention, making them popular for RV manufacturers.
- Urethane Paint: Known for their superior resistance to scratches, fading, and chemicals, urethane paints are often used for high-end RVs.

Challenges in Touch-Up Painting
- Color Matching: Finding the exact paint match for your RV’s original finish can be challenging, especially if the paint has faded or been repainted over the years.
- Surface Preparation: Proper surface preparation is crucial for a seamless repair. This involves cleaning, sanding, and priming the affected area to ensure proper adhesion.
- Application Techniques: Applying the touch-up paint requires a delicate touch to avoid brush strokes and uneven coverage.

Essential Tools for a Successful Touch-Up
Before embarking on your RV touch-up project, gather these essential tools:
- Touch-Up Paint: Choose a high-quality, color-matched paint specifically designed for your RV’s paint type.
- Paint Thinner: Use a compatible thinner to adjust the paint viscosity for smooth application.
- Sandpaper: Assorted grits (100, 200, 400, 600) for sanding the repair area and blending the paint.
- Masking Tape: Protect surrounding areas from paint overspray.
- Paintbrush: A small, high-quality brush with soft bristles for precise application.
- Toothpick: Used for applying small amounts of paint to tight spots.
- Cleaning Rags: For wiping away dust and cleaning the work area.
- Gloves: Protect your hands from paint and solvents.
- Safety Glasses: Protect your eyes from paint particles and dust.
- Respirator: Use a respirator with appropriate filters to prevent inhaling paint fumes.
Step-by-Step Guide to Touch-Up Paint Repair
Now, let’s walk through the process of achieving a professional-looking touch-up repair:
1. Preparation is Key
- Cleaning: Thoroughly clean the affected area with a mild soap and water solution. Remove any dirt, grime, or debris.
- Masking: Use masking tape to protect surrounding areas from paint overspray.
- Sanding: Sand the damaged area with progressively finer grit sandpaper (100, 200, 400) to smooth out the surface and create a good bonding surface for the paint.
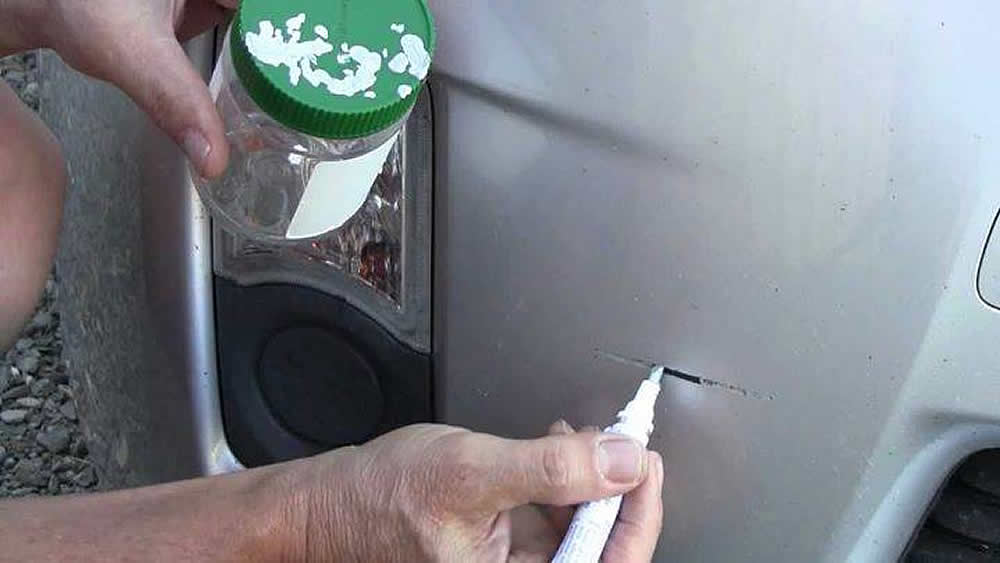
2. Applying the Touch-Up Paint
- Thinning: If necessary, thin the touch-up paint with a compatible thinner according to the manufacturer’s instructions. This will ensure smooth application.
- Small Applications: Apply the paint in thin, even coats, allowing each coat to dry completely before applying the next.
- Feathering: Gradually blend the edges of the touch-up paint with the surrounding paint using a fine-grit sandpaper (600 or higher).
3. Finishing Touches
- Polishing: After the paint has fully dried, use a polishing compound and a soft cloth to blend the repair area with the surrounding paint.
- Waxing: Apply a high-quality RV wax to protect the repaired area and enhance the shine.
Tips for a Seamless Repair
- Natural Light: Work in a well-lit area with natural light to ensure accurate color matching.
- Practice on Scrap: Before applying paint to your RV, practice on a scrap piece of similar material to get a feel for the paint and application techniques.
- Patience is Key: Allow adequate drying time between coats and for the paint to cure completely.
- Professional Assistance: For extensive damage or complex repairs, consider consulting a professional RV painter.
Paint Matching for a Flawless Blend
Achieving a perfect color match is paramount for a seamless repair. Here’s a breakdown of paint matching techniques:
- Manufacturer’s Paint Code: Locate your RV’s paint code, often found on a sticker or data plate. This code can be used to order a pre-mixed paint from an authorized dealer or paint supplier.
- Paint Chip Matching: Compare your RV’s paint to a paint chip library at an automotive paint store. Select the closest match and have the paint mixed according to the chip’s code.
- Spectrophotometer: A spectrophotometer is a device that analyzes the color of your RV’s paint and provides a precise color formula. This method offers the most accurate color match.
Common Mistakes to Avoid
- Skipping Preparation: Inadequate surface preparation will lead to poor adhesion and a noticeable repair.
- Over-Applying Paint: Thick coats of paint will not dry evenly and may result in cracking or peeling.
- Using Incompatible Paint: Using a paint that is not compatible with your RV’s original finish can lead to incompatibility and color mismatch.
Conclusion
With the right tools, techniques, and a little patience, you can achieve professional-looking touch-up repairs on your RV. By following this comprehensive guide, you’ll be equipped to tackle those pesky scratches, chips, and fading paint, ensuring your RV looks its best for years to come. Remember, a well-maintained RV is not only aesthetically pleasing but also a testament to your pride of ownership and a reflection of your love for the open road.

RV Touch Up Paint: How to Achieve a Seamless Repair
Post a Comment for "RV Touch Up Paint: How To Achieve A Seamless Repair"