The Ultimate Guide to Painting Trailer Wheels: A Step-by-Step Masterclass for Professional Results
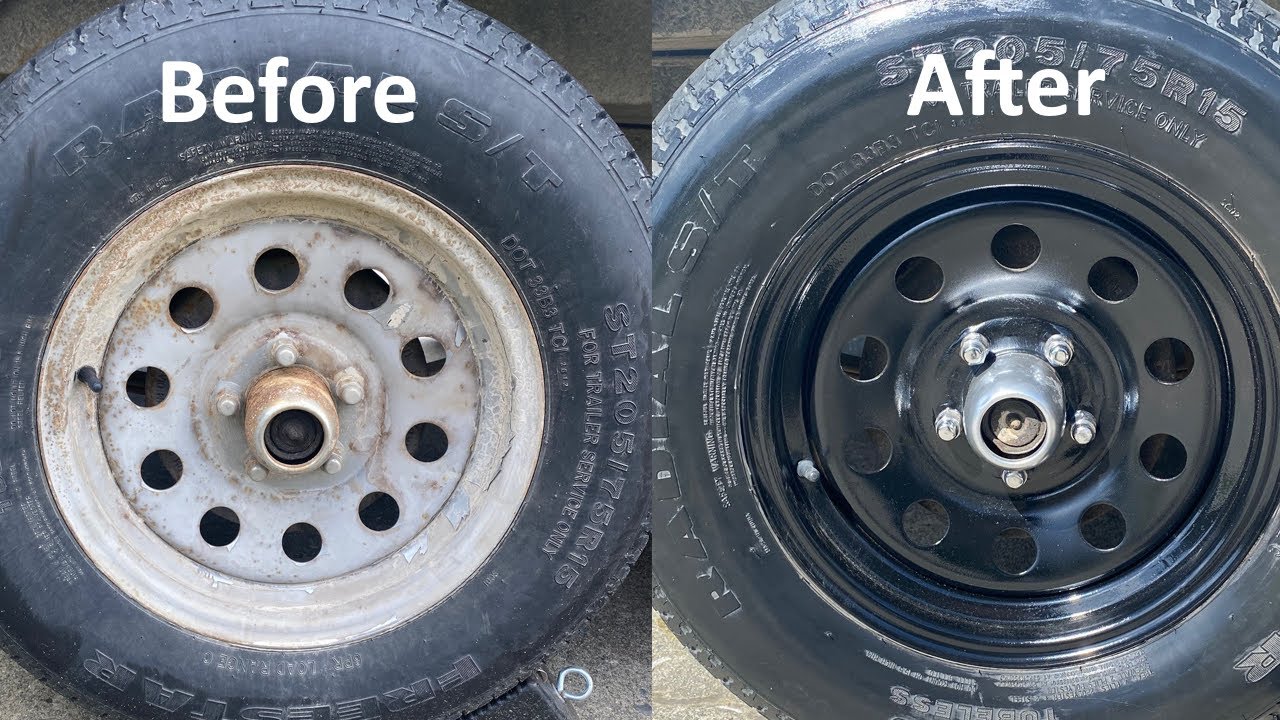
Table of Content
Introduction:
Tired of dull, faded trailer wheels? Ready to give your rig a fresh, professional look? Painting trailer wheels is a cost-effective way to enhance your trailer’s appearance and protect them from the elements. This comprehensive guide will equip you with the knowledge and techniques to achieve a high-quality, long-lasting finish.
Preparation is Key: Setting the Stage for Success
Before you even think about touching a paintbrush, meticulous preparation is crucial. Here’s a breakdown of the essential steps:
1. Choosing the Right Location:
- Garage: An ideal choice, offering protection from the elements and dust.
- Well-Ventilated Outdoor Area: Ensure adequate ventilation for proper drying and to avoid inhaling fumes.
- Avoid Direct Sunlight: Direct sunlight can cause paint to dry too quickly, leading to uneven application and imperfections.

2. Gathering the Necessary Tools and Supplies:
- Safety Gear: A must-have! Wear gloves, eye protection, and a respirator to protect yourself from chemicals.
- Cleaning Supplies: Degreaser, soap and water, rags, and a pressure washer are essential for thorough cleaning.
- Sandpaper: Assorted grits (80, 120, 220, and 400) for sanding and smoothing the wheel surface.
- Primer: A suitable primer for metal surfaces, ensuring proper adhesion of the topcoat.
- Paint: High-quality, durable automotive paint specifically formulated for trailer wheels.
- Paint Thinner: For cleaning brushes and thinning the paint if necessary.
- Paintbrushes: High-quality brushes for applying primer and paint.
- Roller: For applying paint to large areas, especially on wheels with flat surfaces.
- Masking Tape: For protecting areas that should not be painted.
- Drop Cloths: To protect the surrounding area from paint splatters.
- Paint Sprayer (Optional): For a professional, even finish, especially on large wheels.


3. Thorough Cleaning: The Foundation for a Perfect Finish
- Remove the Wheels: Safely detach the wheels from the trailer.
- Pressure Washing: Use a pressure washer to remove dirt, grime, and debris.
- Degreasing: Apply a degreaser to remove any remaining grease, oil, or wax.
- Scrubbing: Use a stiff brush to scrub away stubborn dirt and grime.
- Rinse Thoroughly: Ensure all cleaning agents are completely rinsed off the wheels.
4. Sanding and Smoothing: Creating a Smooth Surface for Paint Adhesion
- Sanding: Start with 80-grit sandpaper to remove any rust or imperfections. Progress to finer grits (120, 220, and 400) to achieve a smooth, even surface.
- Feathering: Blend the edges of the sanding areas to create a seamless transition.
- Dust Removal: Thoroughly clean the wheels with a tack cloth to remove any sanding dust.
5. Masking: Protecting Areas from Paint
- Masking Tape: Apply masking tape to areas that should not be painted, such as the hubcaps, tire sidewalls, and brake components.
- Precise Application: Ensure the masking tape is applied smoothly and securely to prevent paint bleeding.
6. Primer: The Essential Foundation for Paint Adhesion
- Primer Selection: Choose a primer specifically designed for metal surfaces. Consider a rust-inhibitive primer for added protection.
- Application: Apply the primer in thin, even coats, following the manufacturer’s instructions. Allow each coat to dry thoroughly before applying the next.
- Drying Time: Allow the primer to dry completely before moving on to the next step.
Painting Perfection: Achieving a Professional Finish
1. Choosing the Right Paint:
- Durability: Select a high-quality, durable automotive paint formulated for trailer wheels.
- Color: Choose a color that complements your trailer’s design and personal preferences.
- Gloss Level: Consider the desired level of gloss, ranging from matte to high gloss.
2. Applying the Paint:
- Preparation: Ensure the paint is thoroughly mixed and thinned according to the manufacturer’s instructions.
- Thin Coats: Apply the paint in thin, even coats to avoid drips and runs.
- Drying Time: Allow each coat to dry completely before applying the next.
- Multiple Coats: Apply multiple coats for optimal coverage and durability.
3. Paint Application Methods:
- Brush: Suitable for small areas and intricate details.
- Roller: Ideal for large, flat surfaces, providing a smooth, even finish.
- Sprayer: Offers the most professional and even finish, especially for large wheels.
4. Drying and Curing:
- Drying Time: Allow the paint to dry completely according to the manufacturer’s instructions.
- Curing Time: The paint will continue to harden and cure over time, reaching full durability after a few days.
5. Removing Masking Tape:
- Gentle Removal: Carefully peel off the masking tape once the paint is completely dry to avoid damaging the paint.
6. Final Touches:
- Cleaning: Clean up any paint spills or splatters.
- Inspection: Inspect the painted wheels for any imperfections and address them accordingly.
Maintenance and Longevity:
- Regular Cleaning: Wash the wheels regularly with soap and water to remove dirt and grime.
- Waxing: Apply a car wax to protect the paint from the elements and enhance its shine.
- Touch-Ups: Address any minor scratches or chips promptly with touch-up paint.
Conclusion:
By following these detailed steps, you can achieve a professional, durable, and eye-catching finish for your trailer wheels. Remember, patience and attention to detail are key to achieving the best results. With careful preparation, quality materials, and proper application techniques, you can transform your trailer’s appearance and make it stand out from the crowd.
Diagram:
graph LR A[Preparation] --> BCleaning B --> C[Sanding] C --> D[Masking] D --> E[Primer] E --> F[Painting] F --> G[Drying] G --> HMaintenance H --> I[Cleaning] H --> J[Waxing] H --> K[Touch-Ups]Keywords:
- Trailer wheel painting
- Trailer wheel paint
- Painting trailer wheels
- Trailer wheel restoration
- Trailer wheel refurbishment
- Trailer wheel makeover
- Trailer wheel DIY
- Trailer wheel care
- Trailer wheel maintenance
- Trailer wheel protection
- Trailer wheel enhancement
- Trailer wheel aesthetics
- Trailer wheel appearance
- Trailer wheel customization
- Trailer wheel upgrade
- Trailer wheel refinishing
- Trailer wheel restoration guide
- Trailer wheel painting guide
- Trailer wheel painting tips
- Trailer wheel painting techniques
- Trailer wheel painting best practices
- Trailer wheel painting supplies
- Trailer wheel painting tools
- Trailer wheel painting cost
- Trailer wheel painting time
- Trailer wheel painting safety
- Trailer wheel painting step-by-step
- Trailer wheel painting professional results

The Ultimate Guide to Painting Trailer Wheels: A Step-by-Step Masterclass for Professional Results
Post a Comment for "Best Practices For Painting Trailer Wheels"