Capture the Majesty of the Great Wave: A Diamond Painting Journey

Table of Content
- 1 Capture the Majesty of the Great Wave: A Diamond Painting Journey
- 1.1 Choosing the Perfect Diamond Painting Kit
- 1.2 Preparing Your Diamond Painting Workspace
- 1.3 Understanding the Diamond Painting Process
- 1.4 Mastering Diamond Painting Techniques
- 1.5 Finishing Touches and Preservation
- 1.6 Diamond Painting the Great Wave: A Journey of Creativity
- 1.7 Creating Your Own Diamond Painting: A Step-by-Step Guide
- 1.8 Tips for Successful Diamond Painting
- 1.9 Conclusion
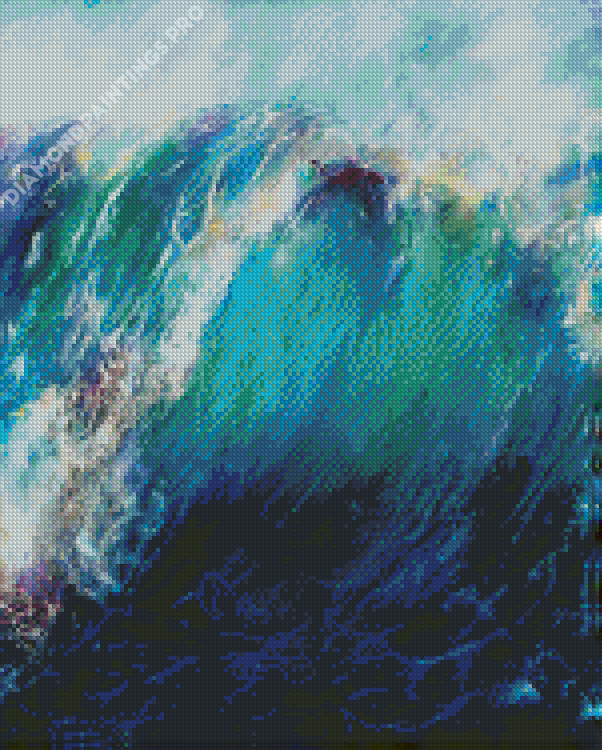
The Great Wave off Kanagawa, a masterpiece by the Japanese artist Hokusai, has captivated audiences for centuries with its dynamic portrayal of nature’s raw power. Now, you can bring this iconic artwork to life through the mesmerizing art of diamond painting. This guide will walk you through the process of creating your own stunning diamond painting of the Great Wave, from selecting the right kit to mastering the techniques for a truly breathtaking masterpiece.
Choosing the Perfect Diamond Painting Kit
The first step in your diamond painting journey is selecting the right kit. Look for a kit that offers a high-quality canvas with a clear, detailed image of the Great Wave. Here’s what to consider:
Canvas Size: The canvas size determines the overall scale of your artwork. Larger canvases provide more detail and a more immersive experience, but they also require more time and effort. Smaller canvases are a great choice for beginners or those with limited space.
Diamond Shape: Diamond paintings typically use square or round diamonds. Square diamonds offer a more precise look and cover the canvas more completely, while round diamonds create a smoother, more traditional effect.
Diamond Quality: The quality of the diamonds directly impacts the final look of your artwork. Choose a kit with high-quality, vibrant diamonds that sparkle and shine. Look for diamonds that are cut evenly and have a smooth, polished surface.
Adhesive: The adhesive on the canvas should be strong and sticky to ensure that the diamonds adhere securely. Look for a kit with a high-quality adhesive that is designed for long-lasting results.

Tools: A good diamond painting kit will include all the necessary tools, such as a diamond pen, tweezers, and a tray. Ensure the tools are sturdy and comfortable to use.

Preparing Your Diamond Painting Workspace
Before you begin, create a dedicated workspace that is clean, well-lit, and free from distractions. You’ll need:
- A flat, stable surface: A table or desk is ideal.
- Good lighting: Natural light is best, but a desk lamp with adjustable brightness can also be helpful.
- A comfortable chair: You’ll be spending a significant amount of time working on your diamond painting, so make sure you’re comfortable.
- Storage containers: You’ll need containers to hold your diamonds and tools. Small plastic containers with lids work well.
- A waste bin: Keep a waste bin nearby for discarded diamonds and other debris.
Understanding the Diamond Painting Process
Diamond painting is a straightforward process that involves applying small, colorful diamonds to a canvas with an adhesive surface. The canvas is divided into numbered sections, each corresponding to a specific color of diamond. Here’s a step-by-step guide:
Prepare the Canvas: Carefully remove the protective film from the canvas. Don’t touch the adhesive surface with your fingers.
Sort the Diamonds: Open the bags of diamonds and sort them into separate containers according to their numbers. This will make it easier to find the right diamonds as you work.
Apply the Diamonds: Use the diamond pen to pick up a diamond and place it on the corresponding numbered section of the canvas. Press down gently to secure the diamond.
Continue Applying Diamonds: Work your way through each section of the canvas, applying diamonds one by one. Follow the numbers on the canvas to ensure that you are using the correct colors.
Use the Tweezers: For smaller sections and areas with intricate details, use tweezers to pick up and place the diamonds.
Press Down Firmly: Once you have applied all the diamonds, use a roller or your hand to press down firmly on the canvas. This will ensure that all the diamonds are securely adhered.
Mastering Diamond Painting Techniques
Here are some tips and techniques to enhance your diamond painting experience:
Work in Sections: Instead of trying to complete the entire canvas at once, work in smaller sections. This will make the process more manageable and help you avoid mistakes.
Use a Diamond Pen: The diamond pen is your primary tool for applying diamonds. Make sure the tip of the pen is clean and free of debris. If you are having trouble picking up diamonds, try using a different pen or cleaning the tip.
Use the Tweezers: For smaller diamonds or areas with intricate details, use tweezers to pick up and place the diamonds. This will give you more control and precision.
Check for Missing Diamonds: As you work, take the time to check for any missing diamonds. If you find a missing diamond, simply pick up a diamond from the corresponding bag and place it in the empty spot.
Take Breaks: Diamond painting can be a time-consuming activity, so it’s important to take breaks every hour or so. Get up and stretch, walk around, or do something else to relax your eyes and muscles.
Finishing Touches and Preservation
Once your diamond painting is complete, you’ll need to add some finishing touches to enhance its beauty and longevity. Consider these options:
Framing: Framing your diamond painting is a great way to protect it from damage and dust. Choose a frame that complements the artwork and your home décor.
Sealing: Sealing your diamond painting with a sealant will protect it from scratches and fading. Use a sealant that is specifically designed for diamond paintings.
Displaying: Hang your diamond painting in a well-lit area where it can be enjoyed. Avoid placing it in direct sunlight, as this can cause the colors to fade.
Diamond Painting the Great Wave: A Journey of Creativity
Creating a diamond painting of the Great Wave is a rewarding experience that allows you to connect with the art of Hokusai and express your own creative spirit. With patience, dedication, and a touch of artistry, you can create a stunning masterpiece that will captivate and inspire for years to come. Remember to enjoy the process and appreciate the beauty of each diamond as you bring the Great Wave to life.
Creating Your Own Diamond Painting: A Step-by-Step Guide
Step 1: Gathering Your Materials
- Diamond painting kit featuring the Great Wave design
- A well-lit workspace
- A flat, stable surface
- Comfortable chair
- Storage containers for diamonds
- A waste bin
- A diamond pen
- Tweezers (optional)
- A roller or your hand for pressing down diamonds
- Framing materials (optional)
- Sealing materials (optional)
Step 2: Preparing Your Workspace
- Choose a clean, well-lit workspace with a flat, stable surface.
- Set up your storage containers, waste bin, and other materials within easy reach.
- Ensure you have comfortable seating.
Step 3: Preparing the Canvas
- Carefully remove the protective film from the canvas.
- Avoid touching the adhesive surface with your fingers.
Step 4: Sorting the Diamonds
- Open the bags of diamonds and sort them into separate containers according to their numbers.
- Label each container clearly for easy reference.
Step 5: Applying the Diamonds
- Use the diamond pen to pick up a diamond and place it on the corresponding numbered section of the canvas.
- Press down gently to secure the diamond.
- Work your way through each section of the canvas, applying diamonds one by one.
- Follow the numbers on the canvas to ensure you are using the correct colors.
- Use tweezers for smaller sections or intricate details.
Step 6: Checking for Missing Diamonds
- As you work, periodically check for any missing diamonds.
- If you find a missing diamond, simply pick up a diamond from the corresponding bag and place it in the empty spot.
Step 7: Pressing Down Diamonds
- Once you have applied all the diamonds, use a roller or your hand to press down firmly on the canvas.
- This will ensure that all the diamonds are securely adhered.
Step 8: Finishing Touches
- Consider framing your diamond painting to protect it from damage and dust.
- Apply a sealant to protect the artwork from scratches and fading.
Step 9: Displaying Your Masterpiece
- Hang your diamond painting in a well-lit area where it can be enjoyed.
- Avoid placing it in direct sunlight to prevent color fading.
Tips for Successful Diamond Painting
- Take Breaks: Diamond painting can be time-consuming, so take breaks every hour or so to rest your eyes and muscles.
- Work in Sections: Instead of trying to complete the entire canvas at once, work in smaller sections for better manageability.
- Use Proper Lighting: Good lighting is crucial for accurate diamond placement.
- Clean Your Tools Regularly: Keep your diamond pen and tweezers clean to avoid debris interfering with the process.
- Practice Patience: Diamond painting requires patience and dedication. Don’t rush the process and enjoy the journey of creating your masterpiece.
Conclusion
Creating a diamond painting of the Great Wave is a journey of artistic expression and a testament to your dedication and patience. With the right tools, techniques, and a passion for art, you can capture the beauty and power of this iconic artwork and create a masterpiece that will be cherished for years to come. Embrace the process, enjoy the journey, and let your creativity flow as you bring the Great Wave to life, diamond by diamond.

Capture the Majesty of the Great Wave: A Diamond Painting Journey
Post a Comment for "Creating The Great Wave With Diamond Painting"