Holiday Magic: Ceramic Christmas Village to Paint
Unleash Your Creativity and Bring Holiday Cheer to Your Home
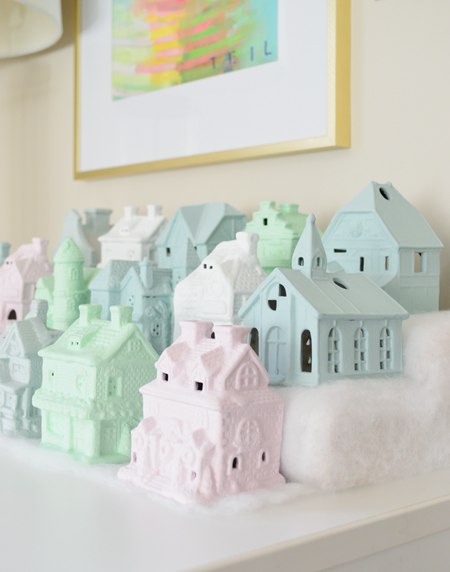
As the festive season approaches, the allure of transforming your home into a winter wonderland becomes irresistible. Amidst the twinkling lights and festive decorations, a ceramic Christmas village can evoke a sense of nostalgia and warmth, capturing the essence of the holiday spirit. Painting your own ceramic Christmas village offers a unique opportunity to unleash your creativity and create a cherished family heirloom.
The Art of Ceramic Painting: A Canvas for Your Imagination
Ceramic painting is an accessible and rewarding art form that allows individuals of all ages and skill levels to express their creativity. The smooth, porous surface of ceramic provides an ideal canvas for painting, enabling you to create intricate designs and vibrant colors that will last for years to come.
A Journey of Festive Creation: Step-by-Step Guide
Embarking on the journey of painting your ceramic Christmas village is a delightful experience that can be enjoyed by the whole family. Here’s a comprehensive guide to help you create your own festive masterpiece:
Gather Your Supplies: Before you begin, gather all the necessary supplies, including ceramic Christmas village pieces, acrylic paints, brushes of various sizes, water, a palette, and a glaze.
Prepare the Ceramic: Clean the ceramic pieces thoroughly with soap and water to remove any dust or debris. Allow them to dry completely before painting.
Choose Your Colors: Select a range of acrylic paints that complement the festive theme. Consider using traditional Christmas colors such as red, green, white, and gold, or opt for more unconventional hues to match your personal style.
Start Painting: Begin by applying a base coat of paint to the entire ceramic piece. Use a large brush for larger areas and a smaller brush for details. Allow the base coat to dry completely before moving on to the next step.
Add Details: Once the base coat is dry, use smaller brushes to add details to your village. This could include painting windows, doors, roofs, and other architectural features. You can also add festive embellishments such as Christmas trees, snowmen, and reindeer.
Glaze and Fire: After you’re satisfied with your painting, apply a layer of glaze to the entire piece. This will give your village a glossy finish and protect the paint from fading or chipping. Allow the glaze to dry completely before firing the piece in a kiln.
Pricing Guide for Ceramic Christmas Village Painting
The cost of painting a ceramic Christmas village can vary depending on the size and complexity of the pieces, as well as the studio you choose. Here’s a general pricing guide to help you budget for your project:
| Piece Size | Price Range |
|---|---|
| Small (e.g., houses, churches) | $10-$20 |
| Medium (e.g., shops, schools) | $20-$30 |
| Large (e.g., town halls, castles) | $30-$50 |
Tips for Painting a Ceramic Christmas Village
- Use a variety of brush sizes to create different effects.
- Experiment with different painting techniques, such as dry brushing and sponging.
- Don’t be afraid to make mistakes. Ceramic paint can be easily removed with water if you’re not satisfied with the results.
- Allow each layer of paint to dry completely before moving on to the next.
- Take your time and enjoy the process. Painting a ceramic Christmas village is a relaxing and rewarding activity.
Conclusion
Painting a ceramic Christmas village is a wonderful way to celebrate the holiday season and create a cherished family heirloom. With a little creativity and patience, you can transform ordinary ceramic pieces into a festive and enchanting winter wonderland. So gather your loved ones, unleash your imagination, and embark on a magical journey of ceramic painting this holiday season.
Post a Comment for "Holiday Magic: Ceramic Christmas Village To Paint"