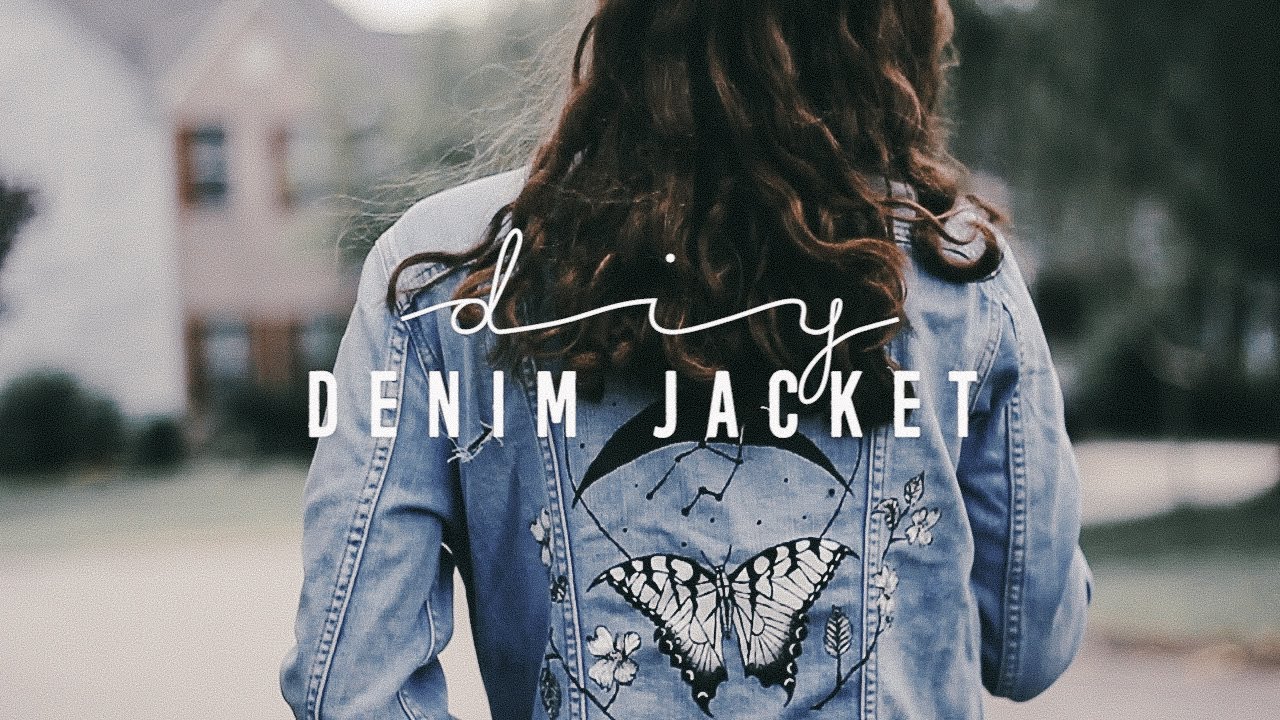
DIY Style: Painted Denim Jackets: A Comprehensive Guide to Personalizing Your Wardrobe
In the realm of fashion, denim jackets have long held a timeless appeal, transcending seasonal trends and becoming a wardrobe staple. While classic denim jackets exude a rugged charm, painted denim jackets offer a unique opportunity to infuse your personal style into a versatile piece. Whether you’re a seasoned artist or a novice crafter, this comprehensive guide will empower you to create a one-of-a-kind painted denim jacket that reflects your creativity and individuality.
Materials You’ll Need:
- Denim jacket
- Fabric paint
- Paintbrushes (various sizes)
- Stencils (optional)
- Fabric medium (optional)
- Palette or mixing tray
- Water container
- Rags or paper towels
Step 1: Prepare Your Denim Jacket
Before you unleash your artistic flair, it’s crucial to prepare your denim jacket for painting. Wash and dry the jacket to remove any dirt or debris. If desired, you can sand the surface of the jacket lightly to create a smoother base for the paint.
Step 2: Choose Your Design
The possibilities for painted denim jacket designs are endless, limited only by your imagination. Consider your personal style, the occasion for which you’ll be wearing the jacket, and any specific themes or motifs that inspire you. You can opt for bold geometric patterns, intricate florals, abstract designs, or even personalized lettering.
Step 3: Sketch Your Design
Once you’ve chosen your design, it’s helpful to sketch it out on paper to visualize the placement and proportions. This will also allow you to experiment with different color combinations and brushstrokes. If you’re using stencils, trace the design onto the jacket using a pencil or fabric marker.
Step 4: Apply Fabric Paint
Shake the fabric paint well before using it. Load your paintbrush with a generous amount of paint and start applying it to the jacket. Use even, consistent strokes and vary the pressure to create different effects. If you’re using multiple colors, mix them on a palette or mixing tray to achieve the desired hues.
Step 5: Use Stencils (Optional)
Stencils can be a useful tool for creating precise and intricate designs. Place the stencil on the jacket and secure it with tape. Apply paint over the stencil using a sponge or a small brush. Carefully remove the stencil and allow the paint to dry completely.
Step 6: Add Details and Embellishments
Once the base design is complete, you can add details and embellishments to enhance the look of your jacket. Use a fine-tipped brush to outline the design or add smaller details. You can also add studs, beads, or embroidery to create a more personalized and textured effect.
Step 7: Seal Your Design
To ensure the longevity of your painted design, it’s essential to seal it. Mix a fabric medium with the fabric paint according to the manufacturer’s instructions. Apply a thin layer of the mixture over the entire painted area. Allow it to dry completely.
Step 8: Care for Your Painted Denim Jacket
To maintain the vibrancy and durability of your painted denim jacket, follow these care instructions:
- Turn the jacket inside out before washing.
- Wash in cold water on a gentle cycle.
- Use a mild detergent and avoid bleach.
- Do not tumble dry.
- Hang the jacket to dry in the shade.
- Iron the jacket on a low setting, using a pressing cloth to protect the painted design.
Conclusion
Creating a painted denim jacket is a rewarding and creative endeavor that allows you to express your unique style. By following the steps outlined in this guide, you can transform a classic denim jacket into a personalized masterpiece that will turn heads wherever you go. Whether you’re a seasoned artist or a beginner crafter, don’t be afraid to experiment with different designs and techniques. With a little patience and creativity, you’ll create a one-of-a-kind painted denim jacket that will become a cherished part of your wardrobe.
Post a Comment for "DIY Style: Painted Denim Jackets"