Mastering the Art of Touch-Ups: A Comprehensive Guide to Applying Delmonico Red Touch Up Paint for a Flawless Finish
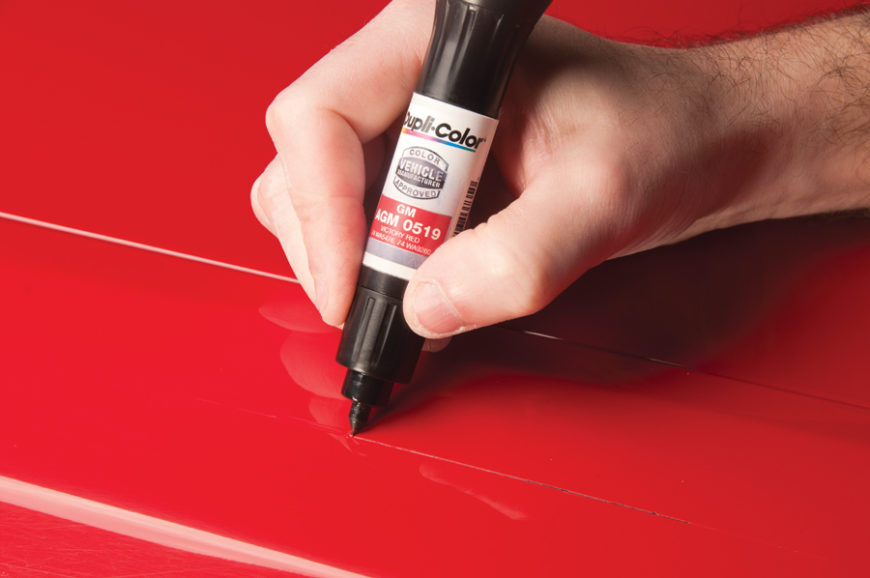
Table of Content
Delmonico Red, a vibrant and captivating hue, is a popular choice for car owners who desire a bold and eye-catching aesthetic. However, even the most meticulously cared for vehicles are susceptible to minor blemishes and scratches. When faced with such imperfections, applying touch-up paint becomes an essential skill, allowing you to restore your car’s pristine appearance and maintain its value.
This comprehensive guide delves into the intricacies of using Delmonico Red touch-up paint, providing you with the knowledge and techniques to achieve a flawless finish that seamlessly blends with your car’s original paint. From preparing the surface to applying the paint and sealing the results, we’ll cover every step in detail, empowering you to tackle touch-ups with confidence.
Understanding Delmonico Red Touch-Up Paint
Delmonico Red touch-up paint is specifically formulated to match the original paint color of your car, ensuring a seamless blend. It typically comes in a small bottle or pen, containing a concentrated paint solution. Some touch-up kits may also include a clear coat, which is essential for protecting the painted area from the elements and enhancing its durability.
Essential Tools and Materials
Before embarking on your touch-up journey, gather the necessary tools and materials to ensure a smooth and successful process:
- Delmonico Red Touch-Up Paint: The core component of your touch-up kit. Choose a color that matches your car’s original paint code.
- Sandpaper (Fine Grit): Used for smoothing out rough edges and preparing the surface for painting.
- Masking Tape: Used to protect surrounding areas from accidental paint spills.
- Cleaning Cloth: For wiping away dust, debris, and excess paint.
- Toothpick or Small Paintbrush: For applying the touch-up paint precisely.
- Clear Coat (Optional): Provides an extra layer of protection and enhances the finish.
- Gloves: Protects your hands from paint stains.
- Safety Glasses: Protects your eyes from paint splatters.


Step-by-Step Guide to Applying Delmonico Red Touch-Up Paint
1. Preparation is Key:
- Clean the Surface: Thoroughly clean the affected area with soap and water. Remove any dirt, grime, or debris that may interfere with the paint adhesion.
- Sand the Area: Use fine-grit sandpaper to gently smooth out any rough edges or scratches. This will create a smooth surface for the touch-up paint to adhere to.
- Mask the Surrounding Area: Apply masking tape around the damaged area to protect the surrounding paint from accidental paint spills.

2. Applying the Touch-Up Paint:
- Shake the Paint Bottle: Shake the touch-up paint bottle vigorously for at least 30 seconds to ensure the paint pigments are evenly distributed.
- Apply Thin Coats: Use a toothpick or small paintbrush to apply thin coats of touch-up paint to the damaged area. Avoid applying thick layers, as this can lead to uneven drying and a noticeable difference in texture.
- Allow Each Coat to Dry: Let each coat of paint dry completely before applying the next. The drying time will vary depending on the type of paint and the ambient temperature.
- Multiple Thin Coats: Apply several thin coats of paint instead of one thick coat. This will create a more even and durable finish.
3. Final Touches:
- Remove Masking Tape: Carefully remove the masking tape once the final coat of paint has dried completely.
- Apply Clear Coat (Optional): If using a clear coat, apply it to the repaired area using the same techniques as the touch-up paint. The clear coat will provide an extra layer of protection and enhance the finish.
- Let the Paint Cure: Allow the paint to cure completely. This may take several days, depending on the type of paint and the ambient temperature.
Tips for Achieving a Flawless Finish:
- Use a Light Touch: When applying the touch-up paint, use a light touch and avoid pressing too hard. This will prevent the paint from being applied unevenly.
- Blend the Edges: After the paint has dried, gently blend the edges of the touch-up paint with the surrounding paint using a fine-grit sandpaper. This will help to create a seamless transition.
- Work in a Clean Environment: Work in a clean and dust-free environment to minimize the risk of dust particles settling on the wet paint.
- Practice Makes Perfect: Practice applying touch-up paint on a scrap piece of metal or plastic before attempting to repair your car. This will help you to develop the necessary skills and techniques.
Common Mistakes to Avoid:
- Applying Thick Coats: Applying thick coats of paint can lead to uneven drying and a noticeable difference in texture.
- Not Blending the Edges: Failing to blend the edges of the touch-up paint with the surrounding paint can create a noticeable difference in color and texture.
- Using the Wrong Paint: Using the wrong color of touch-up paint will result in a mismatched finish.
- Not Allowing the Paint to Cure Properly: Not allowing the paint to cure properly can lead to a weak and easily damaged finish.
Professional Touch-Ups: When to Seek Expert Help
While applying touch-up paint yourself can be a rewarding experience, some situations may necessitate the expertise of a professional:
- Extensive Damage: If the damage is extensive or involves multiple layers of paint, it’s best to seek professional assistance.
- Complex Repairs: For repairs that require specialized techniques, such as blending or color matching, a professional can ensure a flawless finish.
- Time Constraints: If you’re short on time or lack the necessary skills and tools, a professional can provide a quick and efficient solution.
Conclusion: Maintaining the Beauty of Delmonico Red
Applying touch-up paint is a valuable skill for any car owner, especially those who cherish the vibrant allure of Delmonico Red. By following the steps outlined in this guide and paying attention to the tips and warnings, you can confidently tackle minor blemishes and restore your car’s pristine appearance. Remember, practice and patience are key to achieving a flawless finish that seamlessly blends with your car’s original paint, ensuring that your Delmonico Red shines for years to come.

Mastering the Art of Touch-Ups: A Comprehensive Guide to Applying Delmonico Red Touch Up Paint for a Flawless Finish
Post a Comment for "Applying Delmonico Red Touch Up Paint For A Perfect Car Finish"