Unleash Your Inner Artist: Creative Fun with a Paint Your Own Cookies Kit

Introduction:
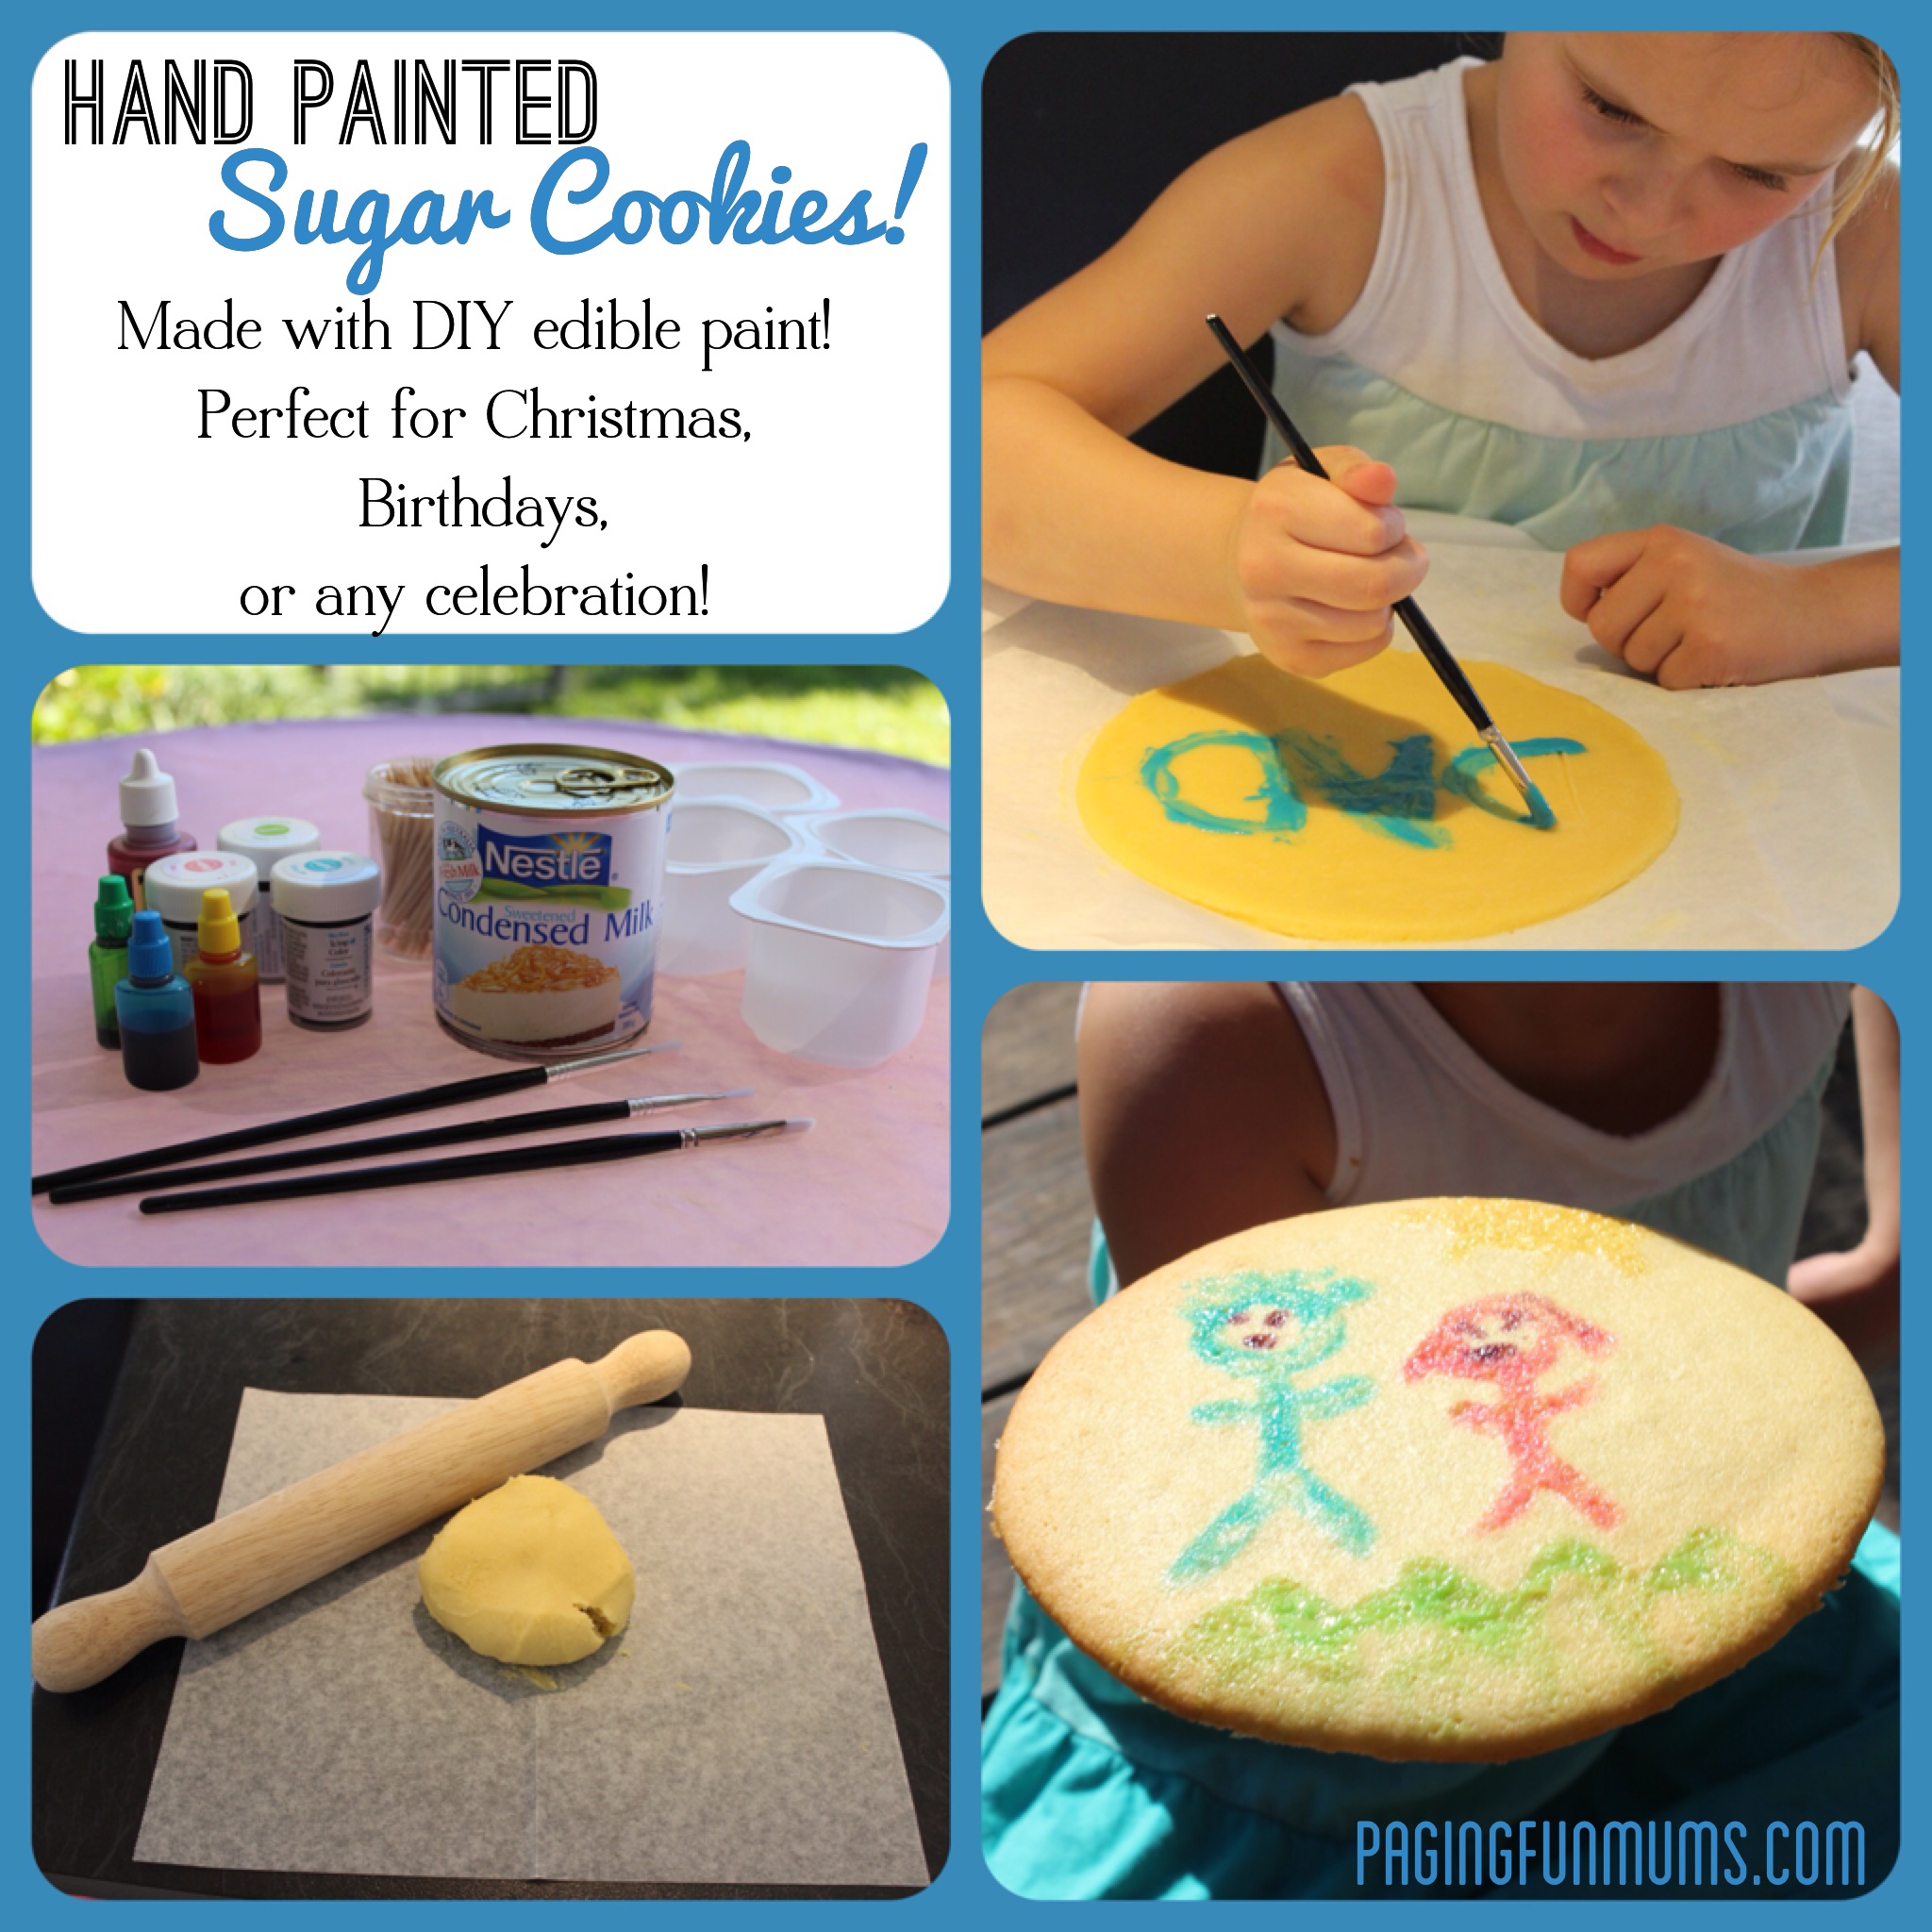
Painting your own cookies is a delightful activity that brings together creativity, deliciousness, and fun for all ages. Whether you’re hosting a birthday party, looking for a unique family activity, or simply seeking a relaxing and enjoyable way to spend an afternoon, a paint-your-own cookies kit offers endless possibilities. This article delves into the world of paint-your-own cookies, providing inspiration, tips, and techniques to elevate your cookie-decorating experience.
The Allure of Paint Your Own Cookies Kits:
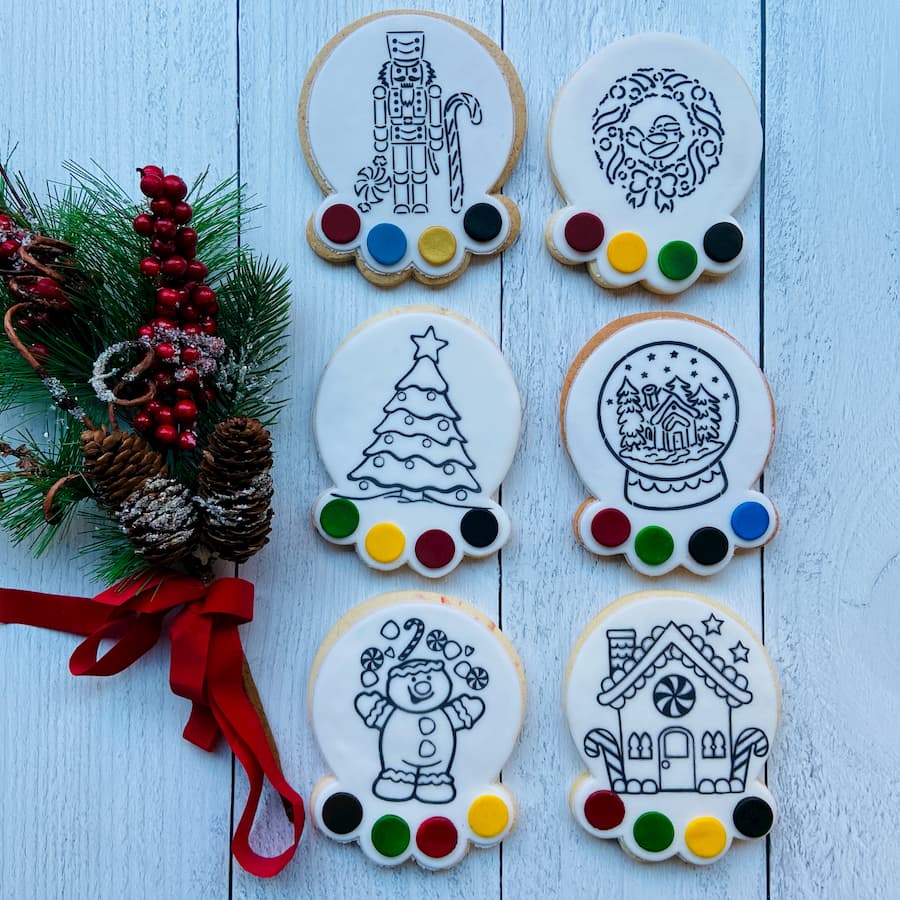
Paint-your-own cookies kits are a fantastic option for those who want to express their artistic side without the mess of traditional painting. The kits typically include:
- Pre-baked cookies: These are usually in fun shapes, like hearts, stars, or animals, ensuring a visually appealing canvas for your creations.
- Edible paint: The paint comes in a variety of vibrant colors and is formulated to be safe for consumption.
- Paintbrushes: These are specifically designed for delicate application on cookies, allowing for precise details.
- Stencils: Optional stencils can be included to guide your designs and provide inspiration.

Unleashing Creativity: Ideas for Cookie Decoration:
The beauty of paint-your-own cookies lies in their endless customization potential. Here are some creative ideas to get you started:
1. Themed Designs:
- Holiday Celebrations: Decorate cookies with festive themes like Christmas trees, snowflakes, or Easter eggs. Use vibrant colors and glitter for a dazzling effect.
- Birthday Celebrations: Create personalized cookies with the birthday person’s name, age, or favorite characters.
- Seasonal Themes: Embrace the changing seasons with autumn leaves, blooming flowers, or summer fruits.
2. Abstract Art:
- Freehand Designs: Let your imagination run wild and create abstract patterns, swirls, and textures. Use a mix of colors and textures for a dynamic effect.
- Watercolor Techniques: Experiment with watercolor techniques to create soft, blended designs.
- Splatter Painting: Use a brush or a straw to splatter paint onto the cookies for a playful, abstract effect.

3. Character Inspiration:
- Animal Friends: Bring your favorite animals to life on cookies. Use different colors and textures to create realistic or whimsical animal portraits.
- Superheroes and Cartoon Characters: Paint iconic superheroes or cartoon characters with vibrant colors and bold lines.
- Fairytale Figures: Transport yourself to a magical world with fairy princesses, dragons, or mythical creatures.
4. Personal Touches:
- Monograms and Initials: Add a personalized touch to cookies with monograms or initials.
- Quotes and Messages: Express your sentiments with meaningful quotes or messages. Use different font styles and colors for a unique look.
- Family Portraits: Create a fun and edible family portrait with personalized details.
Tips for Successful Cookie Painting:
1. Preparation is Key:
- Clean Workspace: Ensure your workspace is clean and free of crumbs.
- Organize Materials: Have all your materials readily available, including paint, brushes, and stencils.
- Chill the Cookies: Chill the cookies for 10-15 minutes before painting to prevent the paint from bleeding.
2. Paint Application Techniques:
- Thin Coats: Apply paint in thin, even coats to avoid smudging.
- Let Each Coat Dry: Allow each coat of paint to dry completely before applying the next.
- Use a Light Touch: Use gentle pressure when applying paint to avoid smudging or damaging the cookies.
3. Enhancing Your Designs:
- Glitter and Sprinkles: Add sparkle and texture with edible glitter or sprinkles.
- Food Coloring: Use food coloring to create custom shades and blend colors.
- Stencils: Use stencils to create precise shapes and patterns.
4. Storage and Display:
- Airtight Container: Store painted cookies in an airtight container to prevent them from drying out.
- Display with Pride: Arrange your painted cookies on a platter or in a decorative jar for a beautiful display.
Beyond the Basics: Advanced Techniques:
- Piping: Use a piping bag and different tips to create intricate designs and textures.
- Airbrushing: An airbrush can create smooth, even coatings and gradients.
- Royal Icing: Use royal icing to create intricate details and borders.
Paint Your Own Cookies Kits for Every Occasion:
Paint-your-own cookies kits are available in a variety of sizes and themes, catering to different needs and occasions. Consider these factors when choosing a kit:
- Number of Cookies: Choose a kit with the appropriate number of cookies for your event or project.
- Theme and Designs: Select a kit that aligns with your chosen theme or design preferences.
- Paint Colors: Ensure the kit includes a variety of colors that match your vision.
- Quality of Materials: Look for kits with high-quality, edible paint and durable brushes.
DIY Paint Your Own Cookies Kits:
If you’re feeling adventurous, you can create your own paint-your-own cookies kit. Here’s what you’ll need:
- Cookies: Bake your own cookies in desired shapes.
- Edible Paint: Use food-grade paint or create your own with powdered sugar, meringue powder, and food coloring.
- Brushes: Choose brushes of different sizes for varying details.
- Optional Extras: Include stencils, glitter, sprinkles, or other decorative elements.
Conclusion:
Paint-your-own cookies kits offer a fun and creative way to express yourself and enjoy a delicious treat. With a little imagination and these tips, you can create stunning works of edible art that will impress your friends and family. Whether you’re a seasoned baker or a novice artist, paint-your-own cookies provide a delightful and rewarding experience for everyone. So gather your supplies, unleash your creativity, and get ready to paint a masterpiece!
Unleash Your Inner Artist: Creative Fun with a Paint Your Own Cookies Kit
Post a Comment for "Creative Fun With A Paint Cookies Kit: Ideas And Tips"