Achieving a Stunning Look with Red Velvet Paint: A Comprehensive Guide

Table of Content
- 1 Achieving a Stunning Look with Red Velvet Paint: A Comprehensive Guide
- 1.1 Choosing the Right Red Velvet Paint
- 1.2 Preparing Your Surface for Red Velvet Paint
- 1.3 Applying Red Velvet Paint: Techniques and Tips
- 1.4 Creative Applications of Red Velvet Paint
- 1.5 Maintaining Your Red Velvet Paint Finish
- 1.6 Conclusion
Red velvet paint, with its rich, luxurious hue and velvety texture, is a stunning choice for adding a touch of elegance and sophistication to any space. Whether you’re looking to revamp a bedroom, create a dramatic accent wall in your living room, or even refresh furniture, red velvet paint can transform your vision into reality.
This comprehensive guide will walk you through everything you need to know about using red velvet paint, from choosing the right shade and preparing your surface to achieving a flawless finish and exploring creative applications.
Choosing the Right Red Velvet Paint
The first step in your red velvet paint journey is selecting the perfect shade. Red velvet paint comes in a vast array of hues, ranging from deep crimson to vibrant scarlet and even muted burgundy. Consider these factors when making your decision:
- Undertones: Red velvet paint can have warm or cool undertones. Warm reds, like those with orange or yellow undertones, exude a cozy and inviting atmosphere. Cool reds, with blue or purple undertones, create a more dramatic and sophisticated ambiance.
- Light: The amount of natural light in your space will influence how the red velvet paint appears. In dimly lit rooms, a deeper red will appear more vibrant, while a lighter shade might get lost. In well-lit areas, a lighter red will retain its vibrancy, while a deeper shade could appear almost black.
- Existing Decor: The red velvet paint should complement your existing décor. Consider the colors of your furniture, rugs, and artwork to ensure a cohesive and harmonious design.
Popular Red Velvet Paint Colors:
- Crimson: A classic, deep red with warm undertones, perfect for creating a bold and dramatic statement.
- Scarlet: A vibrant, energetic red, ideal for adding a touch of excitement and passion to your space.
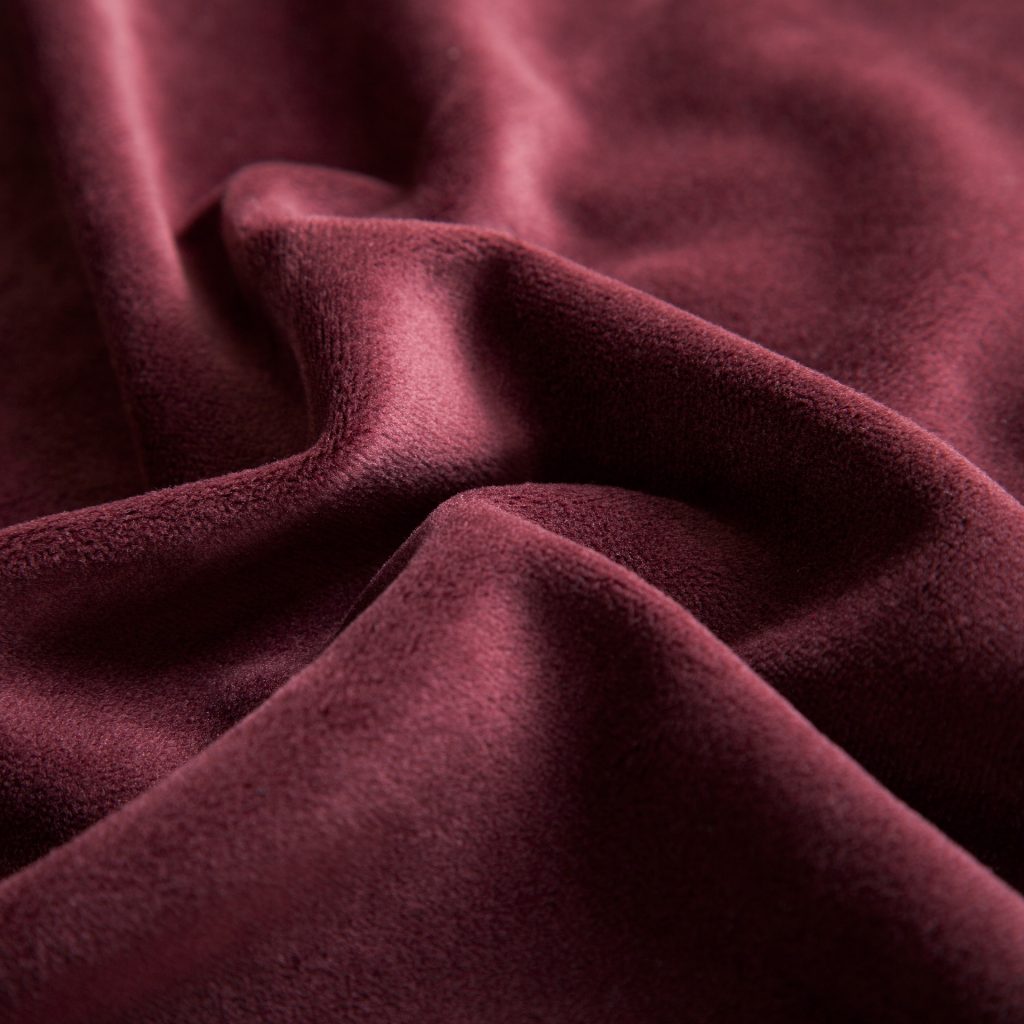
- Burgundy: A rich, earthy red with cool undertones, offering a sophisticated and elegant touch.
- Wine Red: A deep, complex red with hints of purple, perfect for creating a luxurious and intimate atmosphere.

Preparing Your Surface for Red Velvet Paint
Before applying red velvet paint, proper surface preparation is crucial for a flawless finish. Follow these steps:
- Clean the Surface: Thoroughly clean the surface with soap and water, removing any dirt, dust, or grease. Allow the surface to dry completely before proceeding.
- Sand the Surface: Lightly sand the surface with fine-grit sandpaper to create a smooth and even surface for the paint to adhere to. This step is especially important for previously painted surfaces.
- Prime the Surface: Apply a primer specifically designed for the surface you’re painting. This helps the paint adhere properly and creates a uniform base for a smooth finish. Choose a primer that matches the color of the paint for optimal results.
- Fill Any Cracks or Holes: Use a patching compound to fill any cracks or holes in the surface. Allow the compound to dry completely before sanding it smooth.
Applying Red Velvet Paint: Techniques and Tips
Applying red velvet paint requires a delicate touch and a few key techniques to achieve a stunning finish:
- Choose the Right Paintbrush: Opt for a high-quality brush with soft bristles that won’t leave streaks or brush marks. A brush with a wide surface area is ideal for large areas, while a smaller brush is better for detail work.
- Use Thin Coats: Apply thin, even coats of red velvet paint. Avoid overloading the brush, as this can lead to drips and uneven coverage. Allow each coat to dry completely before applying the next.
- Work in Small Sections: Divide the surface into smaller sections and work on each section individually. This allows you to maintain a consistent application and avoid uneven drying times.
- Use a Roller for Large Areas: For large areas, a roller with a nap specifically designed for velvet paint will provide a smooth and consistent finish.
- Apply a Second Coat: After the first coat dries, apply a second coat for a richer and more vibrant color.
Tips for Achieving a Velvety Finish:
- Use a Light Touch: Apply the paint with a light touch, avoiding heavy pressure that can create brush marks.
- Blend the Paint: Use smooth, even strokes to blend the paint seamlessly. Avoid stopping and starting abruptly, as this can create visible lines.
- Use a Damp Cloth: Wipe away any excess paint with a damp cloth immediately after applying each coat. This helps to prevent drips and creates a smooth finish.
- Let the Paint Dry Thoroughly: Allow the paint to dry completely between coats and before applying any additional treatments.
Creative Applications of Red Velvet Paint
Red velvet paint can be used in countless ways to add a touch of elegance and sophistication to your home. Here are some creative ideas:
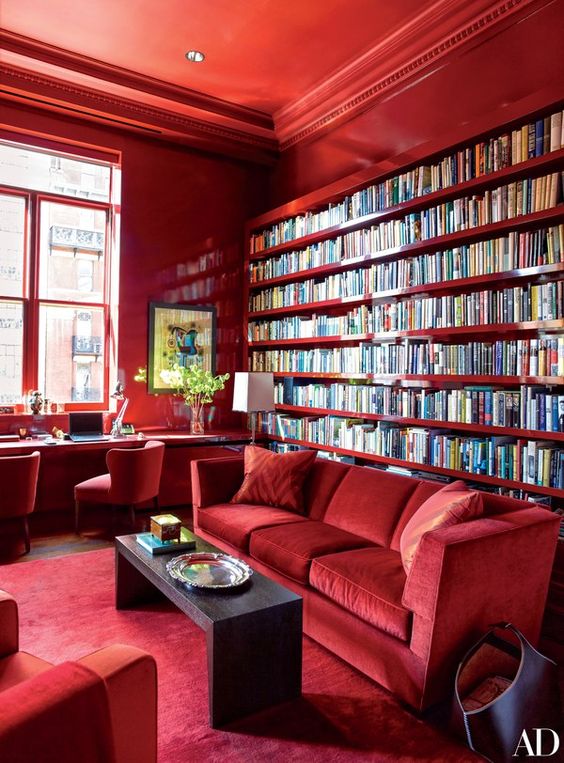
- Accent Walls: Create a dramatic focal point in your living room, bedroom, or dining room by painting an accent wall in red velvet paint.
- Furniture Makeovers: Transform old furniture pieces into stunning statement pieces by painting them with red velvet paint.
- Doors and Trim: Add a touch of luxury to your home by painting doors and trim in red velvet paint.
- Ceilings: Create a dramatic and sophisticated ambiance by painting your ceiling in red velvet paint.
- Art Projects: Experiment with red velvet paint in your art projects, creating unique textures and effects.
- Home Decor: Use red velvet paint to create custom home decor items, such as picture frames, vases, and trays.
Maintaining Your Red Velvet Paint Finish
To ensure your red velvet paint finish remains beautiful for years to come, follow these maintenance tips:
- Regular Cleaning: Dust your red velvet paint surfaces regularly with a soft cloth or feather duster.
- Avoid Harsh Cleaners: Avoid using harsh cleaners or abrasive scrubbing tools, as these can damage the paint finish.
- Protect from Moisture: Avoid exposing your red velvet paint surfaces to excessive moisture, as this can cause the paint to peel or chip.
- Touch-Ups: If you notice any chips or scratches, touch up the paint immediately with a small brush and the same red velvet paint color.
Conclusion
Red velvet paint is a versatile and stunning choice for adding a touch of elegance and sophistication to any space. By following the tips and techniques outlined in this comprehensive guide, you can achieve a flawless finish and transform your vision into reality. Whether you’re creating a dramatic accent wall, refreshing furniture, or adding a touch of luxury to your home decor, red velvet paint is sure to make a statement. Embrace the allure of this rich and luxurious hue and unlock the transformative power of red velvet paint.

Achieving a Stunning Look with Red Velvet Paint: A Comprehensive Guide
Post a Comment for "Achieving A Stunning Look With Red Velvet Paint"