Painting Stock Chevy Rims Black: A Comprehensive Guide
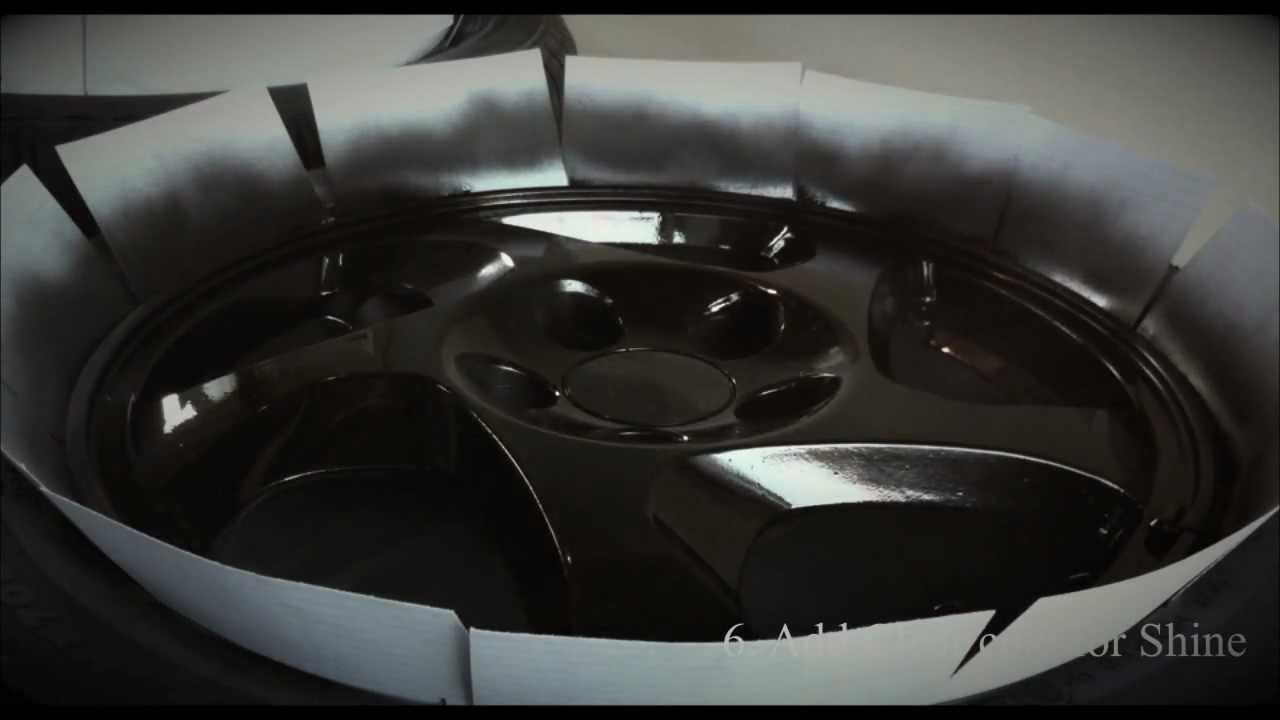
Table of Content
Introduction:
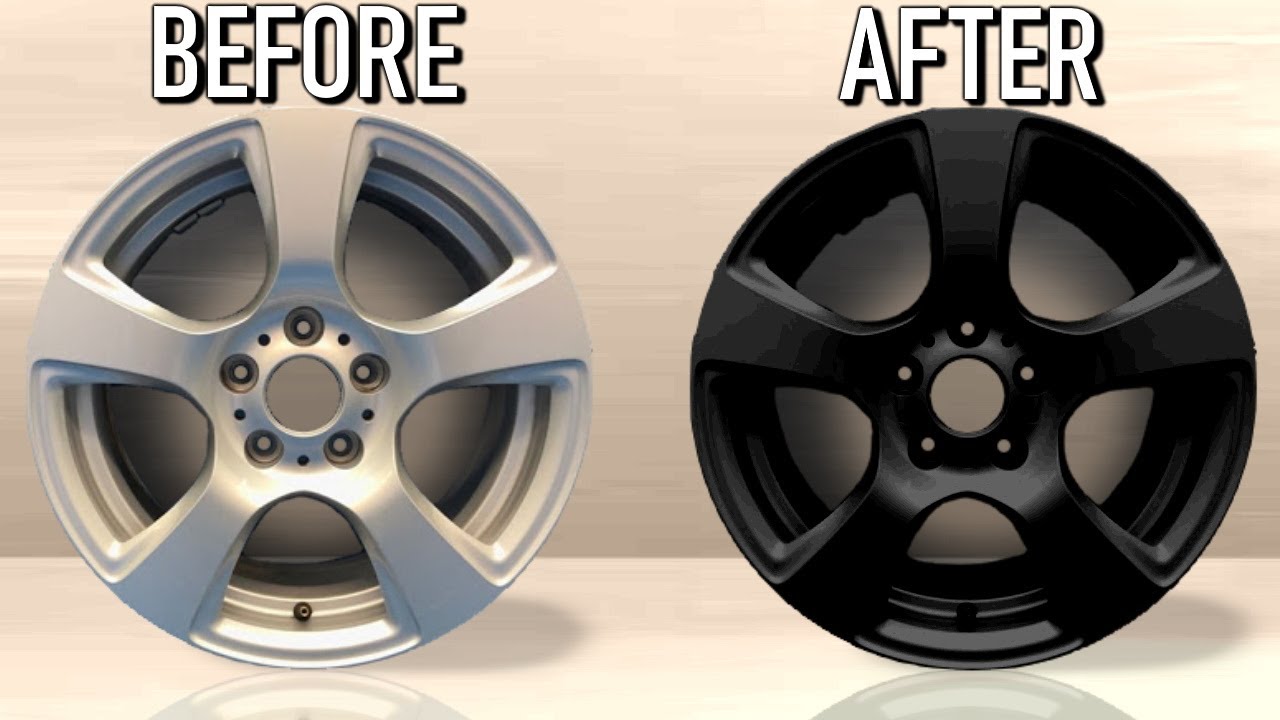
Transforming the look of your Chevy with a fresh coat of black paint on your stock rims is a popular and cost-effective upgrade. It adds a touch of aggression and sophistication, enhancing the overall aesthetic appeal of your vehicle. This comprehensive guide will walk you through every step of the process, from preparation to finishing touches, ensuring a professional and long-lasting result.
1. Gathering Your Supplies:
Before embarking on your rim painting journey, gather the necessary materials:
- Automotive-grade black paint: Opt for a high-quality, durable paint specifically designed for metal surfaces.
- Primer: A suitable primer will ensure proper adhesion and prevent rust formation.
- Clear coat: A clear coat protects the paint from scratches, UV damage, and fading.
- Sandpaper (various grits): You’ll need sandpaper in different grits for prepping the surface, ranging from 80-grit to 400-grit.
- Masking tape: Protect areas you don’t want to paint with masking tape.
- Paint thinner: Use paint thinner to clean brushes and tools after painting.
- Paintbrushes or spray gun: Choose your preferred method of application.
- Gloves and respirator: Protect your hands and lungs from paint fumes.
- Drop cloths or plastic sheeting: Cover your work area to prevent paint spills.
- Cleaning supplies: You’ll need soap, water, and rags to clean the rims thoroughly.

2. Preparing the Rims:
Thorough preparation is crucial for a flawless finish. Follow these steps:
- Remove the rims: Carefully detach the rims from the vehicle. If possible, remove the tires for easier access.
- Clean the rims: Wash the rims thoroughly with soap and water to remove dirt, grime, and grease. Allow them to dry completely.
- Sand the rims: Use 80-grit sandpaper to remove any existing paint, rust, or imperfections. Progress to finer grits (120-grit, 220-grit, 400-grit) for a smoother surface.
- Mask off areas: Use masking tape to protect areas you don’t want to paint, such as the tire valve stem and brake calipers.
- Degrease the rims: Apply a degreaser to remove any remaining contaminants and ensure optimal paint adhesion.
3. Applying Primer:
The primer acts as a bonding layer between the metal and the paint. Follow these steps:
- Choose a suitable primer: Select a primer specifically designed for metal surfaces and compatible with your chosen paint.
- Shake the primer thoroughly: Ensure a consistent mixture before application.
- Apply the primer evenly: Use a paintbrush or spray gun to apply a thin, even coat of primer to the entire rim surface.
- Allow the primer to dry: Follow the drying time instructions on the primer’s label.
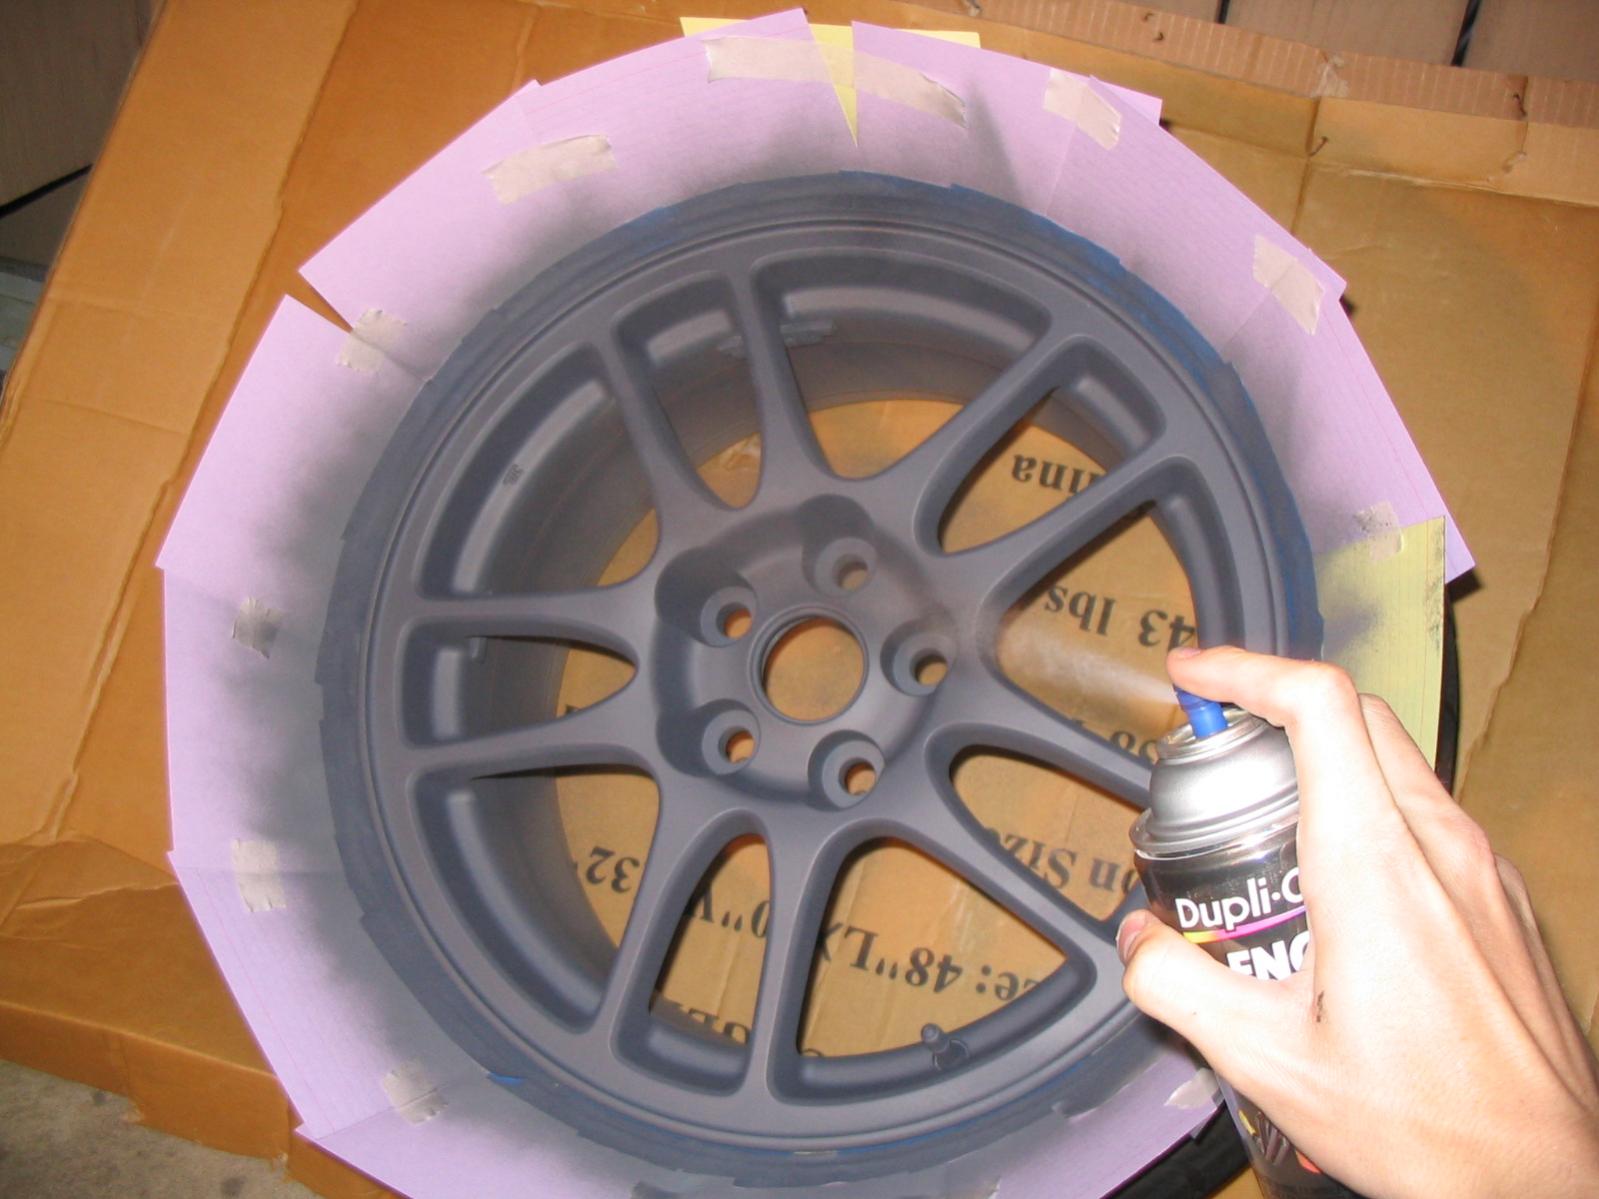
4. Applying Black Paint:
Now comes the exciting part – painting your rims black! Here’s how:
- Shake the paint thoroughly: Ensure a consistent mixture and proper pigmentation.
- Apply the paint in thin coats: Use a paintbrush or spray gun to apply thin, even coats of black paint. Avoid over-applying, as this can lead to drips and runs.
- Allow the paint to dry: Follow the drying time instructions on the paint’s label.
- Apply multiple coats: Apply two or three thin coats of paint, allowing each coat to dry completely before applying the next.
5. Applying Clear Coat:
The clear coat protects the black paint from damage and enhances its shine. Follow these steps:
- Shake the clear coat thoroughly: Ensure a consistent mixture and proper application.
- Apply the clear coat in thin coats: Use a paintbrush or spray gun to apply thin, even coats of clear coat.
- Allow the clear coat to dry: Follow the drying time instructions on the clear coat’s label.
- Apply multiple coats: Apply two or three thin coats of clear coat, allowing each coat to dry completely before applying the next.
6. Finishing Touches:
Once the clear coat has dried completely, it’s time to add the finishing touches:
- Remove masking tape: Carefully remove the masking tape, ensuring no paint is pulled away.
- Clean up any spills: Use paint thinner to clean up any paint spills or drips.
- Let the rims cure: Allow the painted rims to cure for the recommended time period before reinstallation.
7. Reinstalling the Rims:
After the cure time, you can reinstall your freshly painted rims:
- Remove the masking tape: Carefully remove the masking tape, ensuring no paint is pulled away.
- Clean up any spills: Use paint thinner to clean up any paint spills or drips.
- Let the rims cure: Allow the painted rims to cure for the recommended time period before reinstallation.
8. Reinstalling the Rims:
After the cure time, you can reinstall your freshly painted rims:
- Clean the mounting surface: Ensure the mounting surface on the vehicle is clean and free of debris.
- Install the rims: Carefully mount the rims back onto the vehicle, ensuring they are properly secured with lug nuts.
- Torque the lug nuts: Torque the lug nuts to the manufacturer’s specifications.
9. Enjoy Your New Look!
Congratulations! You’ve successfully painted your Chevy rims black, transforming the look of your vehicle. Enjoy the enhanced aesthetic appeal and the satisfaction of a DIY project well done.
Tips for Success:
- Choose the right paint: Opt for a high-quality, durable paint specifically designed for metal surfaces.
- Prepare the surface thoroughly: Proper preparation is key to a lasting finish.
- Apply thin coats: Avoid over-applying paint, as this can lead to drips and runs.
- Allow the paint to dry completely: Follow the drying time instructions on the paint’s label.
- Use a respirator and gloves: Protect yourself from paint fumes.
Professional vs. DIY:
While painting your Chevy rims black is a DIY project that can be accomplished with the right tools and guidance, consider these factors:
- Time and effort: DIY requires time and effort, especially for proper preparation and multiple coats.
- Skill and experience: Painting requires some skill and experience for a professional finish.
- Cost: DIY can be significantly cheaper than professional painting, but the cost of materials and tools should be factored in.
Conclusion:
Painting your stock Chevy rims black is a rewarding project that can significantly enhance the look of your vehicle. By following this comprehensive guide, you can achieve a professional finish and enjoy the satisfaction of a DIY project well done. Remember to prioritize preparation, choose the right materials, and apply thin coats for a long-lasting and aesthetically pleasing result.

Painting Stock Chevy Rims Black: A Comprehensive Guide
Post a Comment for "Painting Stock Chevy Rims Black: A How-To Guide"