Transform Your Garden with Personalized Hand-Painted Planters: Tips & Ideas for a Unique Style

Table of Content
- 1 Transform Your Garden with Personalized Hand-Painted Planters: Tips & Ideas for a Unique Style
- 1.1 1. Choosing the Right Planter: A Foundation for Your Artistic Vision
- 1.2 2. Gathering Your Art Supplies: Essential Tools for Success
- 1.3 3. Preparing Your Planter: A Smooth Surface for Artistic Expression
- 1.4 4. Unleashing Your Creativity: Design Inspiration and Techniques
- 1.5 5. Adding Finishing Touches: Enhancing Your Planter’s Appeal
- 1.6 6. Showcasing Your Masterpiece: Displaying Your Personalized Planter
- 1.7 7. Expanding Your Creative Horizons: More Personalized Planter Ideas
- 1.8 8. Sharing Your Passion: Inspiring Others with Your Creativity
- 1.9 Conclusion: Embracing the Joy of Personalized Gardening
Unleash your creativity and add a touch of individuality to your garden with personalized hand-painted planters. This trend is taking the gardening world by storm, allowing you to express your unique style while providing a vibrant home for your beloved plants. Whether you’re a seasoned gardener or a novice green thumb, hand-painted planters offer a delightful way to infuse your outdoor space with personality.
This comprehensive guide will equip you with the essential tips, tricks, and inspiration to create stunning personalized planters. We’ll delve into the art of choosing the perfect planter, selecting the right paints and brushes, exploring diverse painting techniques, and crafting captivating designs.
Get ready to transform your planters into works of art, adding a splash of color and character to your garden!
1. Choosing the Right Planter: A Foundation for Your Artistic Vision
The first step in your hand-painting journey is selecting the perfect planter. Consider these factors to find the ideal canvas for your artistic expression:
a. Material:
- Terracotta: A classic choice, terracotta planters are porous, allowing for optimal drainage and air circulation. Their earthy tones provide a beautiful backdrop for vibrant colors.
- Ceramic: Ceramic planters offer durability and a smooth surface for precise painting. They come in various shapes and sizes, making them versatile for different plant types.
- Metal: Metal planters, often made from galvanized steel or aluminum, are robust and weather-resistant. They offer a unique textured surface for a rustic aesthetic.
- Plastic: Plastic planters are lightweight, affordable, and available in a wide array of colors and designs. While they may not be as aesthetically pleasing as other materials, they are practical for beginners.
b. Size and Shape:
- Size: Consider the size of your plants and the space available in your garden. Larger planters are ideal for mature plants, while smaller ones suit seedlings and herbs.
- Shape: Experiment with different shapes to add visual interest. Round planters create a classic look, while square or rectangular ones offer a modern edge. Unique shapes like hanging baskets or wall planters can add dimension and intrigue.
c. Existing Design:
- Plain: Plain planters provide a blank canvas for your creative vision. You can create any design you desire without limitations.
- Embossed: Embossed planters offer a textured surface that can add depth and dimension to your artwork. The raised patterns can be incorporated into your design or serve as a starting point for creative embellishment.

d. Condition:
- New: New planters offer a pristine surface for painting, allowing you to start with a fresh canvas.
- Used: Repurposed planters add a touch of vintage charm to your garden. You can give them a new lease on life with a coat of paint and a personalized design.
Tip: Explore local craft stores, antique shops, and online marketplaces to discover unique planters that inspire your creativity.
2. Gathering Your Art Supplies: Essential Tools for Success
Once you have your chosen planter, it’s time to gather the essential art supplies for your project. This includes:
a. Paints:
- Acrylic: Acrylic paints are versatile, fast-drying, and water-based, making them an excellent choice for beginners. They come in a wide range of colors and can be easily blended.
- Oil: Oil paints offer rich colors and a smooth, durable finish. They require a longer drying time but provide a professional look.
- Watercolor: Watercolor paints create a delicate, translucent effect, ideal for creating whimsical or botanical designs. However, they require more experience and can be challenging to work with.
- Spray Paint: Spray paints offer a quick and even application, perfect for creating solid backgrounds or adding a touch of metallic or iridescent accents.
b. Brushes:
- Round: Round brushes are versatile for creating lines, details, and filling in small areas.
- Flat: Flat brushes are ideal for covering large areas and creating smooth, even strokes.
- Fan: Fan brushes create soft, blended effects and are useful for adding textures like leaves or clouds.
- Detail: Detail brushes, with fine tips, are perfect for intricate designs and precise lines.
c. Other Supplies:
- Primer: A primer creates a smooth surface for painting and helps the paint adhere better to the planter.
- Sealer: A sealer protects your artwork from the elements, ensuring its longevity and vibrancy.
- Masking Tape: Use masking tape to create clean lines and protect areas you don’t want to paint.
- Paint Palette: A paint palette provides a surface for mixing colors and holding your paints.
- Water Container: A container for water is essential for cleaning brushes and diluting paints.
- Paper Towels: Paper towels are useful for cleaning spills and drying brushes.
- Gloves: Protect your hands from paint stains with gloves.
Tip: Invest in high-quality brushes and paints for the best results. Look for brushes with soft bristles and paints with vibrant colors and good coverage.
3. Preparing Your Planter: A Smooth Surface for Artistic Expression
Before you start painting, it’s crucial to prepare your planter for a smooth and even application of paint. This involves:
a. Cleaning:
- Thoroughly clean your planter with soap and water to remove dirt, dust, and any existing coatings.
- Allow the planter to dry completely before proceeding.
b. Priming:
- Apply a primer to the entire surface of the planter, ensuring even coverage.
- Let the primer dry completely according to the manufacturer’s instructions.
c. Sanding (Optional):
- For a smoother finish, lightly sand the primed surface with fine-grit sandpaper.
- Remove any sanding dust with a damp cloth before painting.
Tip: If you’re working with a used planter, consider using a paint stripper to remove any existing paint or coatings.
4. Unleashing Your Creativity: Design Inspiration and Techniques
Now comes the exciting part: designing your personalized planter. Here are some ideas to spark your creativity:
a. Geometric Patterns:
- Stripes: Create bold stripes using masking tape to define the lines. Experiment with different widths and color combinations.
- Checks: Combine contrasting colors to create a classic checkered pattern.
- Triangles: Play with different angles and sizes of triangles to create a dynamic design.
- Dots: Use a dotting tool or the end of a brush to create a playful polka dot pattern.
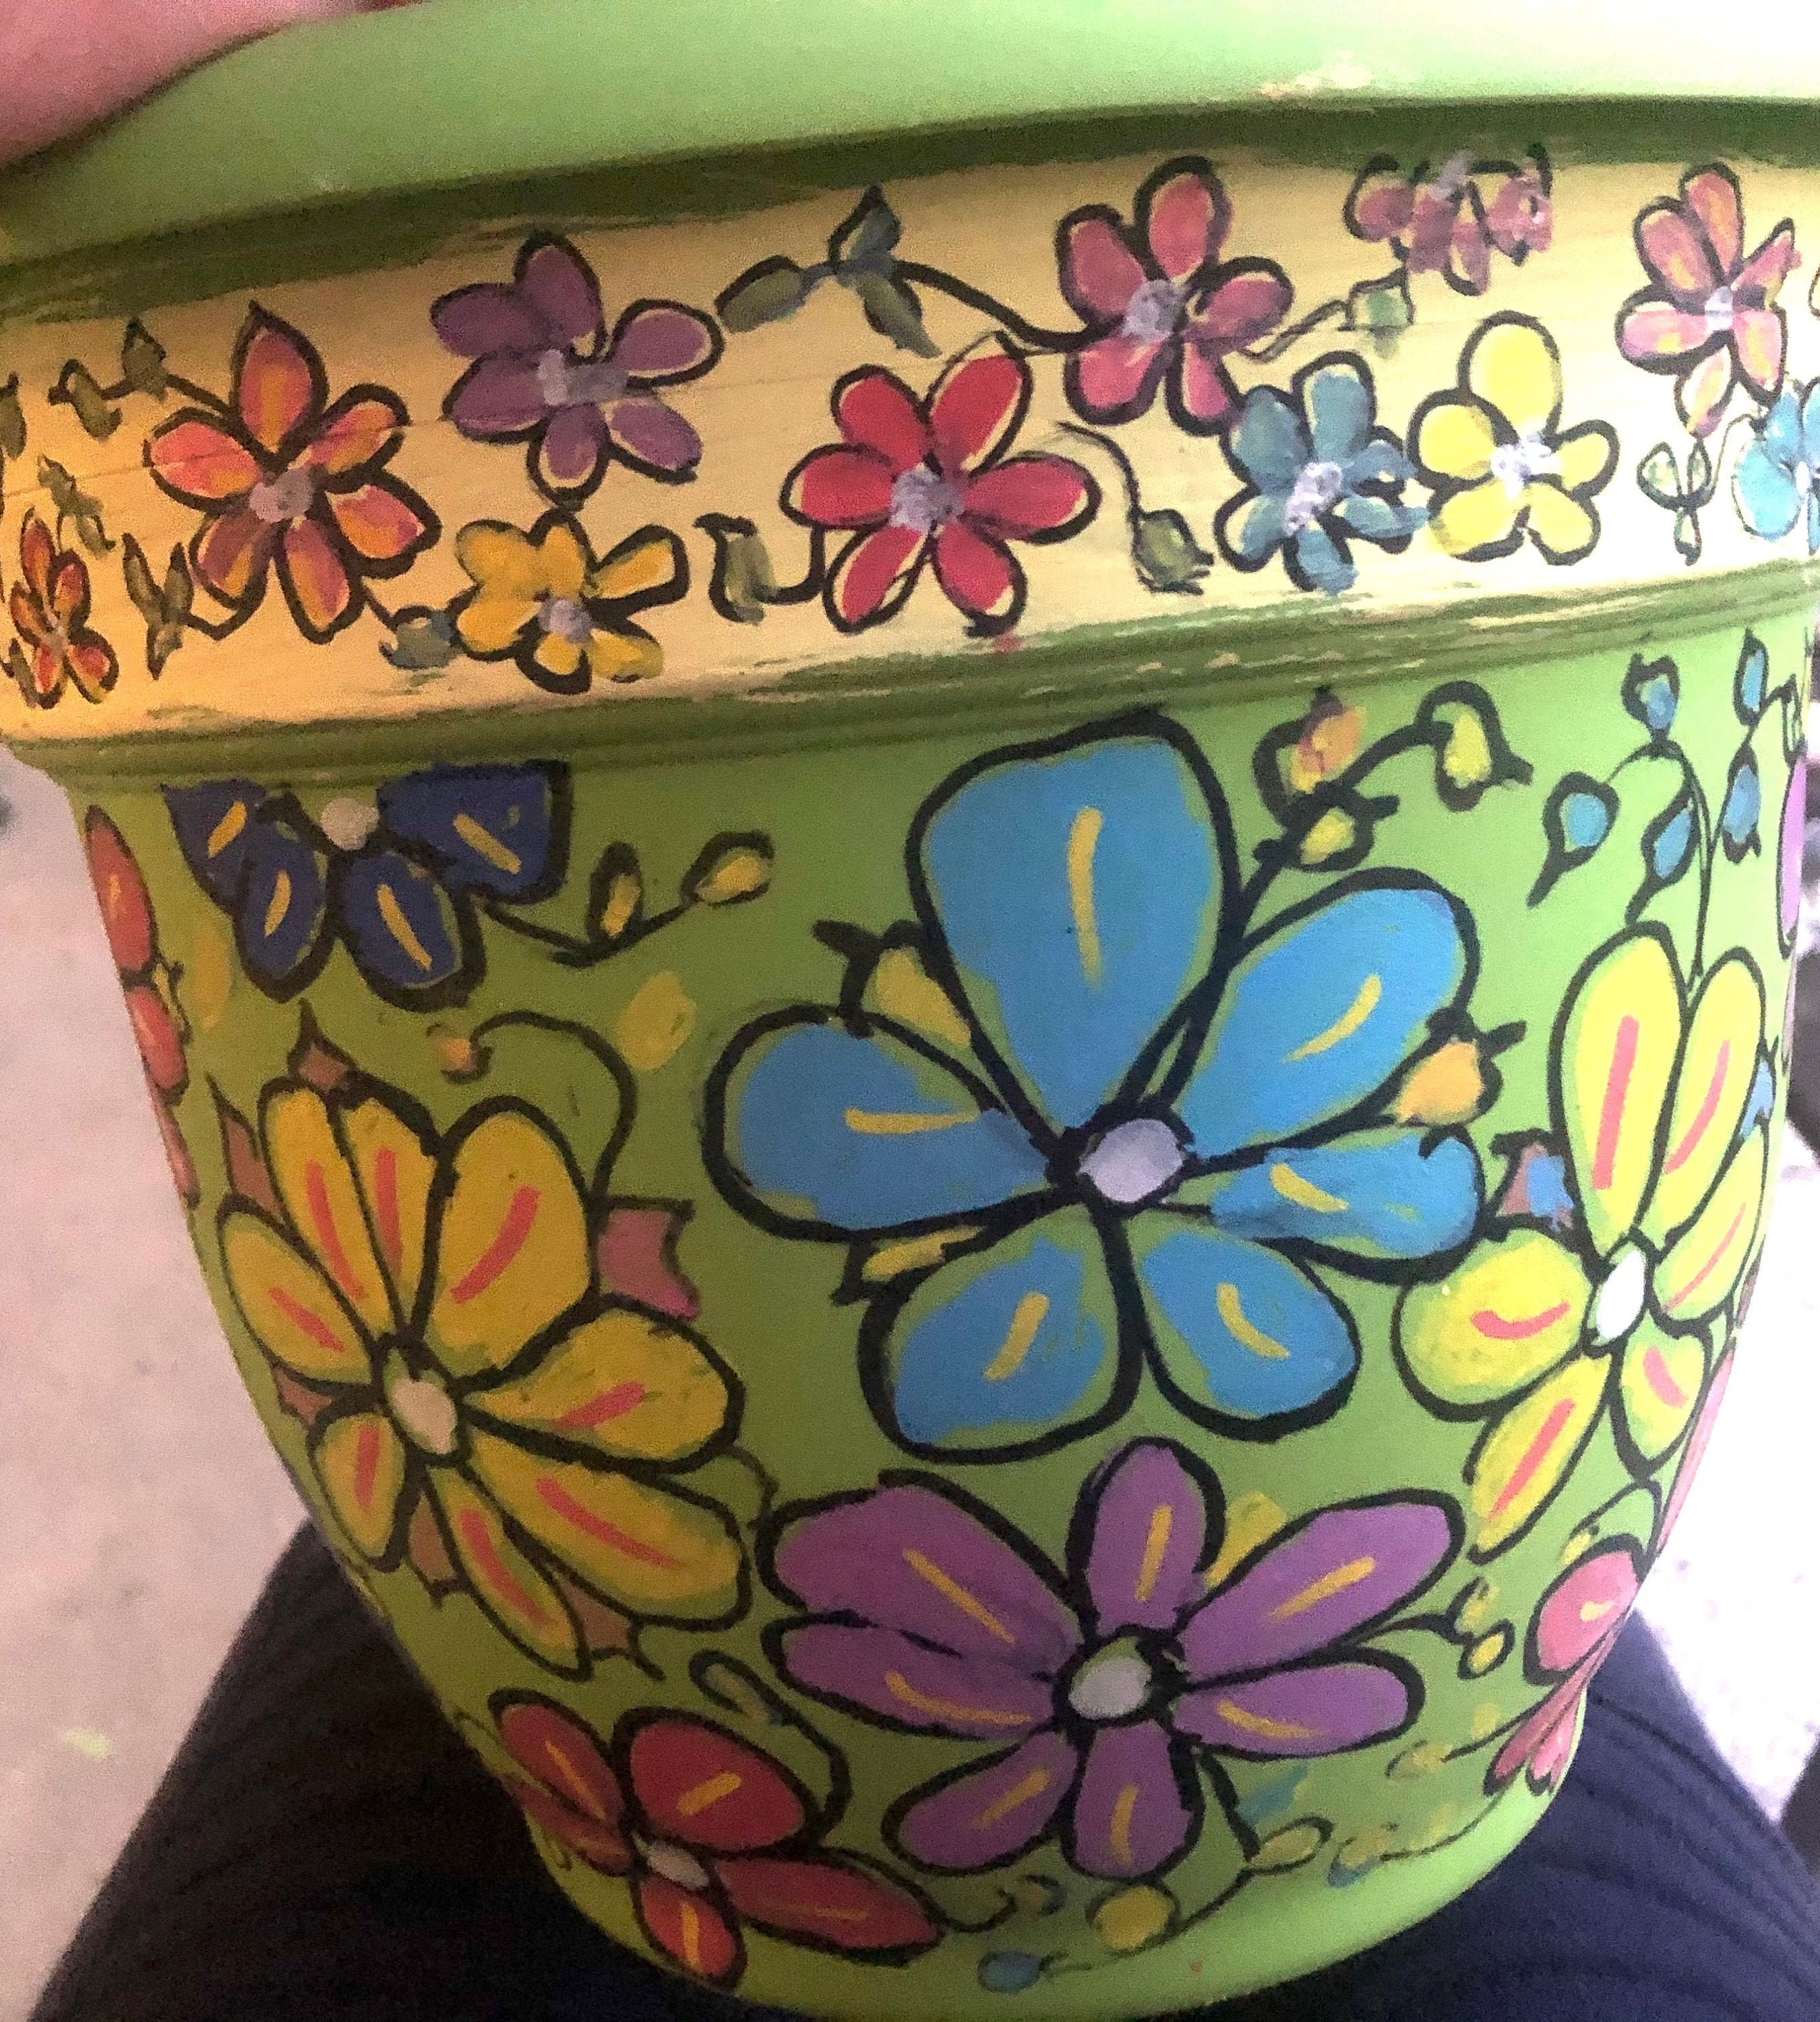
b. Floral Motifs:
- Botanical Prints: Paint realistic flowers, leaves, and vines for a classic garden aesthetic.
- Abstract Florals: Use loose brushstrokes and vibrant colors to create abstract floral patterns.
- Nature-Inspired: Incorporate elements like butterflies, ladybugs, or birds into your floral design.
c. Artistic Styles:
- Abstract: Explore free-flowing brushstrokes and vibrant colors to create a unique abstract design.
- Impressionistic: Use dabs of paint and blended colors to capture the essence of your favorite flowers or landscapes.
- Minimalist: Create simple, elegant designs with clean lines and muted colors.
d. Personalized Touches:
- Monograms: Add a personal touch with your initials or a family name.
- Quotes: Paint a favorite quote or poem for a meaningful and inspiring design.
- Family Portraits: Capture your family’s unique style with playful portraits of your pets or loved ones.
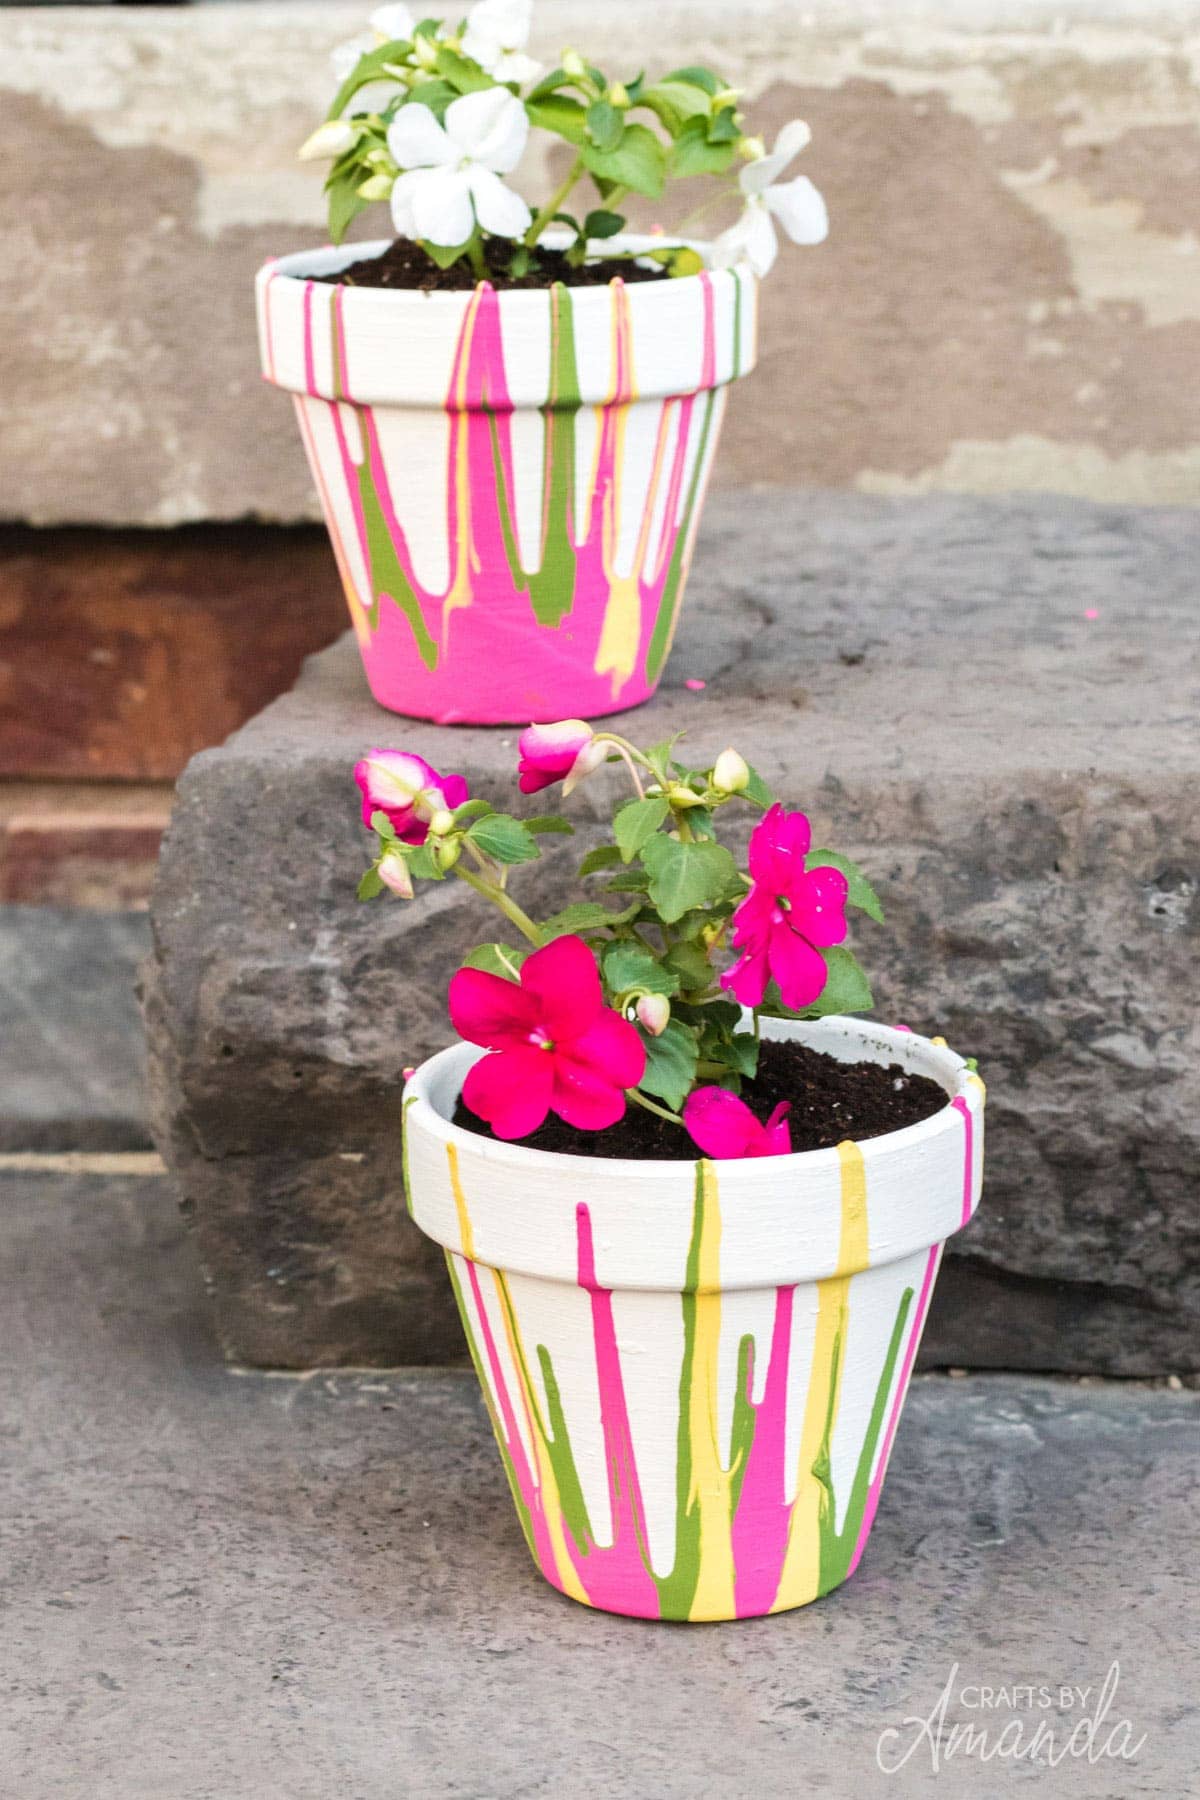
e. Painting Techniques:
- Sponge Painting: Use a sponge to create textured effects and blended colors.
- Dry Brushing: Apply a small amount of paint to a dry brush and lightly stroke the surface to create a distressed look.
- Stenciling: Use stencils to create intricate designs and repeating patterns.
- Spattering: Dip a brush into paint and flick it to create a splatter effect.
Tip: Practice your design on a piece of paper before applying it to the planter. You can also use stencils or transfer paper to help with precise lines and details.
5. Adding Finishing Touches: Enhancing Your Planter’s Appeal
Once your design is complete, you can add finishing touches to enhance its appeal and durability:
a. Sealing:
- Apply a sealer to protect your artwork from the elements, fading, and chipping.
- Choose a sealer that is appropriate for your paint type and the environment where the planter will be placed.
- Apply the sealer in thin coats, allowing each coat to dry completely before applying the next.
b. Glaze:
- A glaze can add a glossy or matte finish to your artwork, enhancing its depth and vibrancy.
- Choose a glaze that complements your design and the overall aesthetic of your garden.
c. Embellishments:
- Add embellishments like buttons, beads, or decorative stones to enhance your design.
- Secure embellishments with glue or paint for a lasting effect.
Tip: Consider adding a drainage hole to your planter to ensure proper drainage for your plants.
6. Showcasing Your Masterpiece: Displaying Your Personalized Planter
Now that your personalized planter is complete, it’s time to showcase your masterpiece in your garden. Here are some ideas for displaying your creation:
a. Placement:
- Choose a location that complements your planter’s design and allows it to stand out.
- Consider the amount of sunlight the planter will receive and select a location that suits the needs of your plants.
b. Grouping:
- Create a cohesive look by grouping your personalized planters together.
- Experiment with different sizes, shapes, and designs to create visual interest.
c. Accents:
- Add decorative accents around your planters, such as garden flags, lanterns, or sculptures, to enhance the overall aesthetic.
Tip: Take photos of your finished planters to capture their beauty and share your creativity with others.
7. Expanding Your Creative Horizons: More Personalized Planter Ideas
Don’t stop at planters! You can personalize other gardening elements with your unique artistic touch. Here are some ideas to expand your creative horizons:
a. Garden Stakes:
- Paint garden stakes with vibrant colors, patterns, or inspirational quotes to mark your plants or add a decorative touch to your garden.
b. Birdhouses:
- Transform plain birdhouses into whimsical works of art with hand-painted designs.
c. Garden Ornaments:
- Personalize garden ornaments like gnomes, frogs, or butterflies with unique paint jobs.
d. Garden Furniture:
- Add a splash of color and personality to your garden furniture with hand-painted designs.
e. DIY Projects:
- Create your own planters from recycled materials like tin cans, wooden crates, or old tires.
Tip: Explore online resources and gardening magazines for inspiration and tutorials for personalized gardening projects.
8. Sharing Your Passion: Inspiring Others with Your Creativity
As you delve into the world of hand-painted planters, you’ll discover a passion for creating unique and personalized pieces. Sharing your creativity with others can inspire them to embark on their own artistic gardening journeys. Here are some ways to share your passion:
a. Social Media:
- Share photos of your personalized planters on social media platforms like Instagram, Pinterest, or Facebook.
- Use relevant hashtags to reach a wider audience and connect with other gardening enthusiasts.
b. Local Markets:
- Sell your hand-painted planters at local farmers’ markets or craft fairs.
- Engage with customers and share your passion for personalized gardening.
c. Workshops:
- Host workshops or classes to teach others the art of hand-painting planters.
- Share your knowledge and techniques to inspire others to create their own masterpieces.
Tip: Create a website or blog to showcase your work and connect with potential customers or students.
Conclusion: Embracing the Joy of Personalized Gardening
Hand-painting planters is a rewarding and creative endeavor that allows you to transform your garden into a reflection of your unique style. From choosing the perfect planter to selecting the right paints and brushes, each step of the process offers an opportunity for artistic expression. Embrace the joy of personalized gardening and let your creativity bloom!
Remember, the possibilities are endless. So grab your paints, brushes, and a touch of inspiration, and let your garden become a canvas for your artistic vision!

Transform Your Garden with Personalized Hand-Painted Planters: Tips & Ideas for a Unique Style
Post a Comment for "Crafting Personalized Hand Painted Planters: Tips And Ideas"