Adding Depth and Dimension: Mastering Metallic Rub-On Paint

Table of Content
Metallic rub-on paint, also known as leafing, is a versatile and captivating art medium that can transform any surface with a shimmering, luxurious finish. This technique, rooted in ancient traditions, has evolved into a modern art form, allowing artists, crafters, and DIY enthusiasts to add depth, dimension, and a touch of elegance to their projects.
Understanding the Magic of Metallic Rub-On Paint
Metallic rub-on paint consists of thin, adhesive sheets of metalized material, typically made from aluminum, copper, gold, silver, or platinum. These sheets are applied to surfaces using gentle pressure, transferring the metallic pigment onto the desired area. The result is a smooth, seamless, and highly reflective finish that can create a range of effects, from subtle shimmer to bold, dramatic accents.
Beyond the Basics: Exploring the Versatility of Metallic Rub-On Paint
While traditionally used for decorative purposes, metallic rub-on paint has proven its versatility across various artistic disciplines. Here’s a glimpse into its diverse applications:
1. Enhancing Visual Art:
- Adding Depth and Texture: Metallic rub-on paint can be layered over existing artwork, creating depth and dimension. This technique is particularly effective on mixed media pieces, adding a touch of brilliance to textures like paper, fabric, or wood.
- Creating Metallic Highlights: Applying metallic rub-on paint strategically can accentuate specific details, adding visual interest and highlighting key elements within a composition.
- Achieving Unique Effects: Experimenting with different colors and textures of metallic rub-on paint can result in unique and eye-catching effects. For example, layering different metallic shades can create a shimmering, iridescent finish.

2. Decorative Crafting and Home Decor:
- Transforming Furniture: Metallic rub-on paint can revitalize outdated furniture, adding a touch of modern elegance to cabinets, tables, and chairs. This technique can create a distressed, vintage look or a sleek, contemporary finish, depending on the application.
- Enhancing Home Accessories: Metallic rub-on paint can elevate the look of everyday objects, turning plain picture frames, vases, and candle holders into statement pieces.
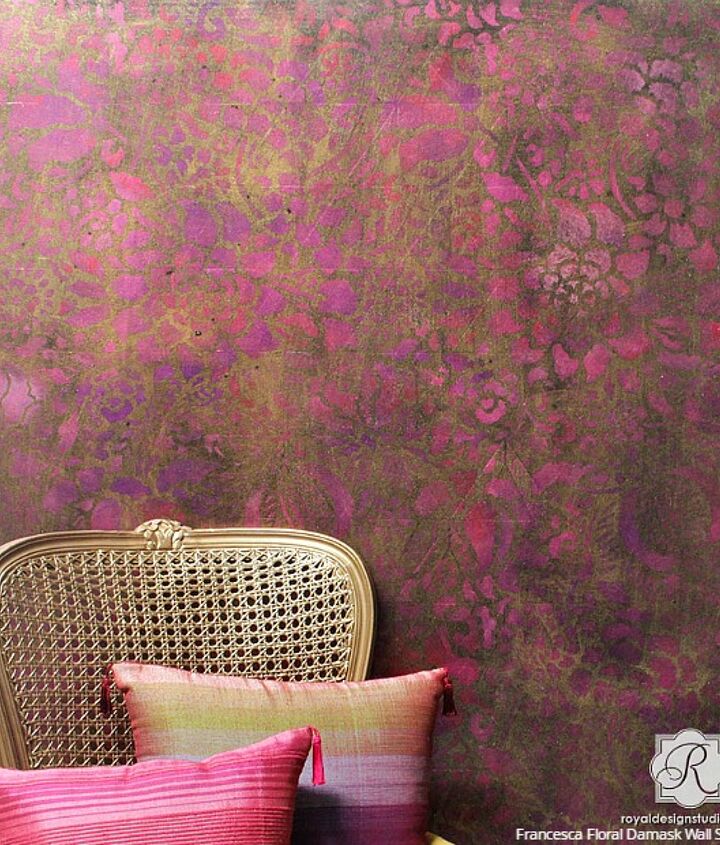
- Creating Custom Wall Art: Metallic rub-on paint can be used to create unique wall art, adding a touch of glamour and sophistication to any room.

3. Jewelry Making and Accessories:
- Adding Sparkle to Jewelry: Metallic rub-on paint can be used to create shimmering accents on jewelry, adding a touch of elegance to necklaces, bracelets, and earrings.
- Designing Custom Accessories: Metallic rub-on paint can be used to personalize accessories like handbags, belts, and shoes, creating unique and eye-catching designs.
4. Paper Crafting and Scrapbooking:
- Creating Eye-Catching Card Designs: Metallic rub-on paint adds a touch of luxury to greeting cards, invitations, and scrapbook pages.
- Adding Dimension to Paper Projects: Metallic rub-on paint can be used to create raised accents, adding dimension and texture to paper crafts.
5. Mixed Media and Collage Art:
- Adding Metallic Accents: Metallic rub-on paint can be incorporated into mixed media and collage artwork, adding a touch of sparkle and sophistication.
- Creating Textured Surfaces: Metallic rub-on paint can be used to create textured surfaces, adding depth and dimension to mixed media projects.
Mastering the Art of Application: Tips and Techniques for Success
Applying metallic rub-on paint is a relatively straightforward process, but mastering the technique requires a few key tips and tricks:
1. Preparation is Key:
- Clean and Smooth Surfaces: Before applying metallic rub-on paint, ensure the surface is clean, dry, and smooth. Any imperfections or dirt will show through the metallic finish.
- Prime for Optimal Adhesion: Priming the surface with a suitable primer helps ensure the metallic rub-on paint adheres properly.
- Choose the Right Tool: A rubber or plastic tool, such as a burnisher, is ideal for applying metallic rub-on paint. A soft cloth or sponge can also be used, but may result in a less precise application.
2. Applying the Rub-On Paint:
- Start with a Small Section: Begin by applying the metallic rub-on paint to a small section of the surface. This allows you to practice the technique and ensure you’re happy with the results before moving to larger areas.
- Apply Firm, Even Pressure: Use a burnisher or other tool to apply firm, even pressure to the metallic rub-on paint. This helps transfer the metallic pigment evenly onto the surface.
- Avoid Overlapping: Once the metallic rub-on paint is applied, avoid overlapping the edges. This can create a messy and uneven finish.
3. Finishing Touches:
- Seal for Durability: After applying the metallic rub-on paint, seal the surface with a clear sealant to protect the finish and prevent tarnishing.
- Enhance with Additional Techniques: Metallic rub-on paint can be combined with other techniques, such as distressing, antiquing, or layering, to create unique and eye-catching effects.
Beyond the Basics: Exploring Advanced Techniques
For those seeking to explore the full potential of metallic rub-on paint, here are some advanced techniques to consider:
1. Creating Distressed Effects:
- Distressing with Sandpaper: Using sandpaper, gently rub away portions of the metallic rub-on paint to create a distressed, vintage look.
- Creating Scratched Effects: Using a sharp tool, create scratches or lines in the metallic rub-on paint to achieve a distressed, aged effect.
2. Layering for Depth and Dimension:
- Layering Different Colors: Layer different colors of metallic rub-on paint to create depth and dimension. For example, layer gold over silver for a rich, multi-dimensional finish.
- Creating Iridescent Effects: Layer different shades of the same metallic color to create an iridescent effect. For example, layer light gold over dark gold to create a shimmering, iridescent finish.
3. Achieving Unique Textures:
- Using Stencils: Use stencils to create intricate patterns and designs with metallic rub-on paint. This technique can be used to create intricate borders, geometric patterns, or custom designs.
- Creating Textured Surfaces: Apply metallic rub-on paint over textured surfaces, such as fabric, paper, or wood, to create unique and eye-catching effects.
Choosing the Right Metallic Rub-On Paint for Your Project
With a wide variety of metallic rub-on paints available, selecting the right product for your project is essential. Consider the following factors:
1. Color and Finish:
- Gold: Gold metallic rub-on paint is a classic choice, adding a touch of luxury and sophistication to any project.
- Silver: Silver metallic rub-on paint is a versatile choice, adding a touch of elegance and modernity to any project.
- Copper: Copper metallic rub-on paint offers a warm and inviting finish, adding a touch of rustic charm to any project.
- Platinum: Platinum metallic rub-on paint offers a cool and sophisticated finish, adding a touch of glamour and elegance to any project.
2. Application:
- Sheets: Metallic rub-on paint sheets are available in various sizes and are ideal for large projects or for creating intricate designs.
- Rolls: Metallic rub-on paint rolls are ideal for large projects, such as covering furniture or walls.
3. Adhesion:
- Adhesive Backed: Most metallic rub-on paints have an adhesive backing, making application simple and straightforward.
- Non-Adhesive: Some metallic rub-on paints require an adhesive to be applied separately. This option allows for more control over the application and can be helpful for creating unique effects.
4. Durability:
- Indoor Use: Most metallic rub-on paints are designed for indoor use and may not be suitable for outdoor applications.
- Outdoor Use: Some metallic rub-on paints are specifically designed for outdoor use and are resistant to fading, weathering, and corrosion.
5. Price:
- Budget-Friendly: Metallic rub-on paints are available at a range of price points, making them accessible to both beginners and experienced crafters.
- Premium Quality: Premium metallic rub-on paints offer exceptional quality, durability, and color saturation.
Safety Precautions and Storage Tips
While using metallic rub-on paint is generally safe, it’s essential to take precautions to protect yourself and your workspace:
- Wear Gloves: Wear gloves to protect your hands from the adhesive backing of the metallic rub-on paint.
- Work in a Well-Ventilated Area: Work in a well-ventilated area to avoid inhaling fumes from the metallic rub-on paint.
- Store Properly: Store metallic rub-on paint in a cool, dry place away from direct sunlight.
Inspiring Projects: Unveiling the Creative Possibilities of Metallic Rub-On Paint
To ignite your creativity, here are some inspiring projects that showcase the versatility and beauty of metallic rub-on paint:
1. Transforming a Plain Mirror:
- Materials: Metallic rub-on paint (gold or silver), burnisher, clear sealant, masking tape, scissors.
Instructions:
- Clean the mirror surface thoroughly.
- Use masking tape to create a geometric pattern or design on the mirror.
- Apply metallic rub-on paint to the exposed areas of the mirror, using firm, even pressure.
- Remove the masking tape carefully.
- Seal the metallic rub-on paint with a clear sealant to protect the finish.
2. Revitalizing a Wooden Tray:
- Materials: Metallic rub-on paint (copper or bronze), burnisher, clear sealant, sandpaper.
Instructions:
- Sand the wooden tray to remove any imperfections or rough spots.
- Apply metallic rub-on paint to the tray, using firm, even pressure.
- Use sandpaper to distress the edges of the tray, creating a vintage look.
- Seal the metallic rub-on paint with a clear sealant to protect the finish.
3. Creating a Custom Jewelry Box:
- Materials: Metallic rub-on paint (gold or silver), burnisher, clear sealant, stencils, scissors.
Instructions:
- Clean the jewelry box surface thoroughly.
- Choose stencils with intricate designs or patterns.
- Apply metallic rub-on paint to the stencils, using firm, even pressure.
- Carefully remove the stencils.
- Seal the metallic rub-on paint with a clear sealant to protect the finish.
4. Enhancing a Canvas with Metallic Accents:
- Materials: Metallic rub-on paint (various colors), burnisher, clear sealant, canvas, acrylic paints.
Instructions:
- Paint the canvas with acrylic paints in your desired colors.
- Allow the acrylic paint to dry completely.
- Use metallic rub-on paint to create highlights, accents, or geometric patterns on the canvas.
- Seal the metallic rub-on paint with a clear sealant to protect the finish.
5. Personalizing a Phone Case:
- Materials: Metallic rub-on paint (various colors), burnisher, clear sealant, phone case, stencils, scissors.
Instructions:
- Clean the phone case surface thoroughly.
- Choose stencils with designs or patterns that you like.
- Apply metallic rub-on paint to the stencils, using firm, even pressure.
- Carefully remove the stencils.
- Seal the metallic rub-on paint with a clear sealant to protect the finish.
Unlocking the Power of Metallic Rub-On Paint: A Creative Journey Begins
Metallic rub-on paint offers a world of creative possibilities, allowing you to add a touch of luxury, elegance, and sophistication to any project. Whether you’re an experienced artist, a passionate crafter, or simply looking for a unique way to personalize your belongings, metallic rub-on paint is a versatile and captivating medium that can transform your creative vision into reality.
Adding Depth and Dimension: Mastering Metallic Rub-On Paint
Post a Comment for "Adding Depth With Metallic Rub-On Paint"