Essential Turkey Hunting Face Paint Techniques: Mastering the Art of Camouflage

Table of Content
- 1 Essential Turkey Hunting Face Paint Techniques: Mastering the Art of Camouflage
- 1.1 Choosing the Right Face Paint: A Foundation for Success
- 1.2 Mastering the Art of Application: Achieving a Natural Look
- 1.3 Advanced Techniques: Enhancing Your Camouflage
- 1.4 The Importance of Practice and Experimentation
- 1.5 Conclusion: A Vital Tool for Turkey Hunting Success
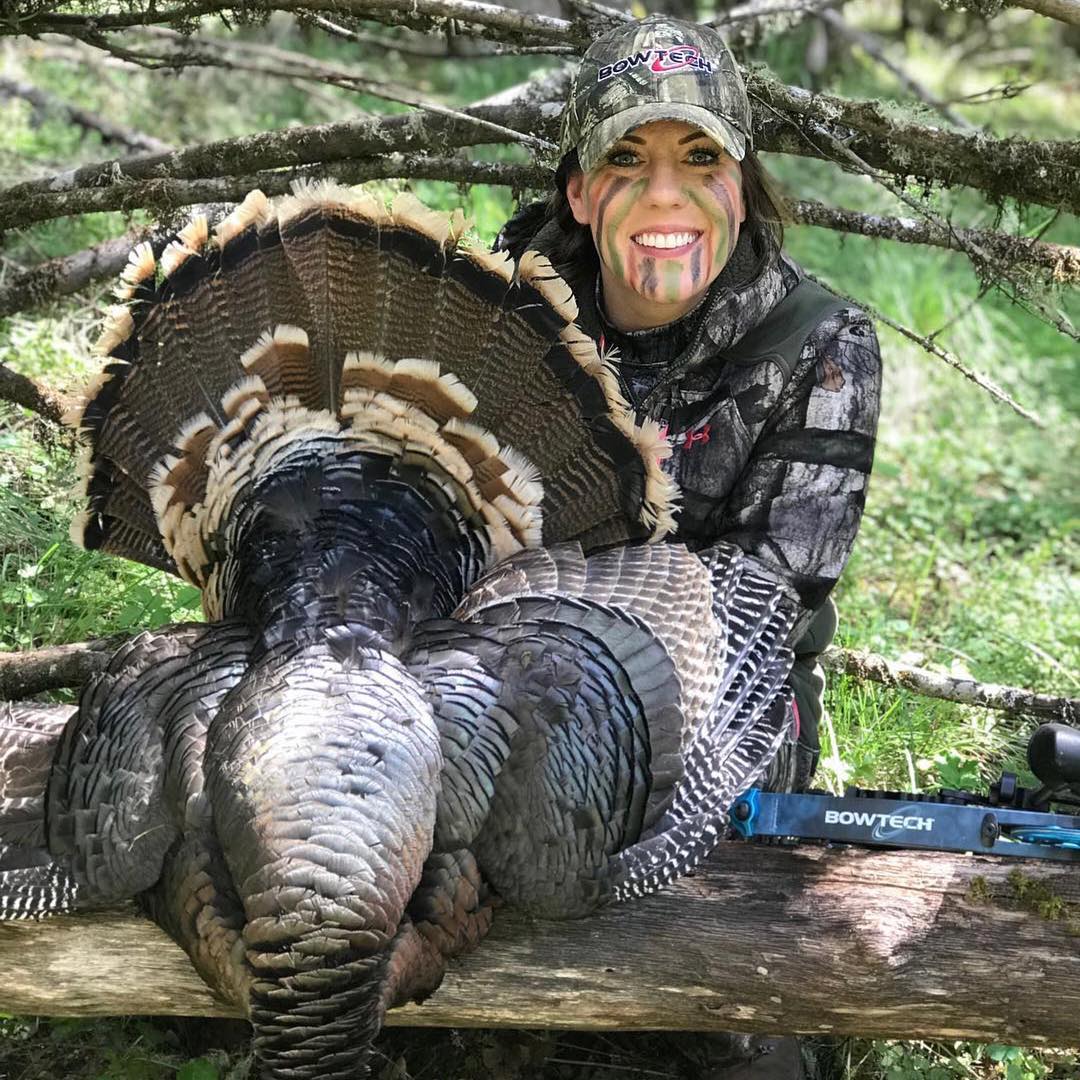
Turkey hunting is a challenging and rewarding pursuit that demands patience, skill, and a keen understanding of your quarry’s behavior. While a variety of factors contribute to a successful hunt, camouflage plays a critical role in minimizing your visibility and maximizing your chances of a close encounter. Face paint, a vital component of effective camouflage, serves as a crucial tool for blending into the environment, particularly in open terrain and during early morning and late evening hunts.
This comprehensive guide delves into the essential techniques for applying turkey hunting face paint, covering everything from choosing the right colors and products to mastering the art of blending and achieving a natural, convincing look. By understanding these techniques, you can significantly enhance your camouflage and increase your odds of success in the field.
Choosing the Right Face Paint: A Foundation for Success
The first step in mastering face paint application is selecting the right products. While a variety of brands and formulas exist, certain qualities are paramount for optimal performance in the turkey hunting environment.
Key Considerations:
- Water-based vs. Oil-based: Water-based face paints offer a quick drying time and are generally easier to apply and remove. However, they can be prone to smearing in humid conditions. Oil-based paints, while more durable and resistant to sweat and moisture, require a solvent for removal and can feel heavy on the skin.
- Color Palette: The color palette you choose should complement the surrounding environment. Greens, browns, and grays are essential for blending into wooded areas, while earth tones and tans are ideal for open fields and grasslands.
- Coverage and Finish: Opt for face paints that offer good coverage and a matte finish. This will help you achieve a natural, non-reflective look that blends seamlessly with your surroundings.
Recommended Products:
- Kryolan Aquacolor: A highly pigmented, water-based face paint known for its vibrant colors and long-lasting wear.
- Ben Nye Final Seal: A professional-grade, oil-based face paint that offers excellent coverage and durability.
- Mehron Paradise Makeup: A water-based face paint that provides a smooth, even application and a natural finish.

Mastering the Art of Application: Achieving a Natural Look
Once you’ve chosen your face paint, the next step is to apply it correctly. The goal is to create a natural, convincing look that blends seamlessly with your surroundings.
Step-by-Step Application Guide:
- Cleanse and Prep: Begin by thoroughly cleaning your face with a mild cleanser and drying it completely. This ensures the paint adheres properly and prevents irritation.
- Apply a Base: Apply a thin layer of foundation or a neutral-colored face paint to create a base for your camouflage colors. This helps to even out skin tone and create a smooth canvas for blending.
- Choose Your Colors: Select colors that complement the surrounding environment. For example, use greens and browns for wooded areas, earth tones and tans for open fields, and grays for rocky terrain.
- Start with the Forehead: Begin by applying a thin layer of paint to your forehead, blending it towards the hairline. Use a sponge or brush to create a natural, feathered look.
- Apply to the Cheeks: Next, apply paint to your cheeks, blending it towards the ears and jawline.
- Cover the Nose: Apply paint to your nose, blending it towards the bridge and cheeks.
- Don’t Forget the Chin: Apply paint to your chin, blending it towards the jawline.
- Blend and Feather: Once all areas are covered, use a brush or sponge to blend the edges and create a natural, feathered look.
- Eyes and Mouth: Be cautious around the eyes and mouth. Avoid applying paint directly to these areas, as it can irritate the skin. If needed, use a light layer of paint around the eye sockets to create a shadow effect.
- Set with Powder: Once the paint is dry, apply a light layer of setting powder to help prevent smudging and create a more natural finish.

Advanced Techniques: Enhancing Your Camouflage
Beyond the basic application techniques, several advanced strategies can further enhance your camouflage and minimize your visibility.
Utilizing Shadows and Highlights:
- Shadows: Create shadow effects by applying darker shades of paint around the eye sockets and jawline. This helps to conceal these features and make you appear less distinct.
- Highlights: Apply lighter shades of paint to the forehead, cheekbones, and chin to create a subtle highlighting effect. This helps to blend you into the environment and make you appear less three-dimensional.
Creating Realistic Patterns:
- Branches and Leaves: Use a sponge or brush to create patterns that mimic branches, leaves, or other natural elements in the surrounding environment.
- Bark and Soil: Apply irregular patches of paint to mimic the texture of bark, soil, or other natural surfaces.
- Animal Patterns: For specific hunting scenarios, you can create patterns that resemble the coloration of the prey animal.
Using Accessories:
- Camouflage Hats and Gloves: Wear a camouflage hat and gloves to complete your camouflage and minimize any exposed skin.
- Camouflage Netting: For extra concealment, consider using camouflage netting to create a more immersive disguise.
The Importance of Practice and Experimentation
Mastering the art of face paint application requires practice and experimentation. Take the time to experiment with different colors, techniques, and products to find what works best for you and your hunting environment. Consider practicing in front of a mirror or filming yourself to analyze your application and identify areas for improvement.
Tips for Successful Practice:
- Practice in Natural Light: Practice applying face paint in the same lighting conditions you’ll be hunting in. This will help you achieve a more realistic look.
- Use a Variety of Surfaces: Practice applying paint on different surfaces, such as your skin, fabric, and even bark. This will help you understand how the paint behaves in different environments.
- Experiment with Different Techniques: Don’t be afraid to experiment with different techniques and tools. There is no one-size-fits-all approach to face paint application.
Conclusion: A Vital Tool for Turkey Hunting Success
Face paint is a crucial tool for turkey hunting success, allowing you to blend seamlessly into the environment and minimize your visibility. By understanding the essential techniques, choosing the right products, and practicing regularly, you can master the art of camouflage and increase your chances of a successful hunt. Remember, the key is to create a natural, convincing look that blends seamlessly with your surroundings, allowing you to become one with the environment and increase your chances of getting close to your prey.
Essential Turkey Hunting Face Paint Techniques: Mastering the Art of Camouflage
Post a Comment for "Essential Turkey Hunting Face Paint Techniques"