Pet Portraits: A Comprehensive Guide to Painting a Hamster
Introduction
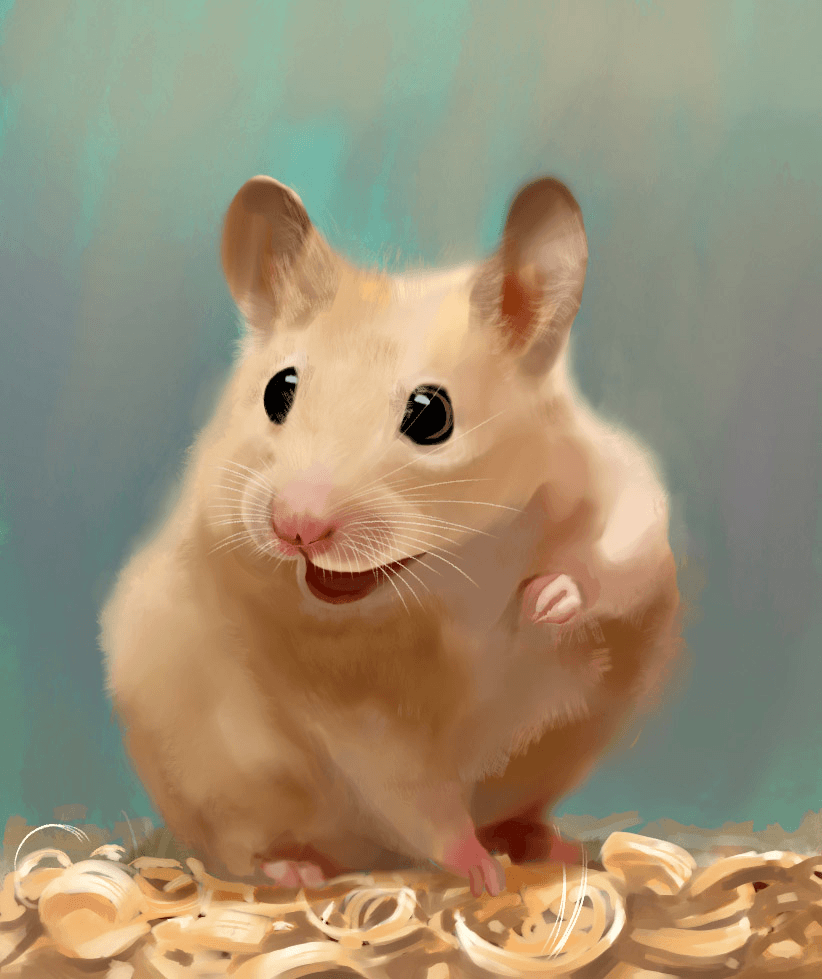
Pet portraits are a cherished way to immortalize the beloved companions in our lives. Hamsters, with their adorable features and playful personalities, make particularly endearing subjects for portraiture. This comprehensive guide will provide you with the essential techniques and tips to create a stunning painting of your furry friend.
Materials
- Canvas or painting paper
- Acrylic or oil paints
- Brushes (various sizes)
- Palette
- Water cup
- Pencil or charcoal
- Reference photo
Step 1: Sketching the Outline
- Lightly sketch the basic outline of the hamster’s body, head, and limbs using a pencil or charcoal.
- Pay attention to the proportions and overall shape of the animal.
- Use smooth, flowing lines to capture the hamster’s natural curves.
Step 2: Defining the Features
- Begin painting the eyes, using a small brush to create the pupil, iris, and surrounding fur.
- Add the nose, mouth, and whiskers with fine brushstrokes.
- Define the ears and paws, paying attention to their shape and texture.
Step 3: Laying Down the Base Colors
- Choose a light color for the hamster’s fur, such as white or cream.
- Apply the base color to the entire body, using a larger brush.
- Allow the paint to dry completely.
Step 4: Adding Shading and Highlights
- Mix a darker shade of the base color and apply it to the areas where shadows fall, such as the underside of the body, around the eyes, and in the folds of the fur.
- Use a lighter shade to create highlights on the top of the head, back, and paws.
- Blend the colors smoothly to create a natural transition.
Step 5: Refining the Details
- Add finer details to the hamster’s features, such as the texture of the fur, the whiskers, and the claws.
- Use a small brush to create tiny strokes to mimic the individual hairs.
- Pay attention to the direction of the fur growth and the way it interacts with the light.
Step 6: Creating the Background
- Choose a background color that complements the hamster’s fur.
- Apply the background color to the canvas, leaving some space around the hamster’s body.
- Use a brush or sponge to create a textured background, if desired.
Step 7: Finishing Touches
- Once the paint is completely dry, add any final details, such as a collar, a toy, or a name tag.
- Sign and date your painting.
Tips for Success
- Use high-quality paints and brushes to achieve the best results.
- Practice sketching the hamster’s features before you begin painting.
- Take your time and don’t be afraid to experiment with different colors and techniques.
- Pay attention to the lighting and shadows to create a realistic effect.
- Seal your painting with a varnish or clear coat to protect it from damage.
Conclusion
Creating a pet portrait of a hamster is a rewarding experience that allows you to capture the unique personality and charm of your beloved companion. By following these steps and incorporating the tips provided, you can create a stunning painting that will be cherished for years to come.
Post a Comment for "Pet Portraits: How To Paint A Hamster"